Continuing from where we left off ----> How to install ICE part #1
Now that you've gotten your HU wiring figured out, it's time to fit in the power and speaker wires. I'm not fond of using the stock wiring mainly because :
#1 - It's too thin. Doesn't sound as good as a bigger quality wire (not necessarily branded)
#2 - It's too much a hassle to figure out which is the correct wires on the stock harness. Most cars have 4 speakers and that means having to figure out which of the 8 wires goes to which speaker.
I would recommend removing the front two seats and the carpet itself for the ultimate in accessibility and proper wiring positioning. To remove the seats, locate the 4 bolts locking it down and just remove the seat. To remove the carpet, you usually have to remove the kick panel, the side sills and generally any plastic bits that's holding or blocking the carpet from being removed. To remove the kick panel, it's normally held down by a plastic screw or clip hidden inside. To remove the side sills, gently give it a tug and it should pop right out. Then remove the clips holding the carpet in place to allow proper access to the place your wires.
But because I'm lazy and I know what I'm doing, I didn't bother removing the carpet or both the front seats.
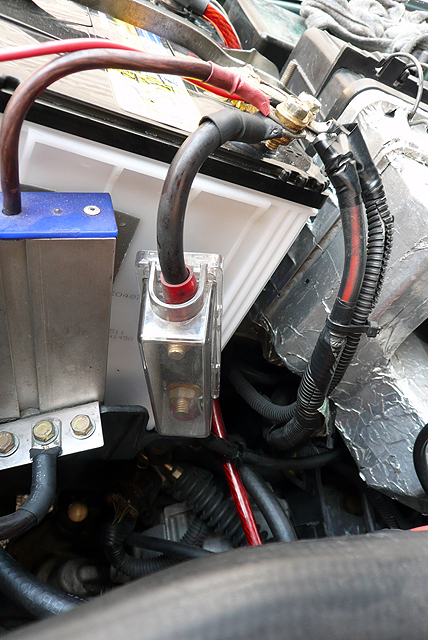
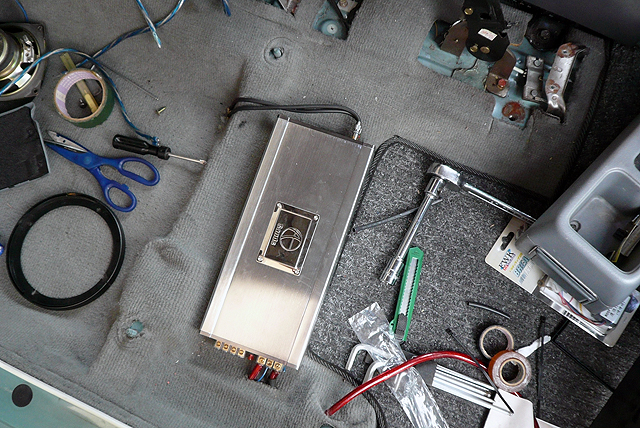
Next up position your main power supply at your battery and figure how long a power cable you need. I was pulling the power from the battery to the front passenger seat only so I used less than 3m of the 4 gauge (4ga) power cable. Generally it's good practice to get slightly longer than what you need just in case something goes wrong. Do not hook up the wire to the live right away! You're not ready so don't power it up. As you can see I used a large fuse box mainly because if there were a surge, I wouldn't want my expensive amp to fry. Highly recommended to get a good fuse. Some cheap fuses have been known to expand in the engine bay and cut off the power supply because of the heat!
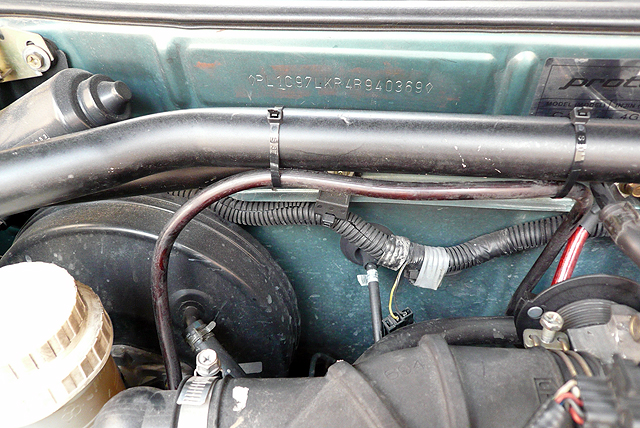
Position your wiring so it doesn't touch anything hot or get in the way of the fan. My power cable is black mainly because it's not new. Old equipment but still in working order!
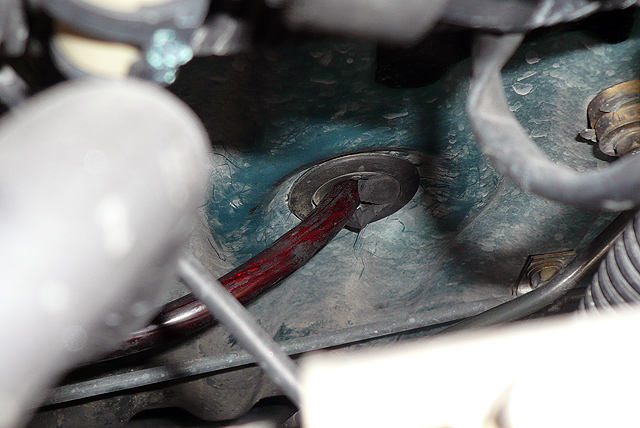
Locate a rubber covered hole or something on your firewall to pull the power wire in the cabin. I basically cut a hole in this rubber cover plug and just pulled the power wire through it. Doing this means I won't get as much external air into my cabin, meaning if I drive by a dumpster the 'pungent aroma' won't permeate into my cabin and suffocate me. I also used some insulation tape to wrap up the holes to really make sure it's sealed.
I forgot to take pictures of how I placed my wiring. But the general rule of thumb is :
1. Keep power wires, speaker wires and RCAs completely apart. They should not cross or touch each other... ever. Especially the power and RCA wires, if they cross paths, overlapped or even placed side by side I can guarantee you'll get the infamous "aeroplane" noise otherwise known as interference.
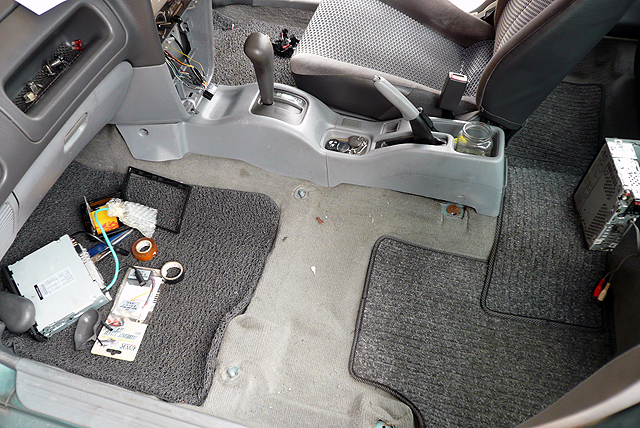
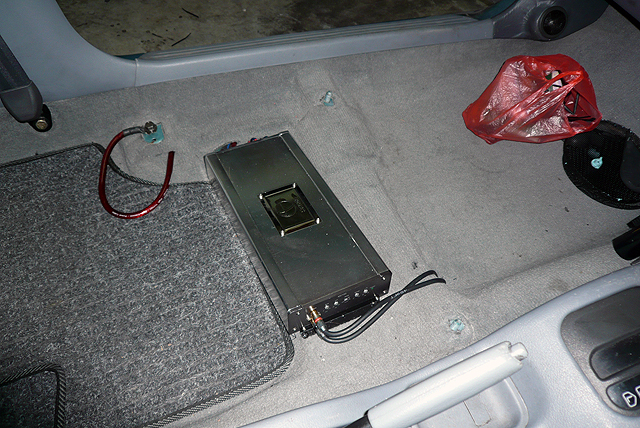
2. What I did was place the power wire to run on the far left side of the car, the RCAs along the middle and speaker wires together with the RCA or on it's own path. This doesn't need to be followed, in my case the RCAs was the most expensive (compared to the power and speaker wires) so I didn't buy a very long RCA cable. I needed to position it just right without any space wastage so I lengthened the other wires to compensate.
In the picture you can see the black RCA cables are running nearest to the center console (which I removed) and the power cables are routed to the far left of the car.
This is probably the hardest part of the whole install - pulling the cables through the super tight rubber protection thingy at the door hinge to the panel. You'll need an old wiper blade, rip out the super long metal thingy and use it as a guide to guide your speaker wire through this rubber protection (thanks Drexchan for the tip!). Start by inserting the wire from the door into the hole and upwards (or vice versa if you like. Just get it through) and once done put the rubber seals back. I got my hands massively scratched doing this so wear gloves!
Next just do some tidying up. I started cable-tying the speaker wires to roughly where the passive crossovers and tied up any loose wires. I pulled another speaker wire for my tweeters and finally laid one final set of speaker wires from the passive crossover location to the amp.
So basically it's like Amp---> Passive crossovers, then the crossover to both the tweeter and midbass.
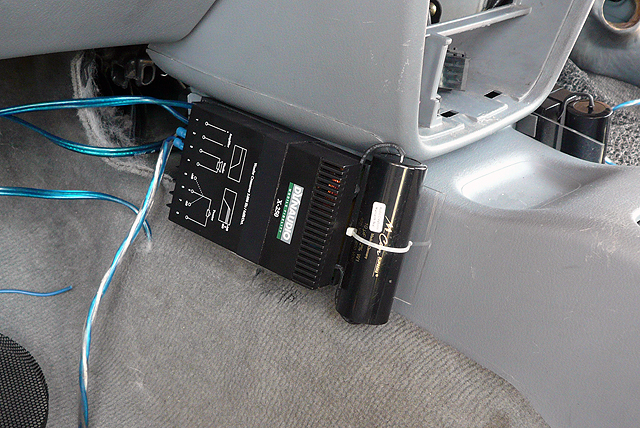
Mount the crossovers! Because my crossovers were massive and pretty damn expensive, I didn't want to place them just anywhere. Best to show off a bit right? So basically I mounted the crossovers someplace non intrusive and connected the speaker wires.
Notice I put all my wiring under the carpet. You'd be pretty silly to expose everything! Now to ground the amp, cut a small short piece of the 4ga power cable and hook it from from the negative terminal of the amp to any part of the car body. Make sure it's an exposed part of the car body otherwise you won't get good grounding and it'll start having irritating 'aeroplane' noises. I sandpapered the seat nut and hooked the ground there.
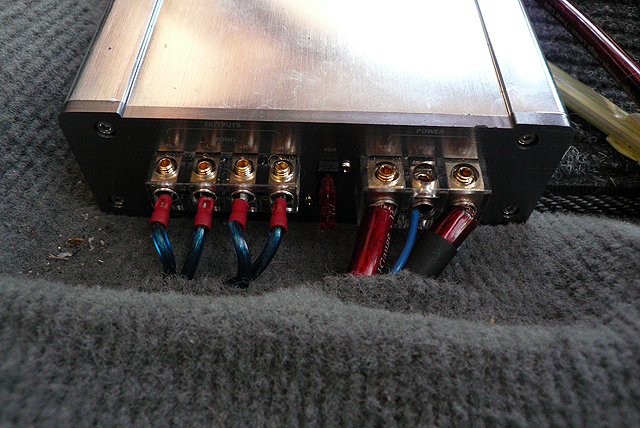
Wire up the amp. Positive (red) is connected straight to the battery, negative (black) is your ground, 'remote' (the thin blue wire) is hooked directly to the corresponding 'remote' on your HU socket which was done in part #1, speakers wires are basically positive and negative left speaker and right speaker. Take note which is positive and which is negative. Speaker wire pairs usually are marked or shaped differently. In my case one was square and the other was round. I placed the square side to positive and round to negative. This speaker wire is connected to the passive crossovers exactly the same way, square to positive and round to negative on the passive crossover. Lastly the RCAs are connected too. Take note which is positive and negative for the RCAs.
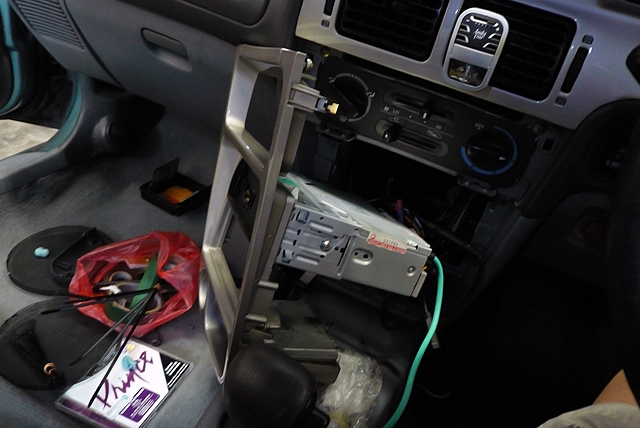
You're almost done! Install your HU with the bracket into the center panel. Hook up the antenna wire, the socket cluster you had already wired up earlier in part #1 and the RCAs. Based on how I hooked up the RCAs to the amp, I followed positive to positive, and negative to negative on the HU.
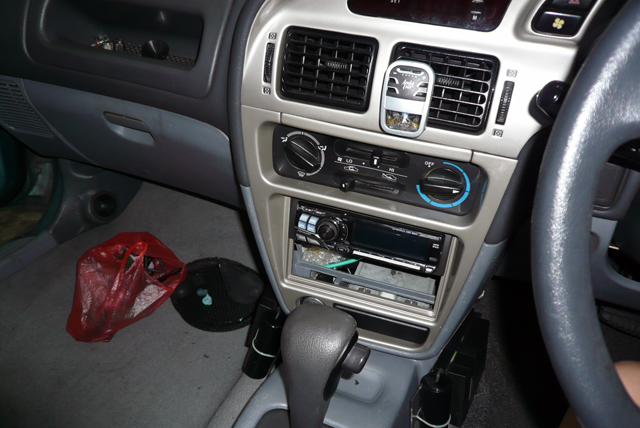
Clip the console back in, screw in the screws and you're pretty much done! I know I have a huge hole at the bottom of my HU but that's another DIY that's coming up later.
Enjoy!
(Oh btw.. don't forget to reinstall your seat. Otherwise JPJ might pull you over for trying to be a track car lightened wannabe.)
Now that you've gotten your HU wiring figured out, it's time to fit in the power and speaker wires. I'm not fond of using the stock wiring mainly because :
#1 - It's too thin. Doesn't sound as good as a bigger quality wire (not necessarily branded)
#2 - It's too much a hassle to figure out which is the correct wires on the stock harness. Most cars have 4 speakers and that means having to figure out which of the 8 wires goes to which speaker.
I would recommend removing the front two seats and the carpet itself for the ultimate in accessibility and proper wiring positioning. To remove the seats, locate the 4 bolts locking it down and just remove the seat. To remove the carpet, you usually have to remove the kick panel, the side sills and generally any plastic bits that's holding or blocking the carpet from being removed. To remove the kick panel, it's normally held down by a plastic screw or clip hidden inside. To remove the side sills, gently give it a tug and it should pop right out. Then remove the clips holding the carpet in place to allow proper access to the place your wires.
But because I'm lazy and I know what I'm doing, I didn't bother removing the carpet or both the front seats.
Next up position your main power supply at your battery and figure how long a power cable you need. I was pulling the power from the battery to the front passenger seat only so I used less than 3m of the 4 gauge (4ga) power cable. Generally it's good practice to get slightly longer than what you need just in case something goes wrong. Do not hook up the wire to the live right away! You're not ready so don't power it up. As you can see I used a large fuse box mainly because if there were a surge, I wouldn't want my expensive amp to fry. Highly recommended to get a good fuse. Some cheap fuses have been known to expand in the engine bay and cut off the power supply because of the heat!
Position your wiring so it doesn't touch anything hot or get in the way of the fan. My power cable is black mainly because it's not new. Old equipment but still in working order!
Locate a rubber covered hole or something on your firewall to pull the power wire in the cabin. I basically cut a hole in this rubber cover plug and just pulled the power wire through it. Doing this means I won't get as much external air into my cabin, meaning if I drive by a dumpster the 'pungent aroma' won't permeate into my cabin and suffocate me.
I also used some insulation tape to wrap up the holes to really make sure it's sealed.
I forgot to take pictures of how I placed my wiring. But the general rule of thumb is :
1. Keep power wires, speaker wires and RCAs completely apart. They should not cross or touch each other... ever. Especially the power and RCA wires, if they cross paths, overlapped or even placed side by side I can guarantee you'll get the infamous "aeroplane" noise otherwise known as interference.
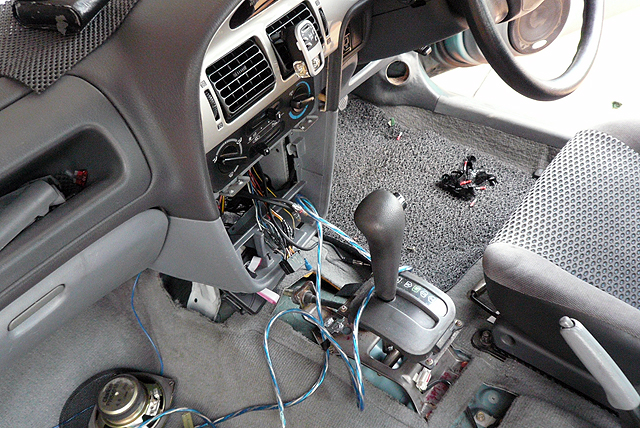
2. What I did was place the power wire to run on the far left side of the car, the RCAs along the middle and speaker wires together with the RCA or on it's own path. This doesn't need to be followed, in my case the RCAs was the most expensive (compared to the power and speaker wires) so I didn't buy a very long RCA cable. I needed to position it just right without any space wastage so I lengthened the other wires to compensate.
In the picture you can see the black RCA cables are running nearest to the center console (which I removed) and the power cables are routed to the far left of the car.
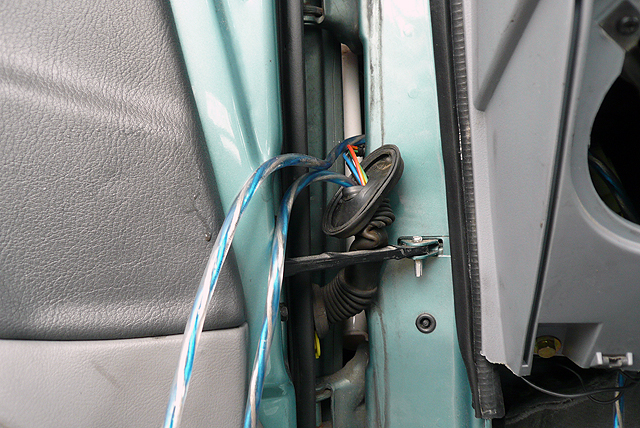
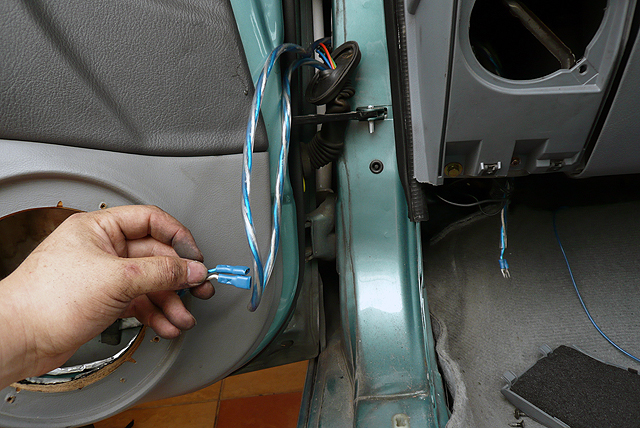
This is probably the hardest part of the whole install - pulling the cables through the super tight rubber protection thingy at the door hinge to the panel. You'll need an old wiper blade, rip out the super long metal thingy and use it as a guide to guide your speaker wire through this rubber protection (thanks Drexchan for the tip!). Start by inserting the wire from the door into the hole and upwards (or vice versa if you like. Just get it through) and once done put the rubber seals back. I got my hands massively scratched doing this so wear gloves!
Next just do some tidying up. I started cable-tying the speaker wires to roughly where the passive crossovers and tied up any loose wires. I pulled another speaker wire for my tweeters and finally laid one final set of speaker wires from the passive crossover location to the amp.
So basically it's like Amp---> Passive crossovers, then the crossover to both the tweeter and midbass.
Mount the crossovers! Because my crossovers were massive and pretty damn expensive, I didn't want to place them just anywhere. Best to show off a bit right?
So basically I mounted the crossovers someplace non intrusive and connected the speaker wires.
Notice I put all my wiring under the carpet. You'd be pretty silly to expose everything! Now to ground the amp, cut a small short piece of the 4ga power cable and hook it from from the negative terminal of the amp to any part of the car body. Make sure it's an exposed part of the car body otherwise you won't get good grounding and it'll start having irritating 'aeroplane' noises. I sandpapered the seat nut and hooked the ground there.
Wire up the amp. Positive (red) is connected straight to the battery, negative (black) is your ground, 'remote' (the thin blue wire) is hooked directly to the corresponding 'remote' on your HU socket which was done in part #1, speakers wires are basically positive and negative left speaker and right speaker. Take note which is positive and which is negative. Speaker wire pairs usually are marked or shaped differently. In my case one was square and the other was round. I placed the square side to positive and round to negative. This speaker wire is connected to the passive crossovers exactly the same way, square to positive and round to negative on the passive crossover. Lastly the RCAs are connected too. Take note which is positive and negative for the RCAs.
You're almost done! Install your HU with the bracket into the center panel. Hook up the antenna wire, the socket cluster you had already wired up earlier in part #1 and the RCAs. Based on how I hooked up the RCAs to the amp, I followed positive to positive, and negative to negative on the HU.
Clip the console back in, screw in the screws and you're pretty much done! I know I have a huge hole at the bottom of my HU but that's another DIY that's coming up later.
Enjoy!
(Oh btw.. don't forget to reinstall your seat. Otherwise JPJ might pull you over for trying to be a track car lightened wannabe.)
Attachments
Last edited: