NVH, or Noise, Vibration and Harshness, is the study and modification of the noise and vibration characteristics of vehicles, particularly cars and trucks. - Wikipedia, Feb 2013.
So what exactly is it? In other words: You sit in the car. The car runs, you feel annoyed by the noise e.g. tyre or road noise, rattling noise, tweaking noise, or even ur mother in law keep on nagging. Sorry I cant solve the last problem for you. You're on your own
Too long exposure to certain level of noises would cause us crazy, or even death. So what is noisy and what is not, except the monster in law? Here is a few examples:
1. Jet tak-off (measured at 25m) : 150 decibel (dB) - eardrum rupture
2. Thunderclap, chain saw, oxygen torch : 120 dB - Pain to the ear
3. Motorcycle, farm tractor, garbage truck: 100 dB - Serious damage in 8hr exposure
4. Average factory, milling machine : 80 dB - Damage in 8hr exposure
5. Passenger car at 65mph at 25ft : 77dB - Arbitrary base of comparison. Annoyingly loud to some people
6. Office, background music, restaurant : 60 dB - Fairly quiet
7. Quiet suburb, conversation at home : 50 dB - quiet
8. Library, lowest limit of urban ambient : 40 dB - zzzzzZZzzzZzz krruuuh ~
What I did was trying to improve the NVH of my car, and test if I succeed. So how would I know if I succeed? Sound is measured in decibel, or dB in short. The usual frequency is the 'A' band. That's where dB(A) comes. Sound dB doesnt add up like 1+1 = 2, but in a logarithmic pattern. Ok dat's boring. Let me give an example: when two source of sound have the same dB (lets say you have two Monster in Law nagging the same thing at the same sound level), the add up amount of sound is 3.01dB. So if I can achieve an improvement that gives plus minus 3dB, i'm happy.
Ok. Lecture session done. Now's the practical session. What do I need? Sound insulation material, and if possible, a leng lui beside me of course. Many people use polyethelyene foam as sound insulation with brands such as Insulflex or Superlon. For damping purposes, bitumen with butyl sheet is commonly used. For my case, I neither used Insulflex nor Superlon, but something similar. Trocellen. Same kind of material and serve the same purpose. Trocellen is not known for its purpose as sound insulation to Automotive dudes. But in fact, the manufacture OEM sound insulation panels for many automotive brands. What I used is actually for industrial purposes, commonly used to insulate ductings, chilled water pipes, etc. So not only do PE Foams improve sound insulation, they improve the heat resistivity too.
Measurement: I dont have a decibel meter and I cant manage to borrow one. But hey! I bet you dont know...we have smartphones!! Decibel measuring apps are available and they are quite accurate. With accuracy of plus minus 2 dB. But of course, not all apps could do that, so choose wisely. I am using "decibel 10th" btw, and it's quite accurate.
So lets start the pictures already !!! :slug: Oh ya, I'm doing it on a Myvi Extreme.
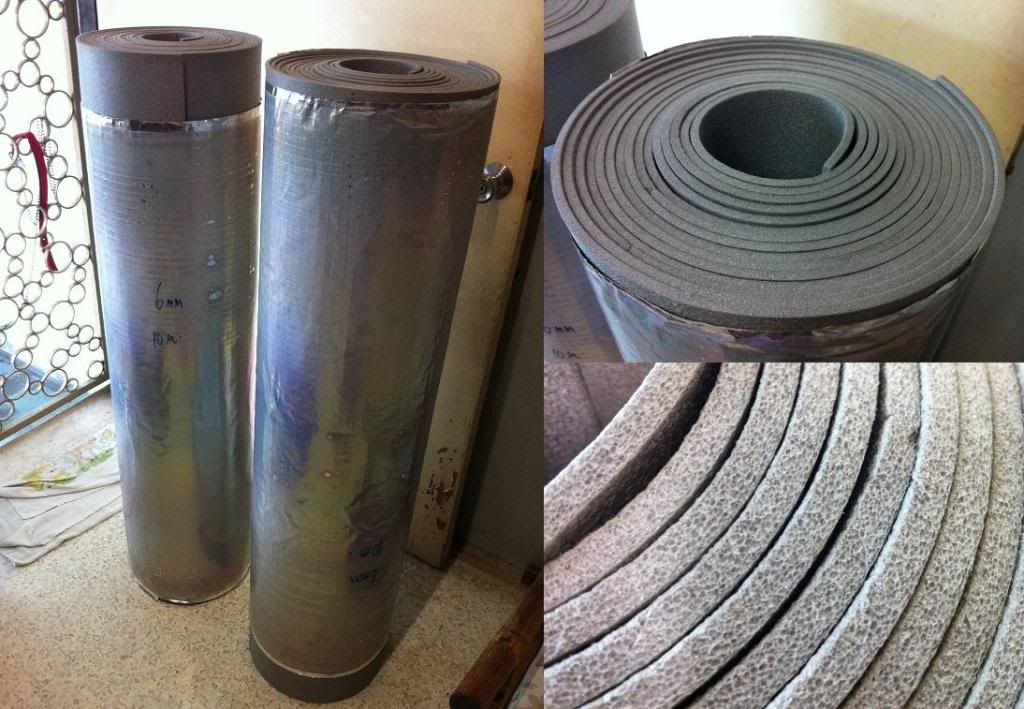
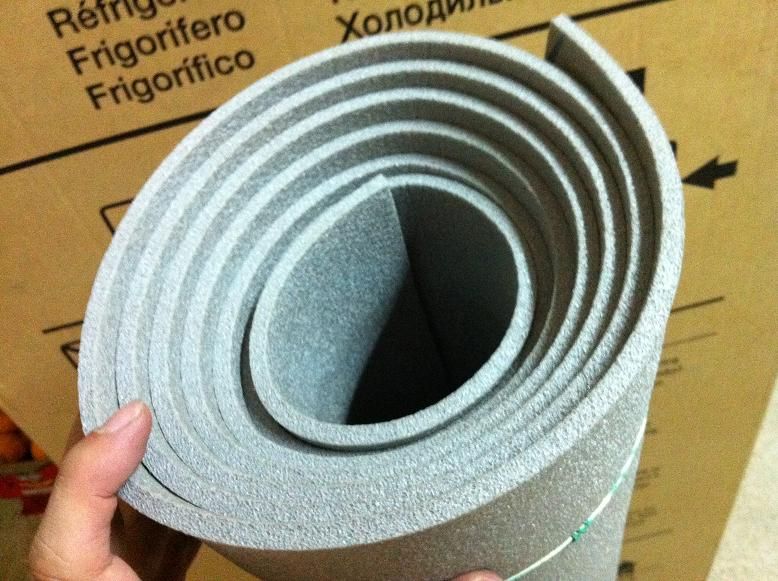
1. This is the P.E Foam I mentioned. 1.2m width, 10m long. Another roll is my friend's.
2. The damping material I used. Bitumen + butyl sheet.

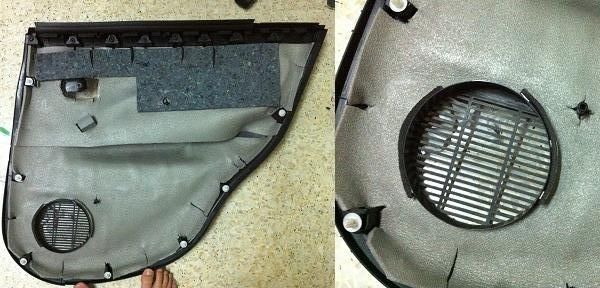
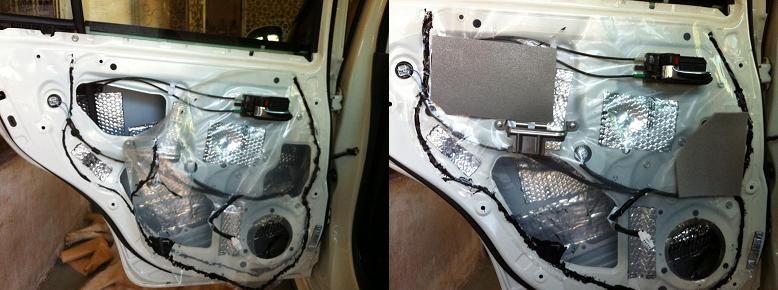
3. Rear door. I used Dunlop Contact Adhesive to stick to it.
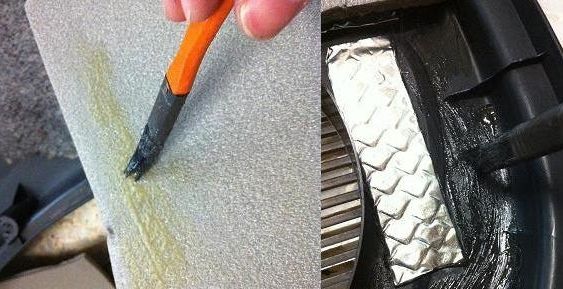
4. Apply some on the PE Foam, and then on the place you wana stick as well. Stick and then apply pressure. As you can see, I used some damping material near the speaker. Once done, let the glue dry under a fan or ventilation to get rid of the smell.
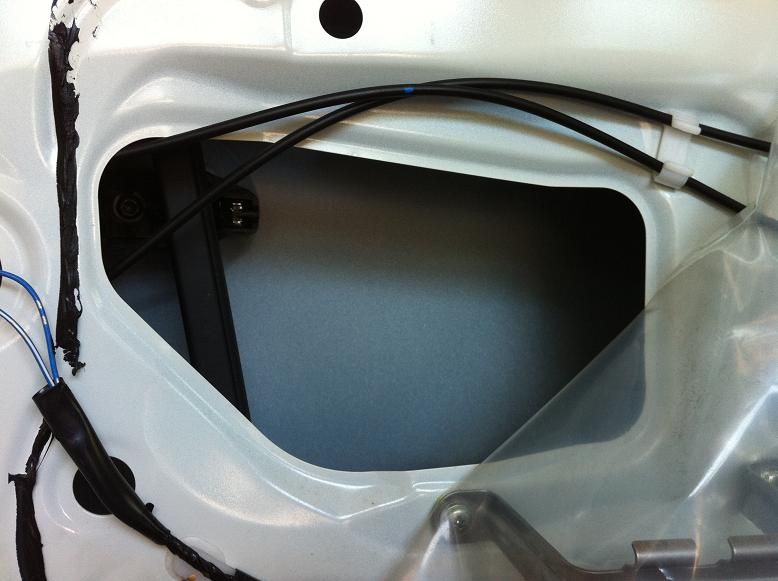
5. This is how it looks inside. Notice the large free area, that's where it vibrates the most.
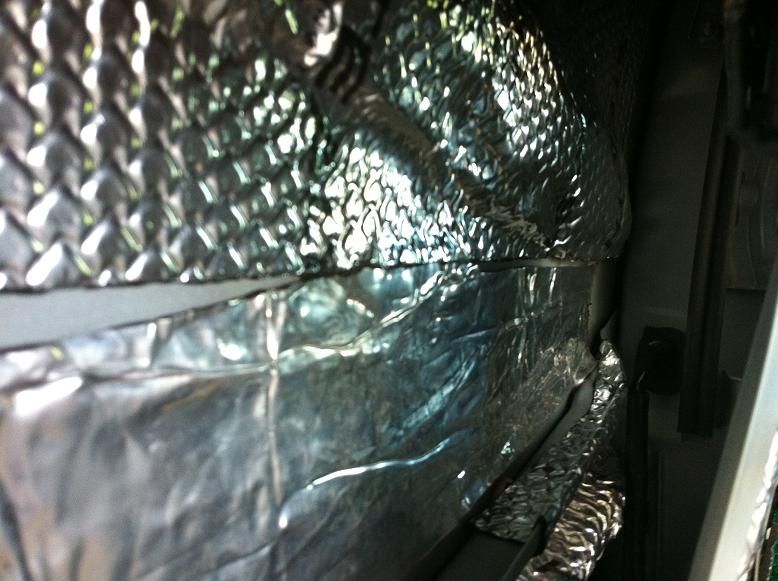
6. Stick the damping material...make sure all inch is sticked on the panel. Notice that there's two different material. The bottom one is previous insulation material being applied.
7. I did not do two layers damping as I deem that it is unecessary. Just dampens the free area would do. So for the inner panel, I only stick some on big flat panels. DIY is all about cost efficient isnt it?
8. This is where the speaker would be, so I put two layers of dampening material (old bitumen + new one)
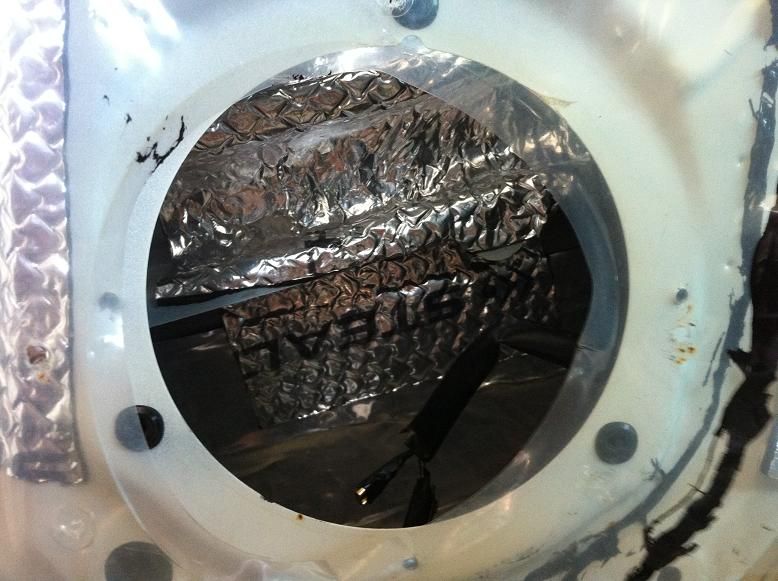
9. As I did not do 2 dampening layers, I just cover up the holes with PE Foam to reduce noise travel.
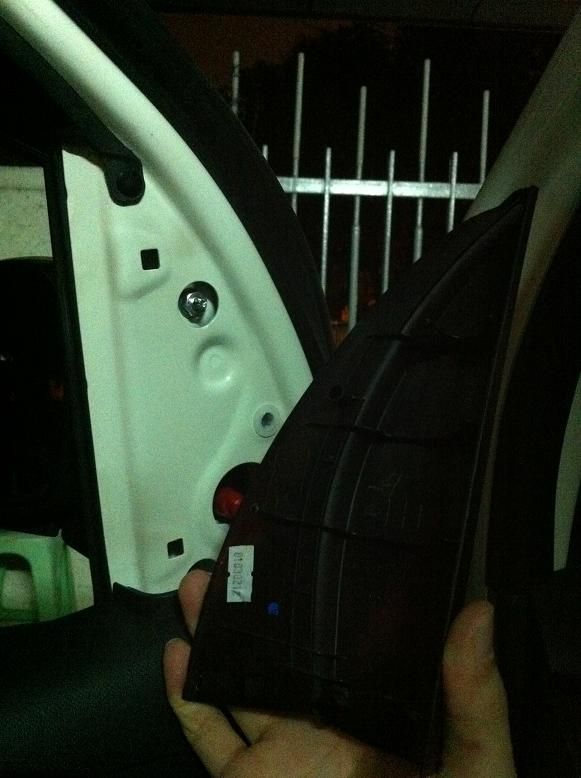
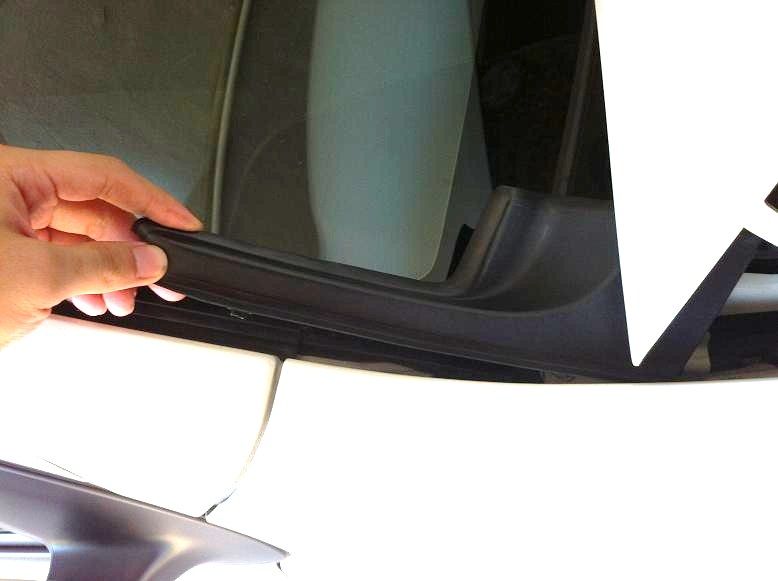
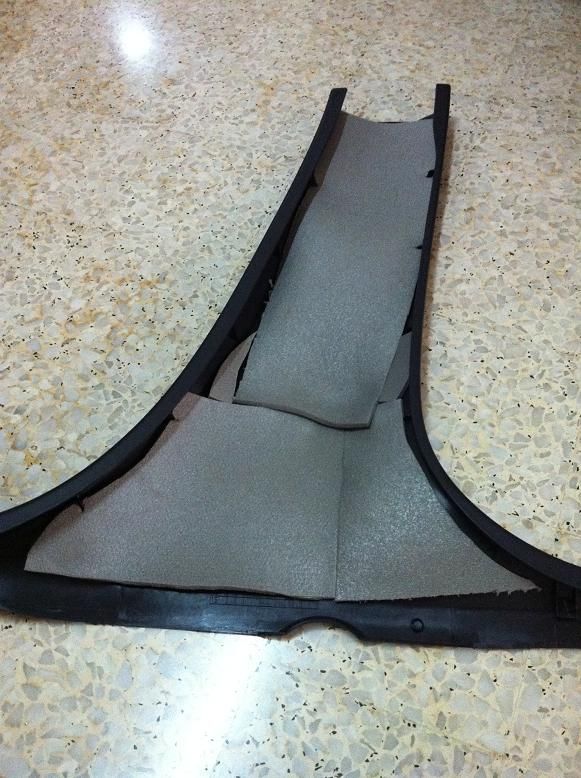
10. Moving to the front door. Open the triangle thingy first....
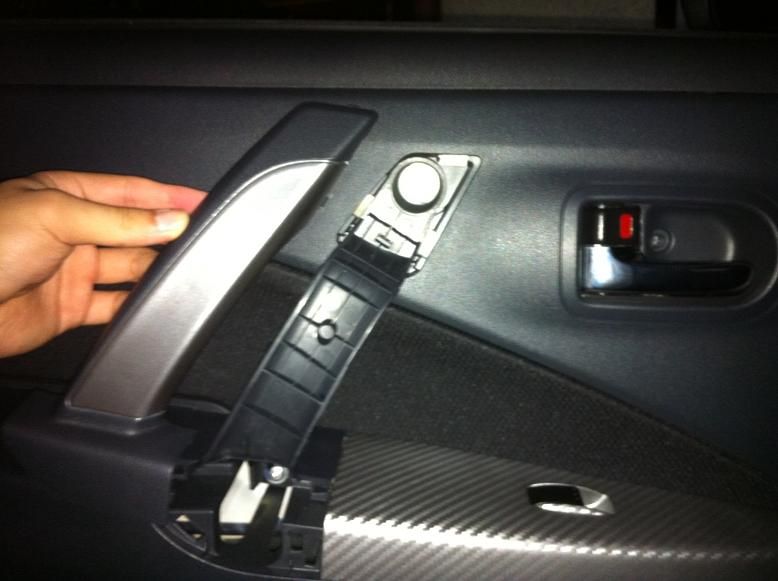
11. Open up the handle in order to take out the plastic panel.
12. For the front door, because there's no speaker there, I only dampen the free area and not whole metal sheet.
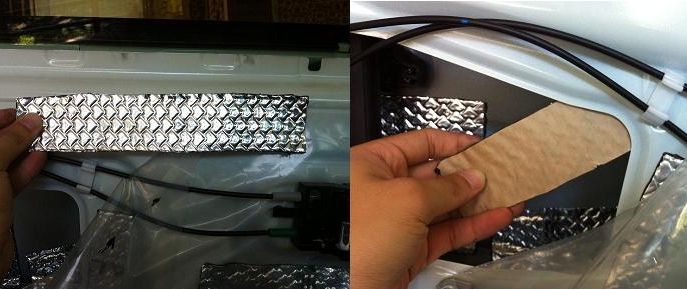
13. In order to reduce wastage, must always measure and plan!!
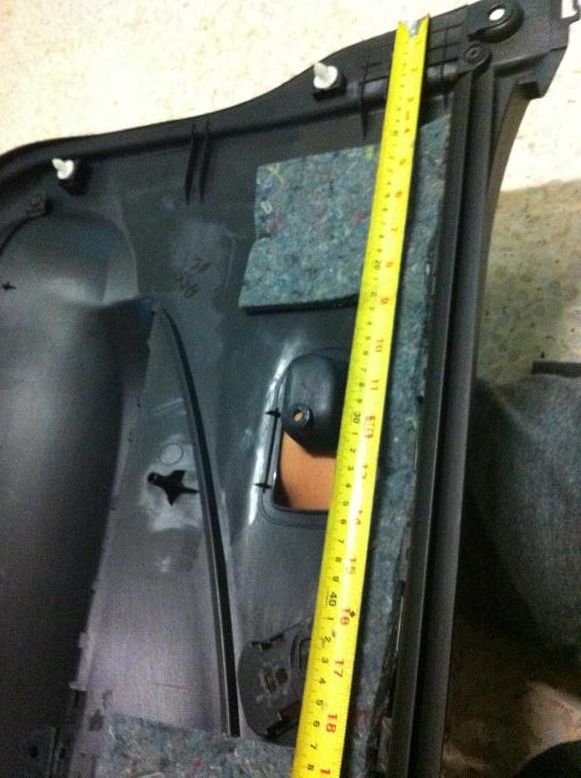
14. Opps, perfect.
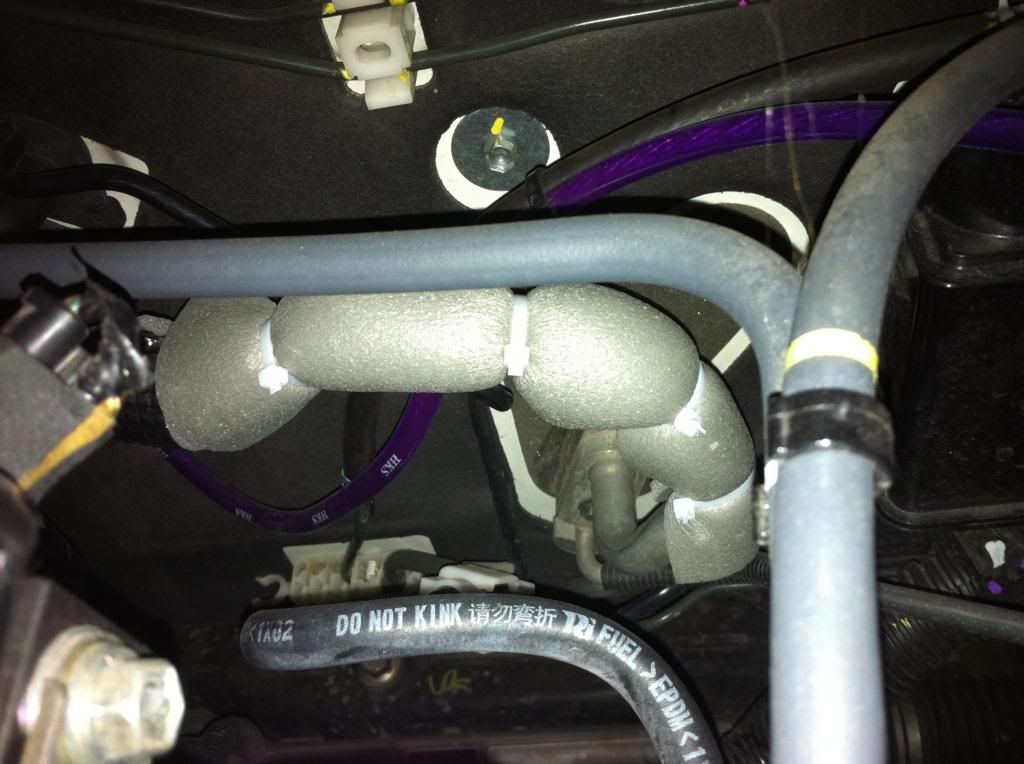
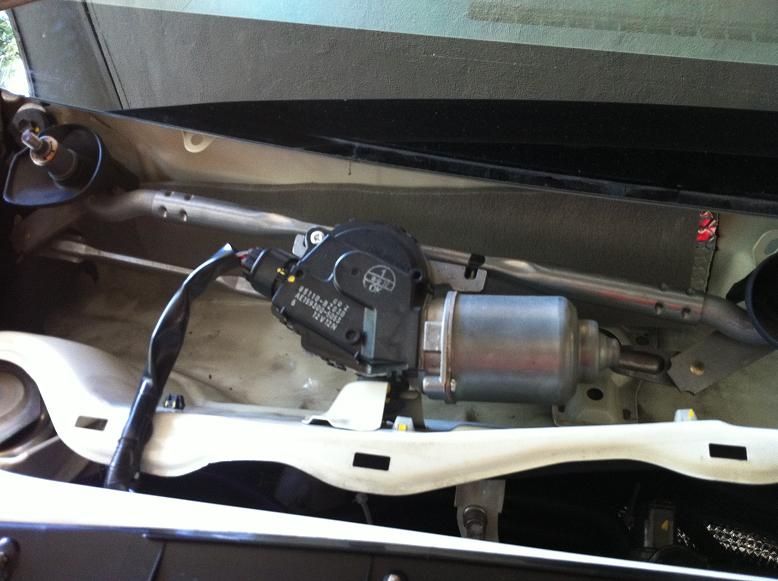
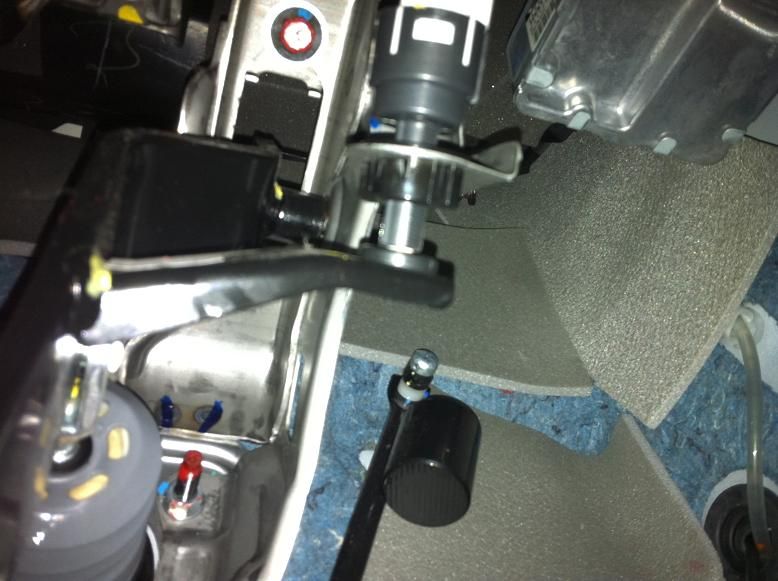
15. Next, the upper firewall
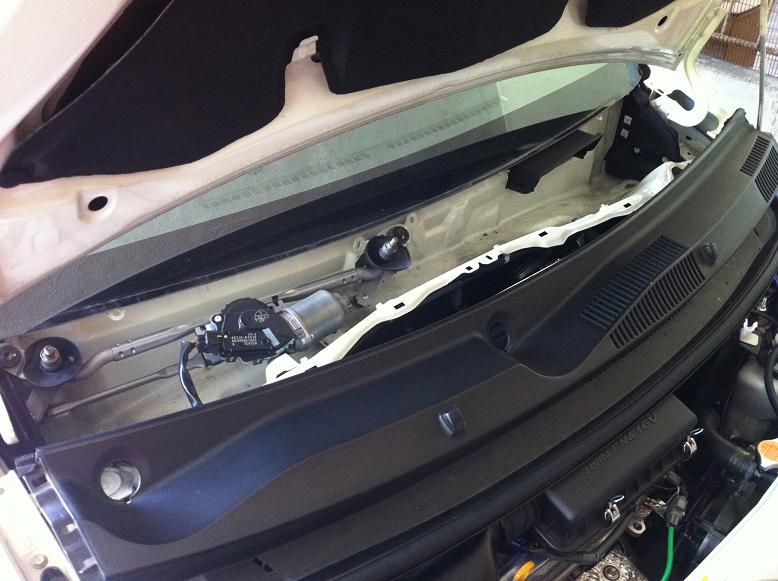
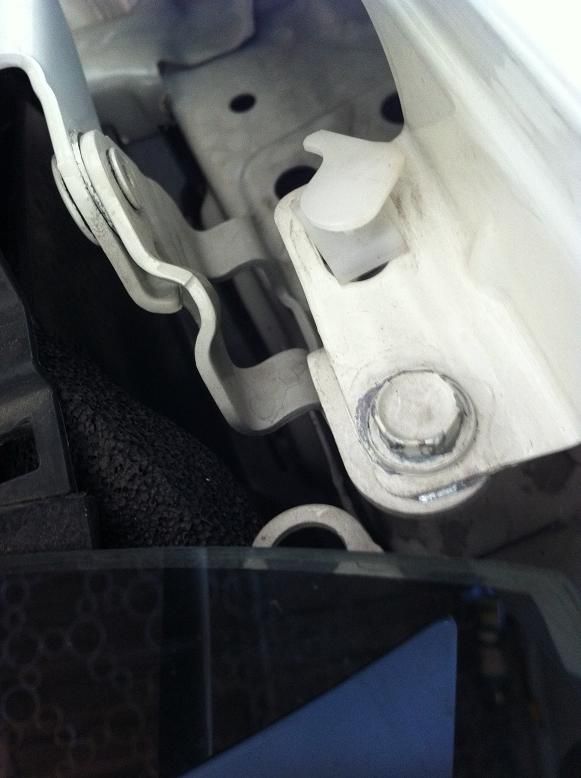
16. Open the bolt that secures the wiper.
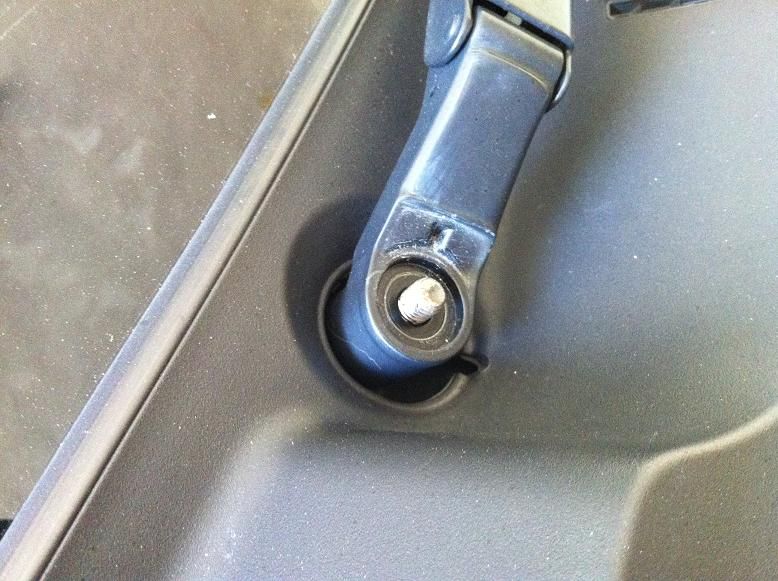
17. Then disamble this thing out by sliding it outwards.
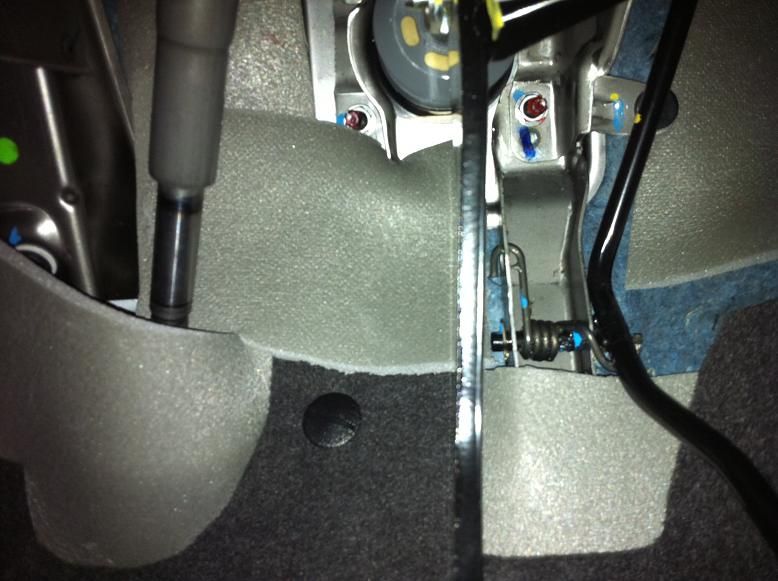
18. There's a piece of clip that secures it. Pull it out from this clip.
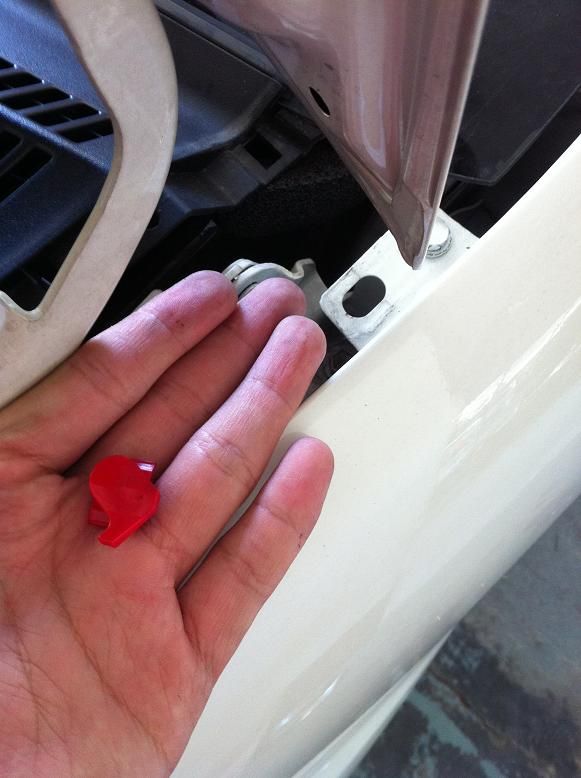
19. The clip at another side is red colour
20. install some PE Foam on the plastic panel
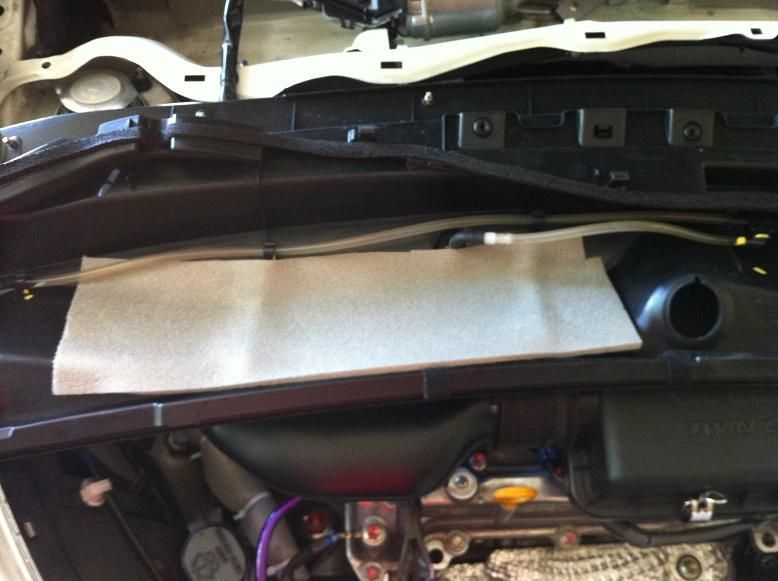
21. I actually used both PE foam and Bitumen sheet on this. Bitumen first, then PE foam on top of the bitumen.
22. More
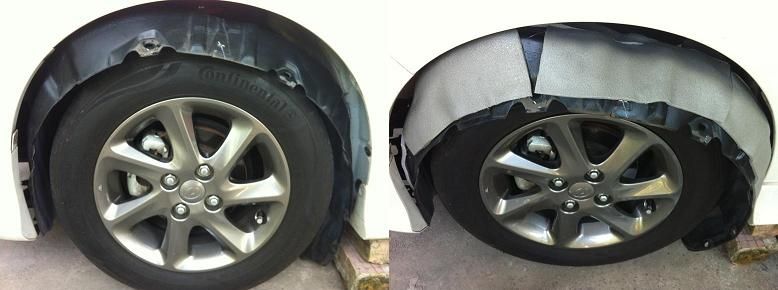
23. Sticked some on the inner side of the fender. Same thing, bitumen then PE Foam on top.

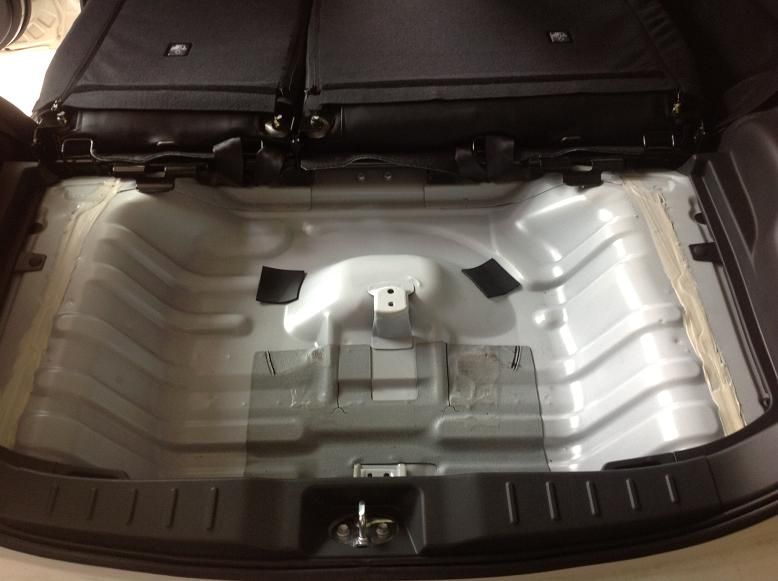
24. The rear boot floor...bare metal
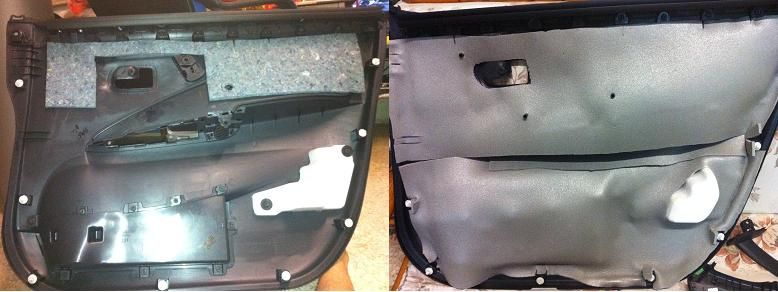
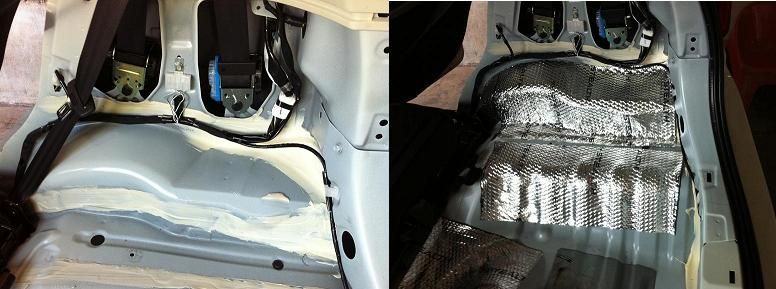
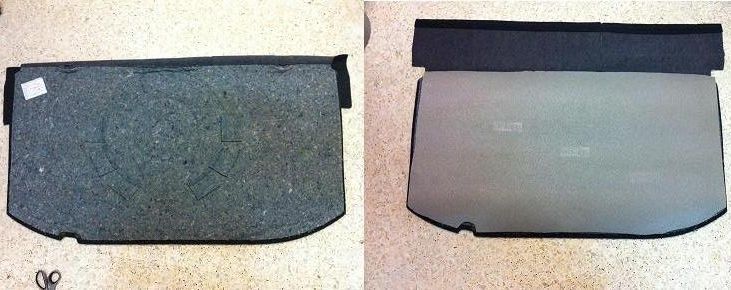
25. Before and after
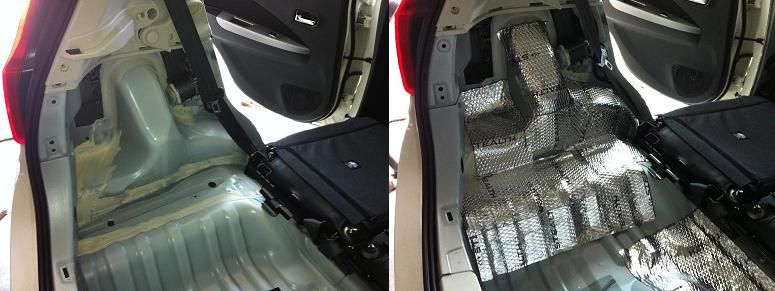
26. Another before and after
27. The bare part has this very hard metal so the vibration wont be much.

28. A layer of PE Foam on top of everything after that.
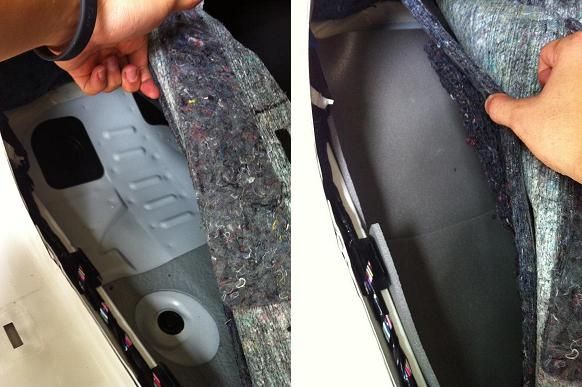
29. Remove the carpet and put some PE Foam here.
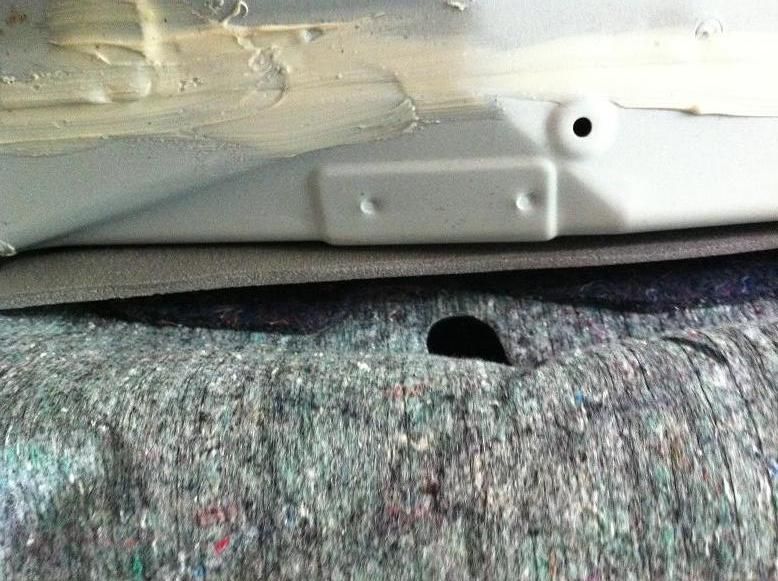
30. Stuffed the PE Foam under the carpet without any adhesive.
31. Plastic panels at the inner side of the boot. Use PE Foam.

32. The panel covering the spare tyre.
33. The middle plastic panel. At the seat belt that one.
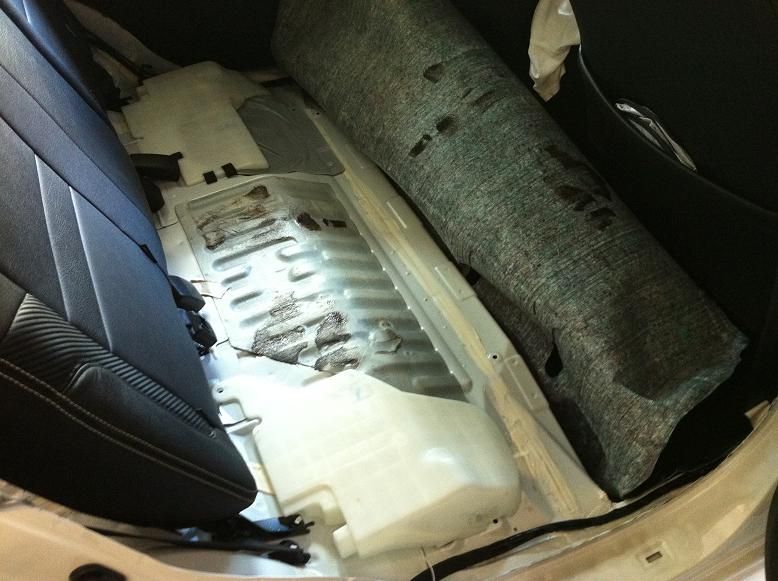
34. Front Floor. Same thing, stuffed PE Foam into it.
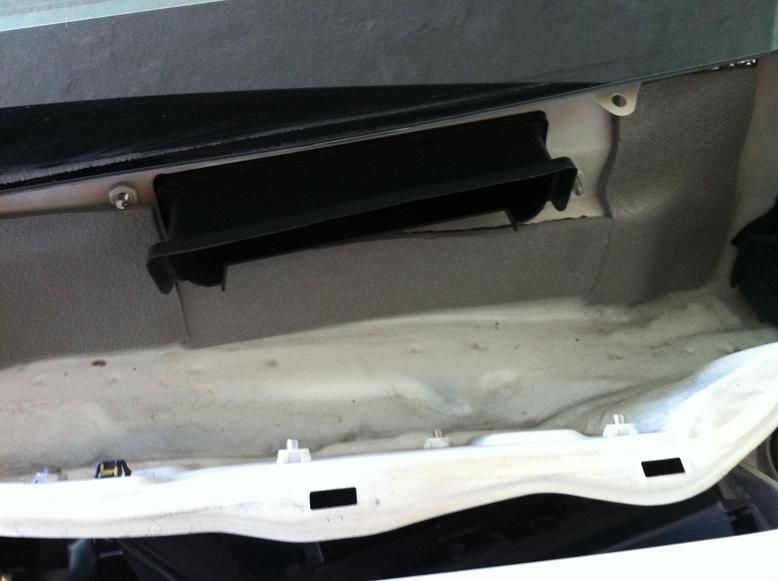
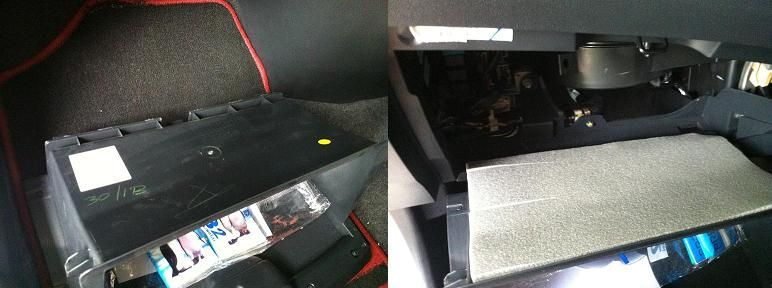
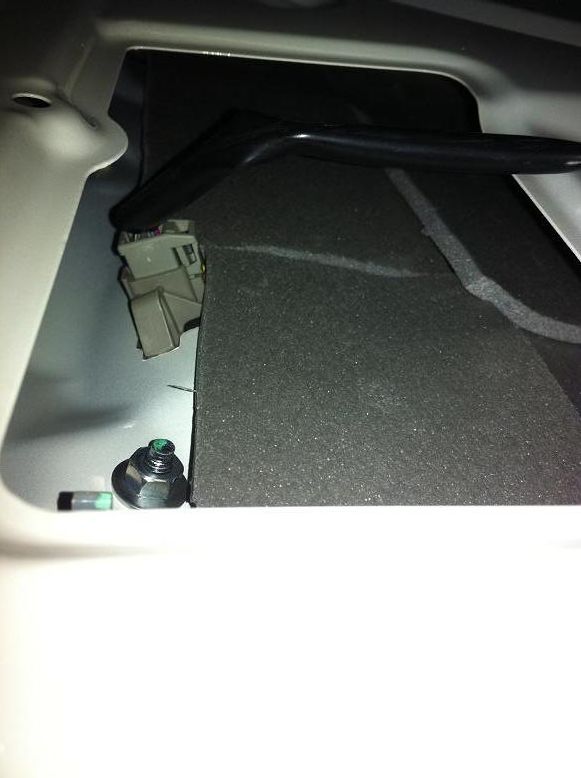
35.Open up the utility box and you'll see this. Yes it is a fan
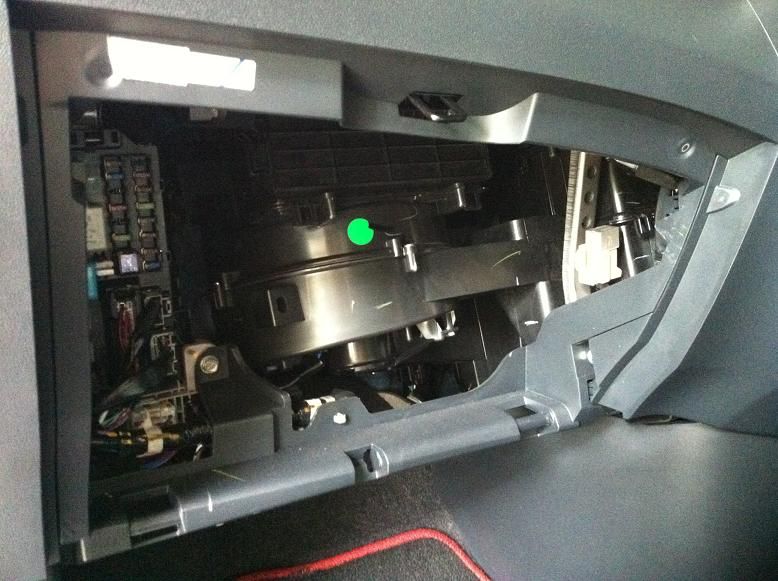
36. PE Foam on the inner side of the utility box to absorb the fan noise.
37. Sticked some on the firewall...inner side of the dashboard.
38.Moreeee
39. The boot door. Open the plastic panel and put insulation inside.
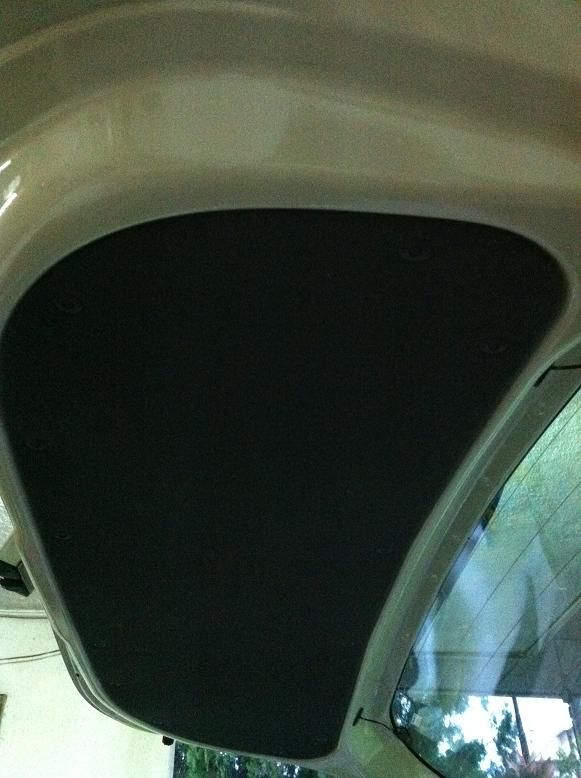
40. Stick some PE Foam inside the metal panel.
41. FDaun Pisang ~
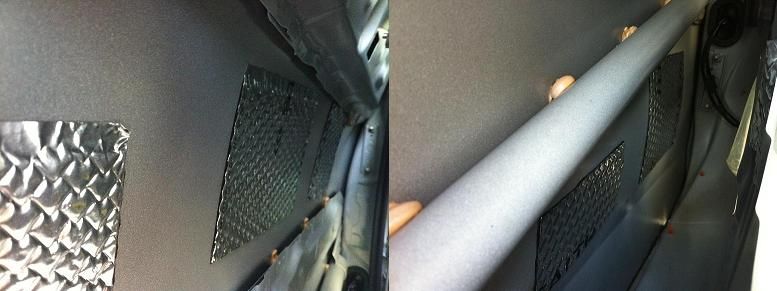
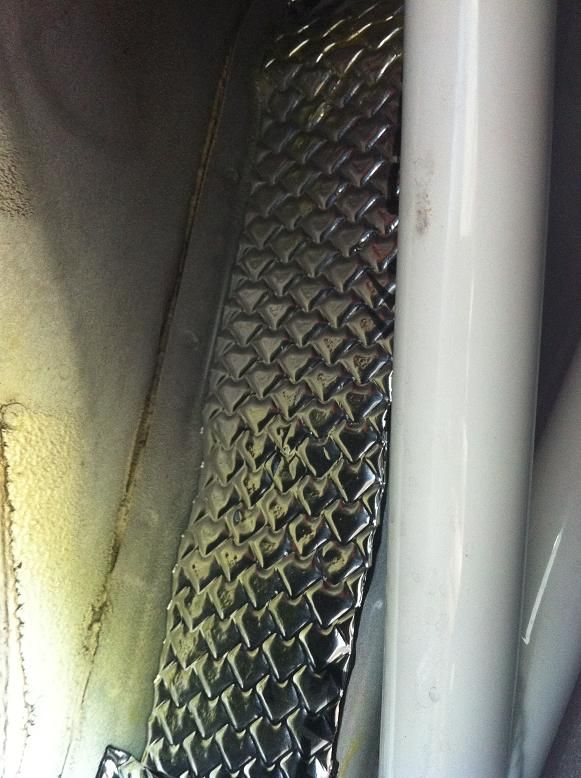
42. Put some dampening material and PE foam on the fender, near the fender bar there. But this picture only shows dampening. I added PE foam afterwards.
43. My humble vegetarian lunch of the day ~

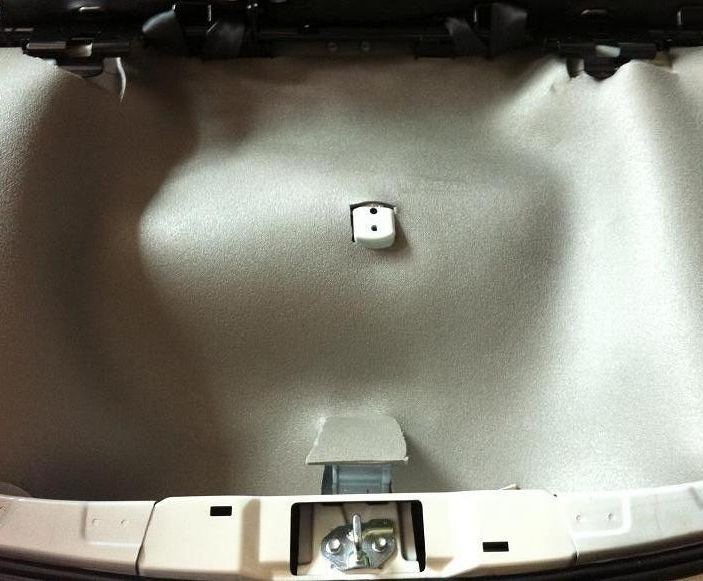
44. Finally, proceeded with the hood.
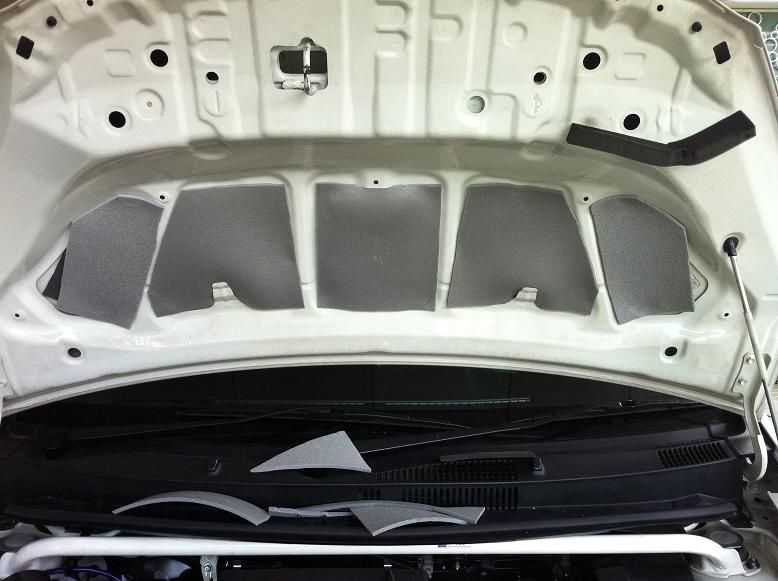
45. I still have this much after the installations. So might wanna add more layers to some of the parts next time. Maybe I shall do the roof next. Previously didnt think of doing the roof as I wana reduce maily road noise.
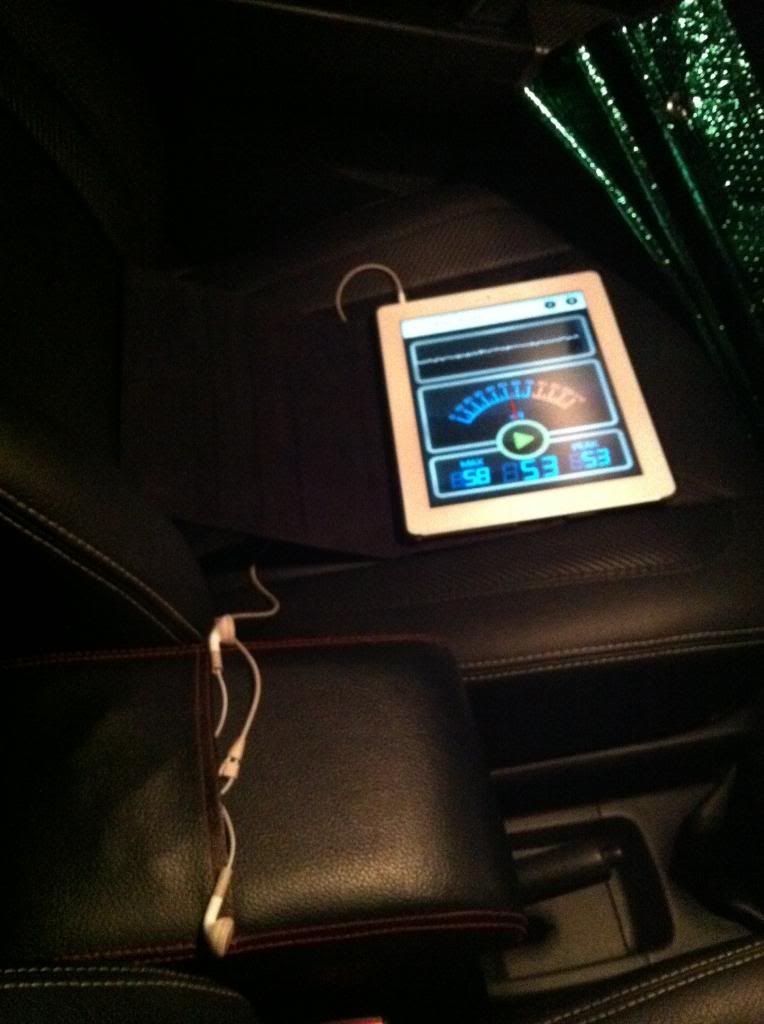
46. This is how I positioned the sensors, in this case, the microphones and earpiece.
NOW! THE TESTING AND ITS RESULTS EVERYBODY HAS BEEN WAITING FORRRRRRRR !!!
I did my testing at DUKE Highway, both started at 11p.m.
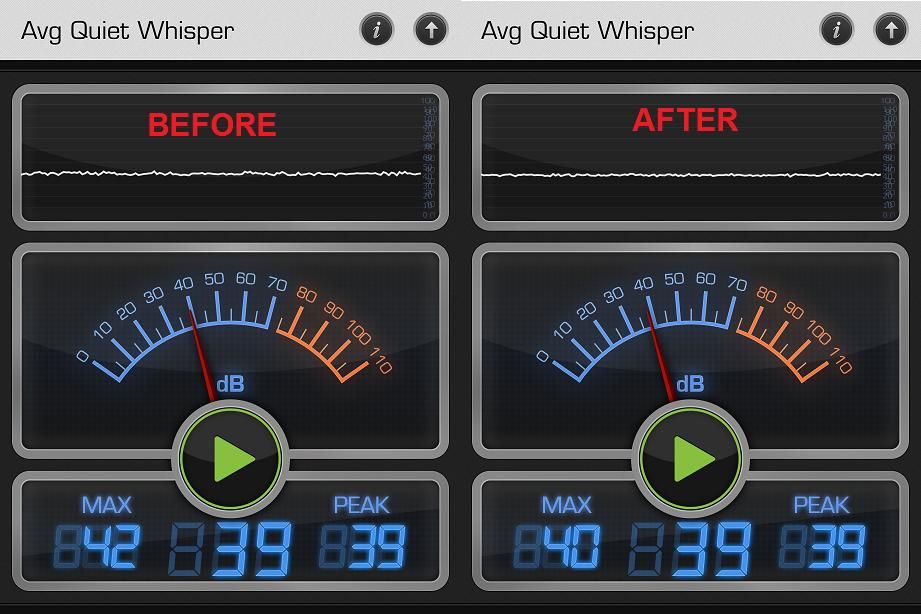
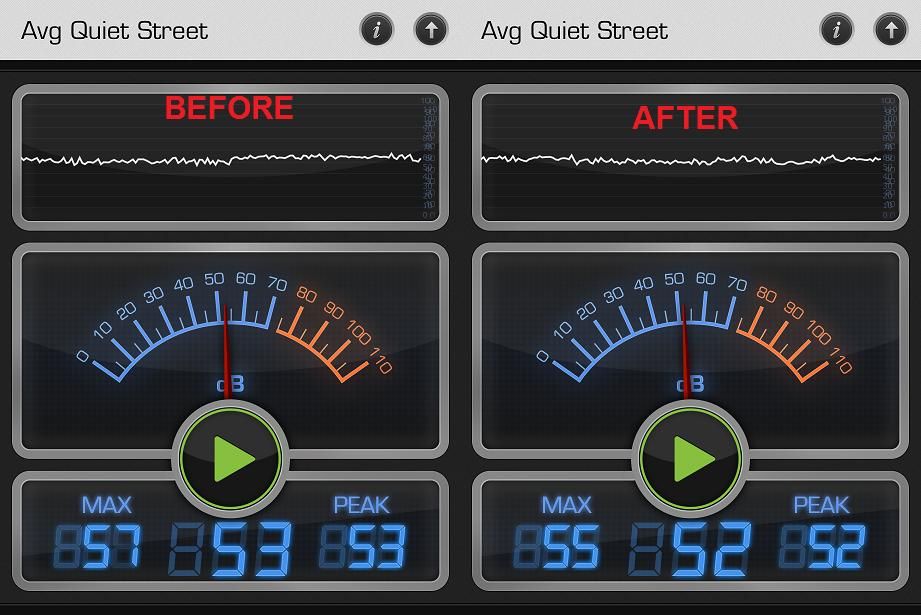
1. First Test. In the car porch, engine off, no movement.
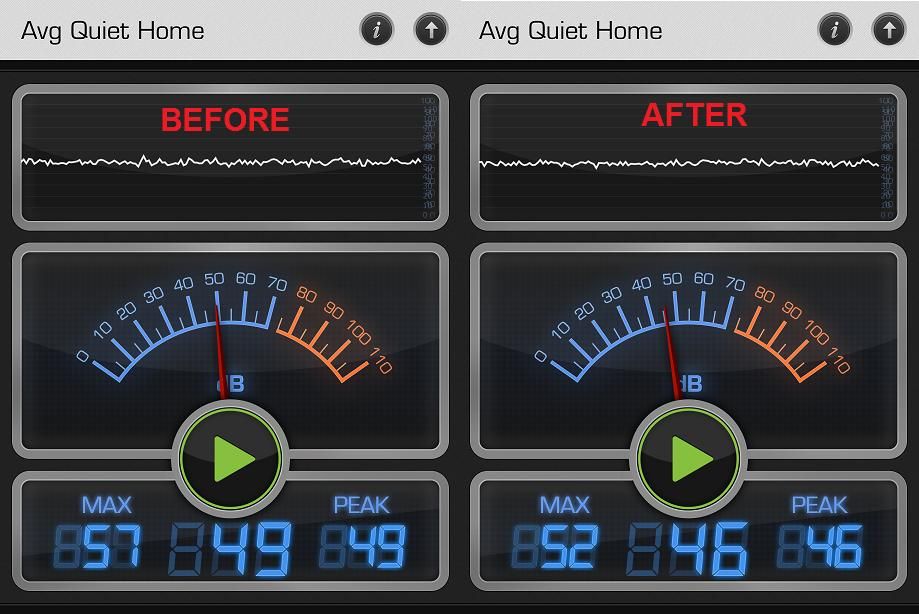
2. Second Test: In car porch, ENGINE RUNNING, idle.
3. Third Test: In car porch, ENGINE RUNNING, AIR CONDITIONING ON.
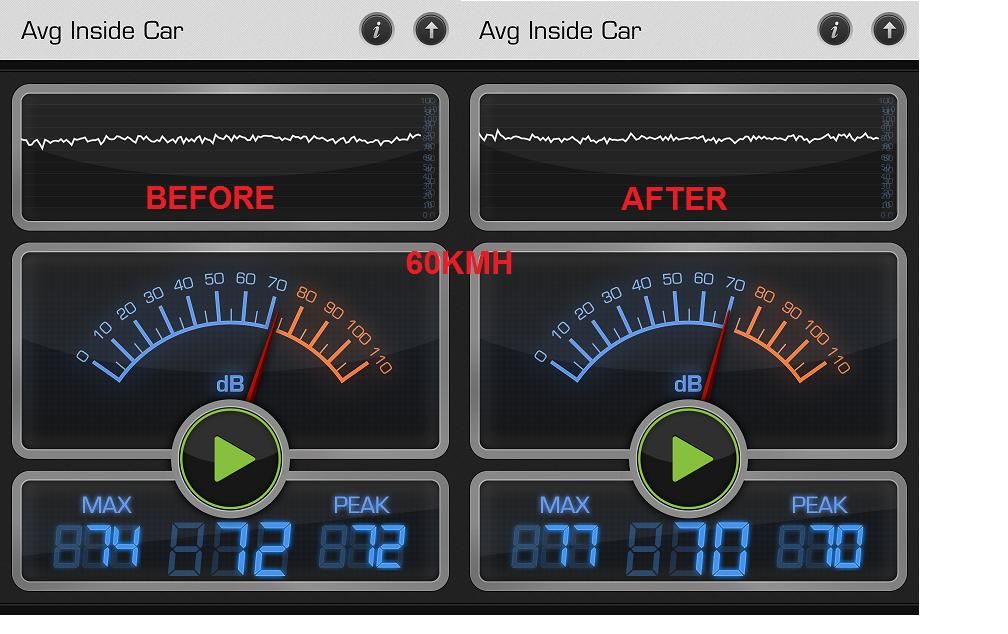
4. Forth Test: Driving at 60km/h, no music, AC On
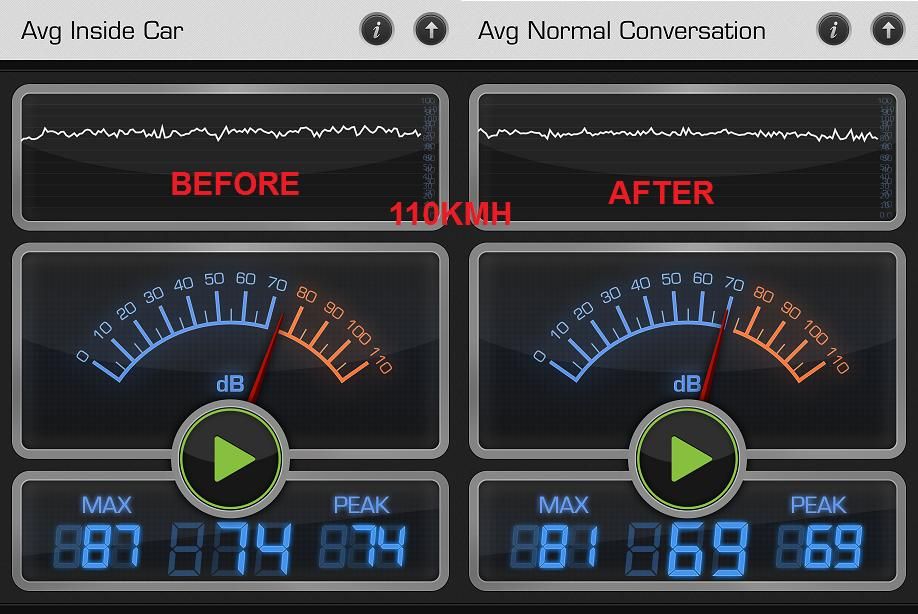
5. Fifth Test: Driving at 110km/h, AC On. Note that the reading for 110kmh is lower than 60 which is weird. But take note at the maximum reading and the graph. At 60kmh there's less disturbance and averagely lower. Its just at that time, the reading was caught at 70dB.
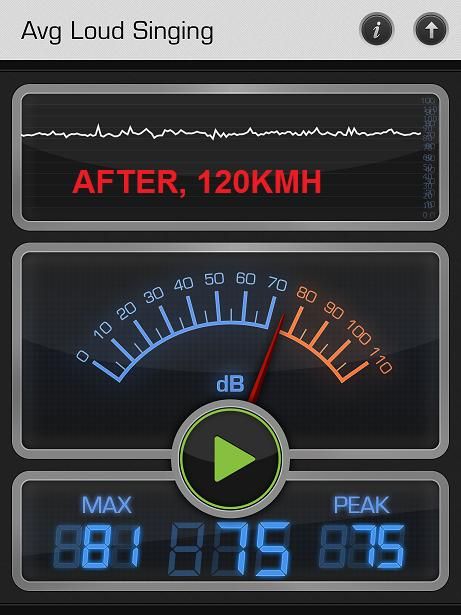
6. I sped up to 120km/h and this is what I got.
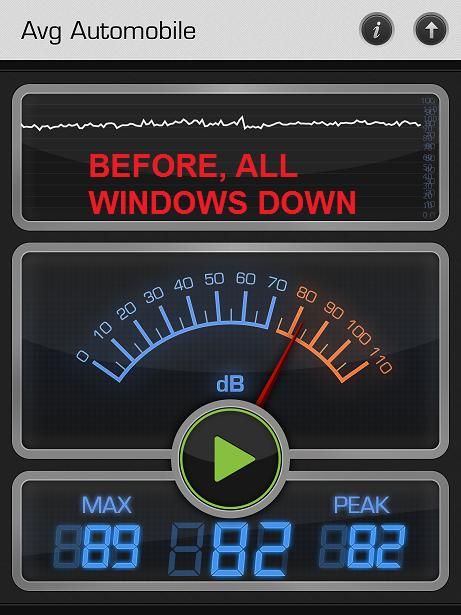
7. And just for information, with all windows down and at 110km/h. But this was before the insulation is installed.
So there we are with respective readings. The effort resulted in 2-4dB decreased in noise level, which is a very good thing. It means that my effort isnt down the drain
Personally, without seeing these data, what I can feel after installing the insulation:
1. Road noise level reduced, but not to the extend of heaven and hell
2. No more rattling noise when I blast the speakers!!! Previously there was some rattling sound which is very annoying made me canot turn up the volume too much.
3. ICE is improved. The music is now more solid feel.
4. Doors feel solid, especially the rear door.
The satisfaction level of completing a DIY = priceless
The adrenaline pumping feel to your heart when you nearly fucked up your DIY = also damn priceless
Thanks for viewing. Please comment / suggest if there's any in your mind :wavey:
So what exactly is it? In other words: You sit in the car. The car runs, you feel annoyed by the noise e.g. tyre or road noise, rattling noise, tweaking noise, or even ur mother in law keep on nagging. Sorry I cant solve the last problem for you. You're on your own
Too long exposure to certain level of noises would cause us crazy, or even death. So what is noisy and what is not, except the monster in law? Here is a few examples:
1. Jet tak-off (measured at 25m) : 150 decibel (dB) - eardrum rupture
2. Thunderclap, chain saw, oxygen torch : 120 dB - Pain to the ear
3. Motorcycle, farm tractor, garbage truck: 100 dB - Serious damage in 8hr exposure
4. Average factory, milling machine : 80 dB - Damage in 8hr exposure
5. Passenger car at 65mph at 25ft : 77dB - Arbitrary base of comparison. Annoyingly loud to some people
6. Office, background music, restaurant : 60 dB - Fairly quiet
7. Quiet suburb, conversation at home : 50 dB - quiet
8. Library, lowest limit of urban ambient : 40 dB - zzzzzZZzzzZzz krruuuh ~
What I did was trying to improve the NVH of my car, and test if I succeed. So how would I know if I succeed? Sound is measured in decibel, or dB in short. The usual frequency is the 'A' band. That's where dB(A) comes. Sound dB doesnt add up like 1+1 = 2, but in a logarithmic pattern. Ok dat's boring. Let me give an example: when two source of sound have the same dB (lets say you have two Monster in Law nagging the same thing at the same sound level), the add up amount of sound is 3.01dB. So if I can achieve an improvement that gives plus minus 3dB, i'm happy.
Ok. Lecture session done. Now's the practical session. What do I need? Sound insulation material, and if possible, a leng lui beside me of course.
Many people use polyethelyene foam as sound insulation with brands such as Insulflex or Superlon. For damping purposes, bitumen with butyl sheet is commonly used. For my case, I neither used Insulflex nor Superlon, but something similar. Trocellen. Same kind of material and serve the same purpose. Trocellen is not known for its purpose as sound insulation to Automotive dudes. But in fact, the manufacture OEM sound insulation panels for many automotive brands. What I used is actually for industrial purposes, commonly used to insulate ductings, chilled water pipes, etc. So not only do PE Foams improve sound insulation, they improve the heat resistivity too. Measurement: I dont have a decibel meter and I cant manage to borrow one. But hey! I bet you dont know...we have smartphones!! Decibel measuring apps are available and they are quite accurate. With accuracy of plus minus 2 dB. But of course, not all apps could do that, so choose wisely. I am using "decibel 10th" btw, and it's quite accurate.
So lets start the pictures already !!! :slug: Oh ya, I'm doing it on a Myvi Extreme.
1. This is the P.E Foam I mentioned. 1.2m width, 10m long. Another roll is my friend's.
2. The damping material I used. Bitumen + butyl sheet.
3. Rear door. I used Dunlop Contact Adhesive to stick to it.
4. Apply some on the PE Foam, and then on the place you wana stick as well. Stick and then apply pressure. As you can see, I used some damping material near the speaker. Once done, let the glue dry under a fan or ventilation to get rid of the smell.
5. This is how it looks inside. Notice the large free area, that's where it vibrates the most.
6. Stick the damping material...make sure all inch is sticked on the panel. Notice that there's two different material. The bottom one is previous insulation material being applied.
7. I did not do two layers damping as I deem that it is unecessary. Just dampens the free area would do. So for the inner panel, I only stick some on big flat panels. DIY is all about cost efficient isnt it?
8. This is where the speaker would be, so I put two layers of dampening material (old bitumen + new one)
9. As I did not do 2 dampening layers, I just cover up the holes with PE Foam to reduce noise travel.
10. Moving to the front door. Open the triangle thingy first....
11. Open up the handle in order to take out the plastic panel.
12. For the front door, because there's no speaker there, I only dampen the free area and not whole metal sheet.
13. In order to reduce wastage, must always measure and plan!!
14. Opps, perfect.
15. Next, the upper firewall
16. Open the bolt that secures the wiper.
17. Then disamble this thing out by sliding it outwards.
18. There's a piece of clip that secures it. Pull it out from this clip.
19. The clip at another side is red colour
20. install some PE Foam on the plastic panel
21. I actually used both PE foam and Bitumen sheet on this. Bitumen first, then PE foam on top of the bitumen.
22. More
23. Sticked some on the inner side of the fender. Same thing, bitumen then PE Foam on top.
24. The rear boot floor...bare metal
25. Before and after
26. Another before and after
27. The bare part has this very hard metal so the vibration wont be much.
28. A layer of PE Foam on top of everything after that.
29. Remove the carpet and put some PE Foam here.
30. Stuffed the PE Foam under the carpet without any adhesive.
31. Plastic panels at the inner side of the boot. Use PE Foam.
32. The panel covering the spare tyre.
33. The middle plastic panel. At the seat belt that one.
34. Front Floor. Same thing, stuffed PE Foam into it.
35.Open up the utility box and you'll see this. Yes it is a fan
36. PE Foam on the inner side of the utility box to absorb the fan noise.
37. Sticked some on the firewall...inner side of the dashboard.
38.Moreeee
39. The boot door. Open the plastic panel and put insulation inside.
40. Stick some PE Foam inside the metal panel.
41. FDaun Pisang ~
42. Put some dampening material and PE foam on the fender, near the fender bar there. But this picture only shows dampening. I added PE foam afterwards.
43. My humble vegetarian lunch of the day ~
44. Finally, proceeded with the hood.
45. I still have this much after the installations. So might wanna add more layers to some of the parts next time. Maybe I shall do the roof next. Previously didnt think of doing the roof as I wana reduce maily road noise.
46. This is how I positioned the sensors, in this case, the microphones and earpiece.
NOW! THE TESTING AND ITS RESULTS EVERYBODY HAS BEEN WAITING FORRRRRRRR !!!
I did my testing at DUKE Highway, both started at 11p.m.
1. First Test. In the car porch, engine off, no movement.
2. Second Test: In car porch, ENGINE RUNNING, idle.
3. Third Test: In car porch, ENGINE RUNNING, AIR CONDITIONING ON.
4. Forth Test: Driving at 60km/h, no music, AC On
5. Fifth Test: Driving at 110km/h, AC On. Note that the reading for 110kmh is lower than 60 which is weird. But take note at the maximum reading and the graph. At 60kmh there's less disturbance and averagely lower. Its just at that time, the reading was caught at 70dB.
6. I sped up to 120km/h and this is what I got.
7. And just for information, with all windows down and at 110km/h. But this was before the insulation is installed.
So there we are with respective readings. The effort resulted in 2-4dB decreased in noise level, which is a very good thing. It means that my effort isnt down the drain
Personally, without seeing these data, what I can feel after installing the insulation:
1. Road noise level reduced, but not to the extend of heaven and hell
2. No more rattling noise when I blast the speakers!!! Previously there was some rattling sound which is very annoying made me canot turn up the volume too much.
3. ICE is improved. The music is now more solid feel.
4. Doors feel solid, especially the rear door.
The satisfaction level of completing a DIY = priceless
The adrenaline pumping feel to your heart when you nearly fucked up your DIY = also damn priceless
Thanks for viewing. Please comment / suggest if there's any in your mind
:wavey: