Photos Of My 93' Corolla

  • See what others are reading now! Try Forums > Current Activity
  • Search function more powerful with google results! Try Search
I received/installed this today - An Ultra Racing rear strut brace. Should help stiffen things up a little more :)

IMG_4325-resized.jpg


IMG_4324-resized.jpg


IMG_4326-resized.jpg


IMG_4336-resized.jpg


IMG_4337-resized.jpg


IMG_4339-resized.jpg


IMG_4368-resized1.jpg


IMG_4350-resized.jpg
 
Here are my two latest purchases - An Ultra Racing 29mm solid front swaybar and a Whiteline 18mm solid rear swaybar, both with polyurethane bushings. Should make a very noticeable difference to the handling compared to the original 24mm front and 14mm rear swaybars :)

IMG_4463-resized.jpg


IMG_4454-resized-1.jpg
 
greetings from the Philippines!

Bro, i have to say that your AE101 is awesome. Your patience and ingenious plan to come up w/ those mods are simply yet very astounding. Your hard work and perserverance paid off. Keep up the good stuffs comin'!

PS. this is my first post. \m/
 
greetings from the Philippines!

Bro, i have to say that your AE101 is awesome. Your patience and ingenious plan to come up w/ those mods are simply yet very astounding. Your hard work and perserverance paid off. Keep up the good stuffs comin'!

PS. this is my first post. \m/

Thanks buddy! :biggrin:. I really appreciate the kind words. Very pleased that you like what I've done so far, and that your very first post was in my thread :biggrin:

Bro where're you located at? Your car must be rock solid by now. What a beast

Hey bro, I'm located in New Zealand. Yeah she's pretty solid now. No longer all show and no go, hehe.
 
I installed my 18mm Whiteline rear swaybar today. I finished installing it quite late in the afternoon so haven't had a chance to go for a drive yet but I'm sure I'll have a bit of fun throwing the car around some corners to test it out :cool:

IMG_4484-resized.jpg


IMG_4483-resized.jpg


IMG_4490-resized.jpg
 
I got this in the mail yesterday - A custom personalized plate keyring. Thought it was a pretty cool idea as it's made from acrylic and the lettering is raised/painted like my real plate. Just something a little bit different :biggrin:

IMG_4518-resized2.jpg
 
I got this in the mail yesterday - A custom personalized plate keyring. Thought it was a pretty cool idea as it's made from acrylic and the lettering is raised/painted like my real plate. Just something a little bit different :biggrin:

IMG_4518-resized2.jpg

actually, it's not safe to put a plate no on ur keys..

coz if any1 got ur keys.. they wouldn't have any problem to identify the car..

juz my personal opinion :wink:
 
actually, it's not safe to put a plate no on ur keys..

coz if any1 got ur keys.. they wouldn't have any problem to identify the car..

juz my personal opinion :wink:

I've had a few people say the same thing, but I'm not the type of person to let my keys out of my sight. I've never once lost my keys (or my wallet for that matter) so have no concern about them falling into the wrong hands :)
 
I received and installed these sweet looking carbon fiber cam/spark plug covers today. The quality really impressed me, especially how it still features the 'TWINCAM 20' lettering found on the original plastic cover:

IMG_4659_tonemapped2nd-resized1.jpg


IMG_4612-resized3.jpg
 
I decided to take some better/wider shots of the carbon covers today:

IMG_4730-resized2.jpg


IMG_4727-resized2.jpg


IMG_4745-resized1.jpg


IMG_4759-resized3.jpg


I also received some more goodies in the mail today - An Exedy heavy duty clutch and pressure plate and an Exedy lightweight chromoly flywheel (both made in Japan).

The flywheel weighs 4.9kg, which is exactly 1kg less than the stock Blacktop flywheel. Should make a noticeable difference in acceleration:

IMG_4775-resized.jpg


IMG_4777-resized.jpg


IMG_4779-resized.jpg


IMG_4772-resized.jpg


IMG_4774-resized.jpg
 
Another day, another delivery :D. These arrived a few minutes ago - My 275mm front rotors and a set of new brake pads that I ordered from Toyota. Got my set of AE101 twinpot calipers and ST202 Celica carrier brackets sitting here already waiting so I'm looking forward to putting everything on :)

IMG_4785-resized.jpg


IMG_4786-resized1.jpg
 
I did the 275mm rotor upgrade and twinpot caliper swap yesterday :D. Everything went to plan and the braking performance is phenomenal. It comes to a dead stop within a matter of seconds and literally throws you forward in the seat. I can brake a lot later into corners and don't have to push anywhere near as hard on the pedal for the same effect. It was definitely a worthwhile upgrade and they've been a lot of fun to drive with so far :)

Here's some pics (they're a lot shinier in real-life but you get the idea) -

IMG_4806-resized.jpg


IMG_4807-resized.jpg


IMG_4810-resized.jpg


IMG_4812-resized.jpg


IMG_4813-resized.jpg


IMG_4819-resized.jpg


IMG_4853-resized.jpg
 
Not sure if you will find this there...Ferodo Dot 5 racing fluid...makes a huge difference, even to a standard set-up.
 
This car is more jdm than the ones in japan itself. cool ride and effort dude.
 
Not sure if you will find this there...Ferodo Dot 5 racing fluid...makes a huge difference, even to a standard set-up.

Thanks for the tip! I'll be sure to put some of that in next time I flush out the fluid :)

This car is more jdm than the ones in japan itself. cool ride and effort dude.

Haha, thanks man :biggrin:. I appreciate it.


I installed this sweet looking Tomei fuel pressure regulator today. I had always assumed that fuel pressure regulators were only beneficial for turbocharged engines, until I came across a post online about a fellow Blacktop owner who had installed a FPR, played around with the pressure setting and had great results.

The factory fuel pressure for a Blacktop is 40psi at full throttle, and raising it to 44psi seems to be the sweet spot for the ECU as it doesn't affect the top end performance and doesn't seem to affect the fuel economy. After my first initial drive once I had finished the installation I was very impressed at how much of a difference the additional 4psi of fuel pressure had made. The sluggishness down low had gone and the throttle response had increased dramatically. The engine now responds when I want it to, instead of having to wind itself up from low to mid rpm like it used to.

All in all it has definitely made the engine rev more freely and respond a lot quicker. It's now a lot more fun to drive, especially around town. Proved to be a very worthwhile upgrade :)

The set-up consists of:

* Genuine Tomei Type S fuel pressure regulator.
* Genuine Tomei liquid filled gauge.
* Genuine Tomei fuel rail adapter.
* Goodyear fuel hose & 4mm silicone vacuum hose.
* 2x 90-degree brass elbow fittings, 1x straight fitting.

IMG_4970-resized.jpg


IMG_4994-resized.jpg


IMG_4984-resized.jpg


IMG_4952-resized.jpg
 
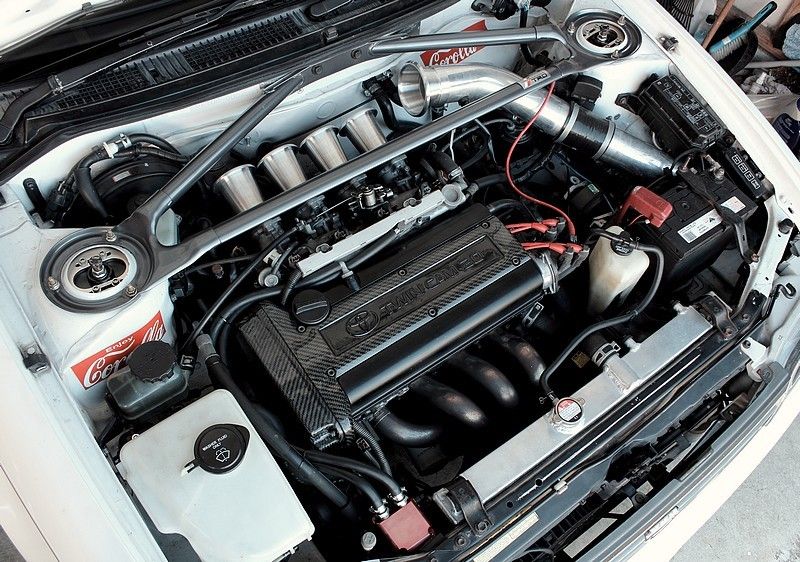
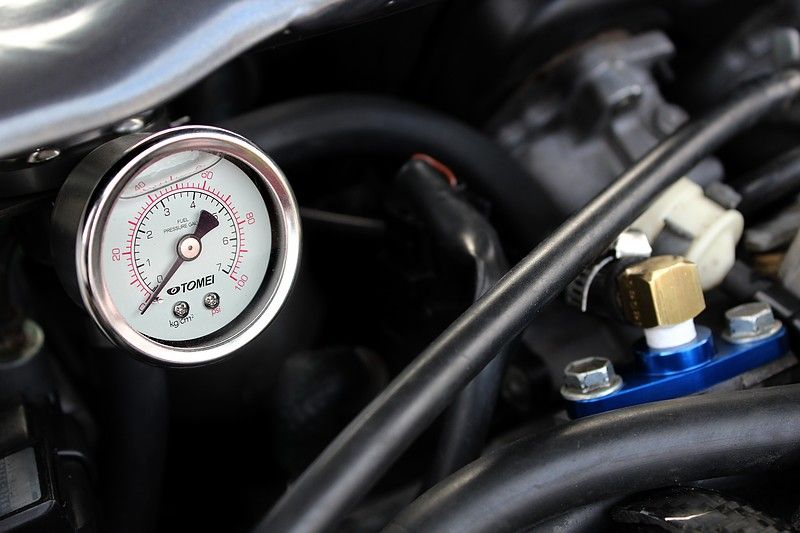
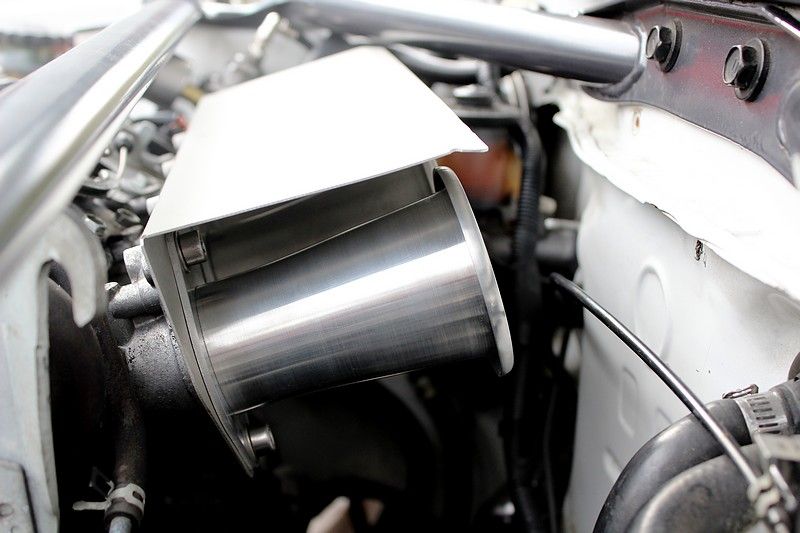
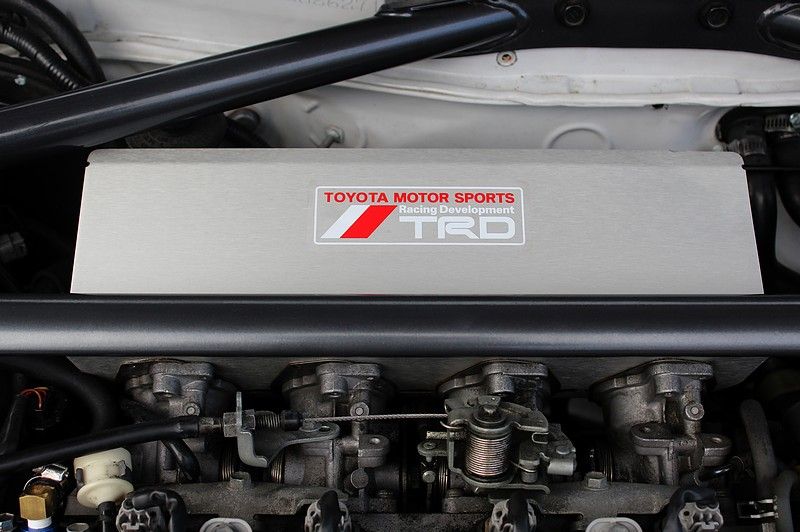
I've been toying around with the idea of shorter trumpets/ram tubes lately as the engine bay heat being sucked into my open 110mm tubes wasn't doing the performance any favors. I reverted back to the standard curved rubber trumpets for a few weeks and even though the car felt a little more sluggish, the engine much preferred the nice cold air it was ingesting from the cold air intake.

Curiosity got the better of me and I decided to remove the rubber trumpets and run no trumpets whatsoever inside the plenum for just one day. The result was that the engine didn't really have any power down low, but as soon as it hit 5,500rpm the needle rocketed to redline, as expected. One thing I noticed with the factory rubber trumpets is that they're good for mid-range power, but once you get higher up in the rev range the power starts backing off a bit.

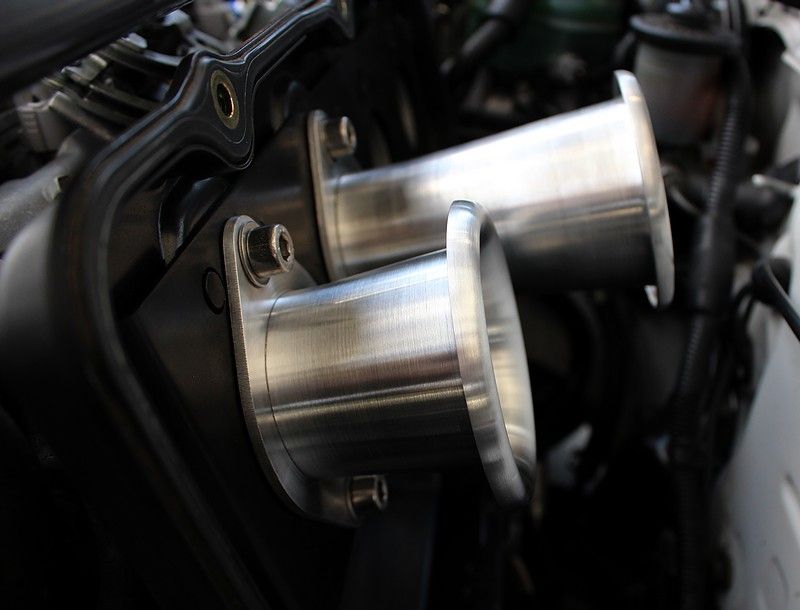
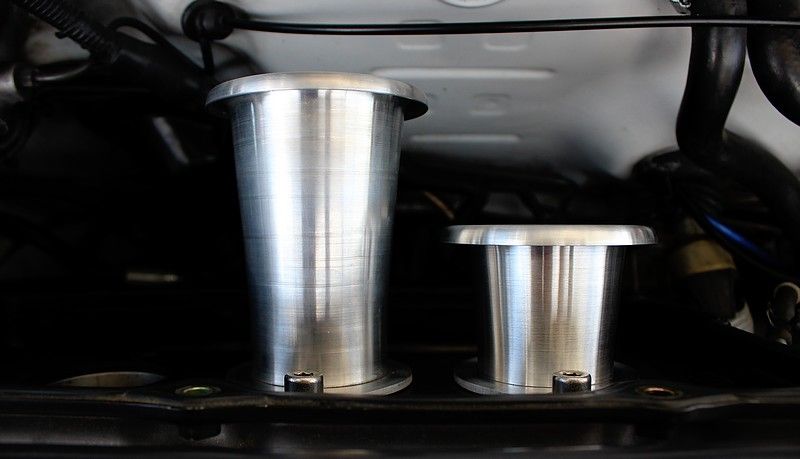
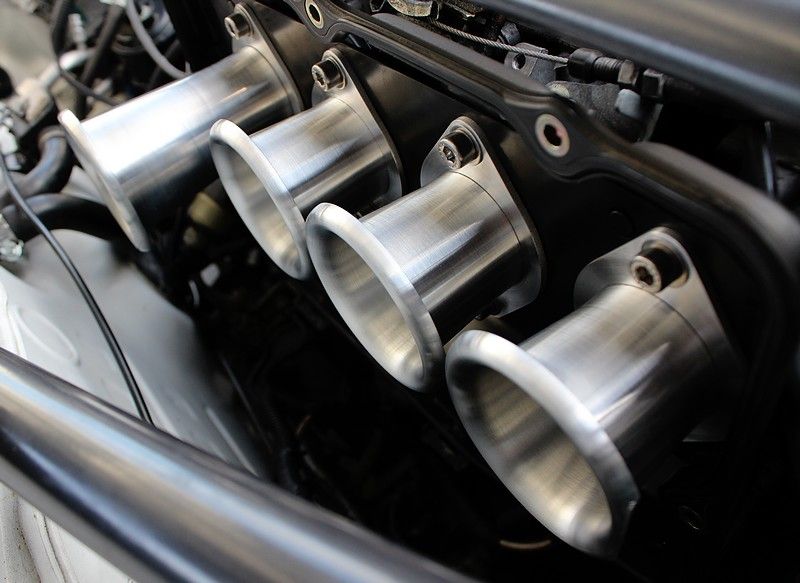
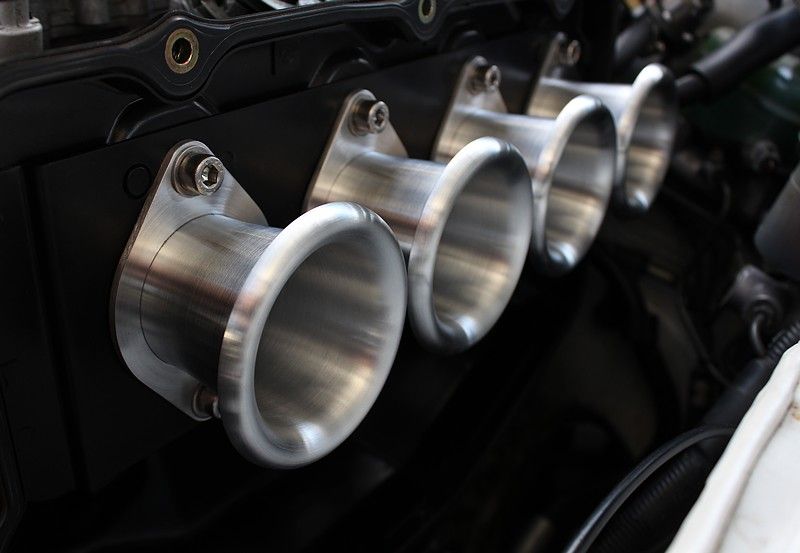
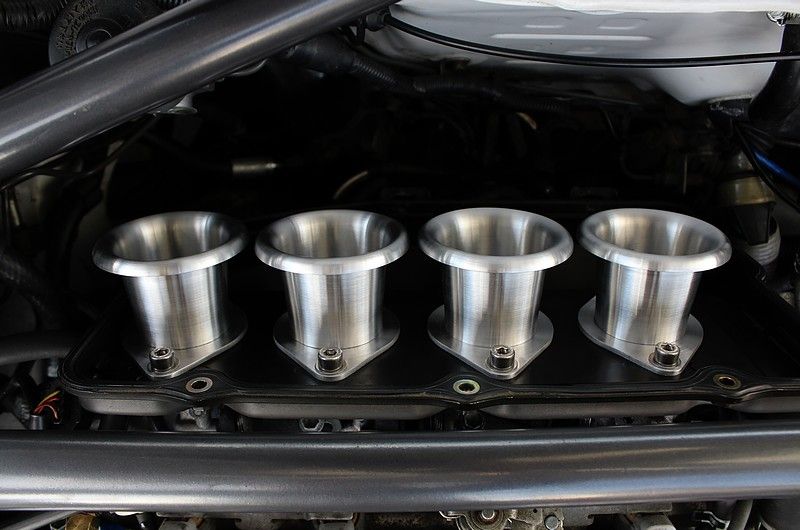
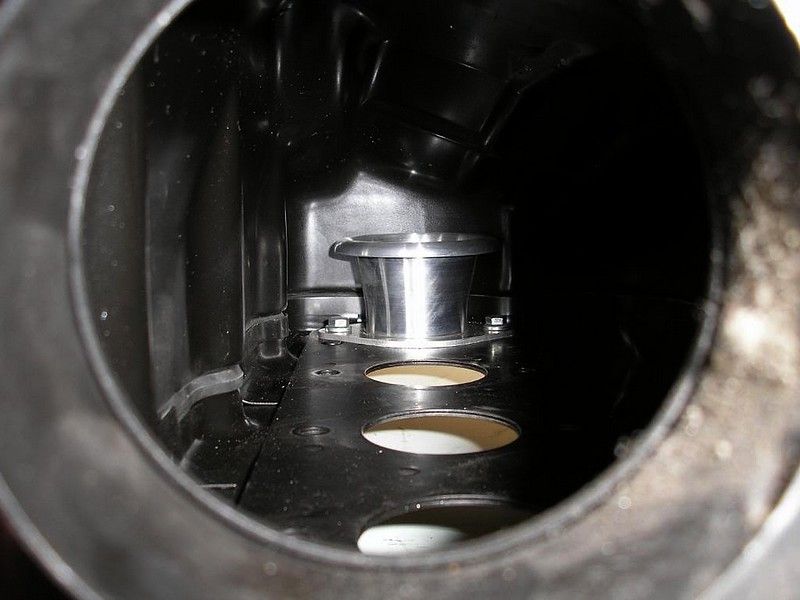
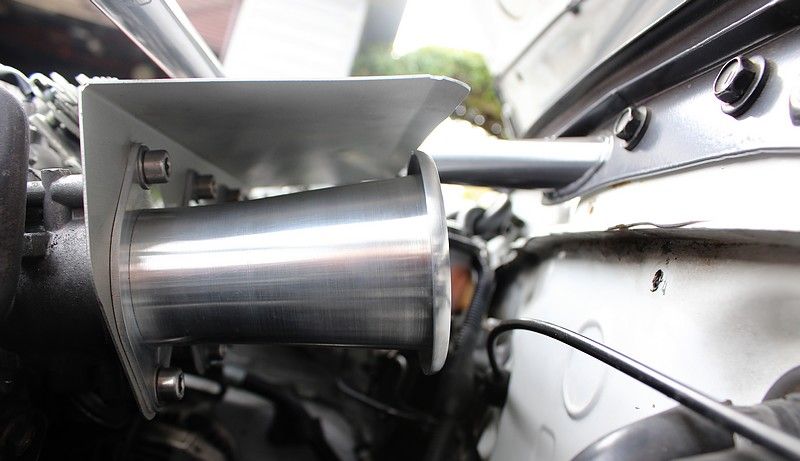
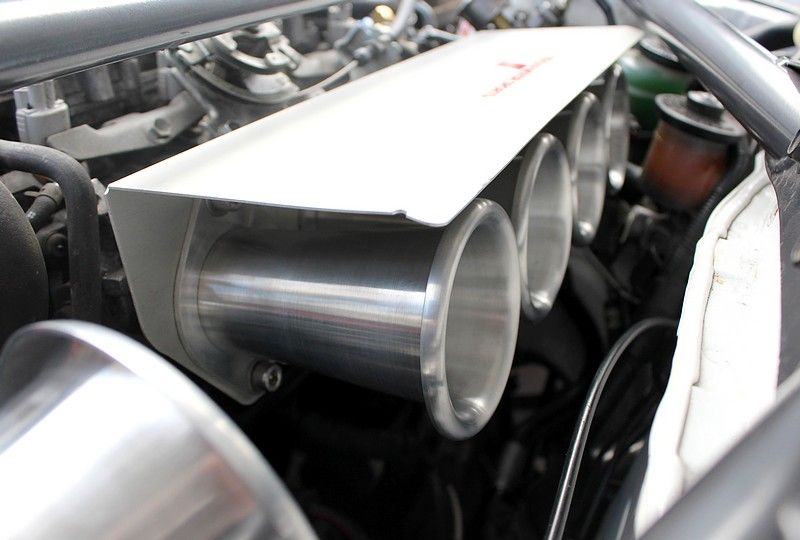
To cut a long story short (no pun intended), I decided to get a set of 60mm trumpets custom made which will fit perfectly in the standard plenum. You can actually fit as large as 70mm inside the plenum but it starts getting pretty cramped, so I decided that 60mm would be a nice compromise.

They arrived today and I was quick to install them. Upon my 20-minute test drive I noticed that the power down low had dropped off a bit, but up high it was all guns blazing. The full power band comes on from about 5,000rpm, all the way to 8,000rpm, which I discovered ends up being a good place to be as the engine is constantly in it's power band for the next gear when shifting at the 8,000rpm redline.

It's certainly going to take a bit of getting used to, but so far so good. I'm going to miss the sound my 110's made, and the torquey-ness of the standard trumpets, but when driving the engine at it's full potential the 60's seem to be a good choice :)

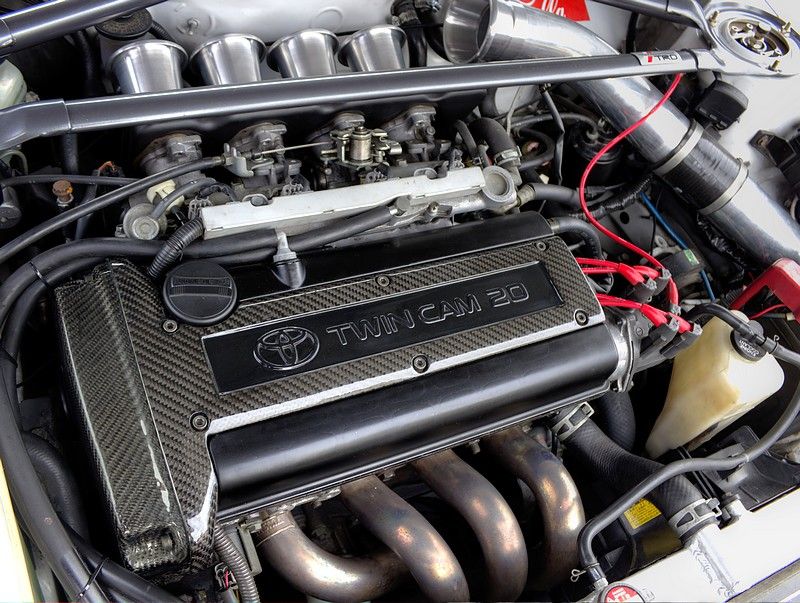
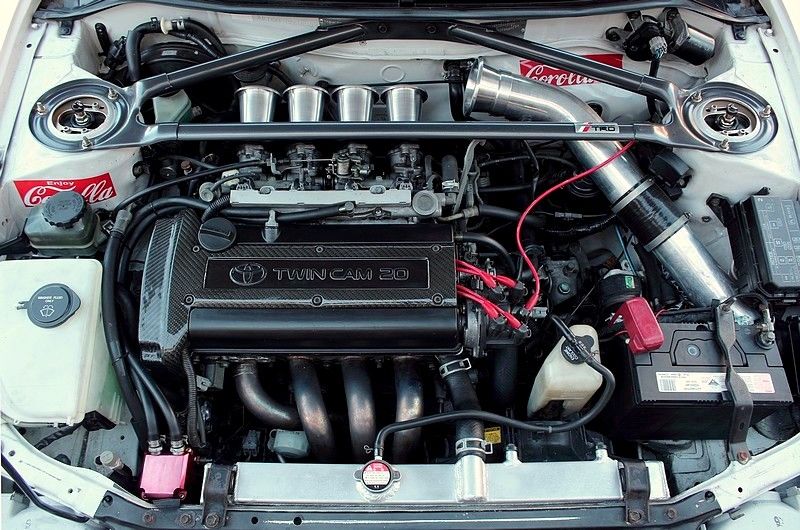
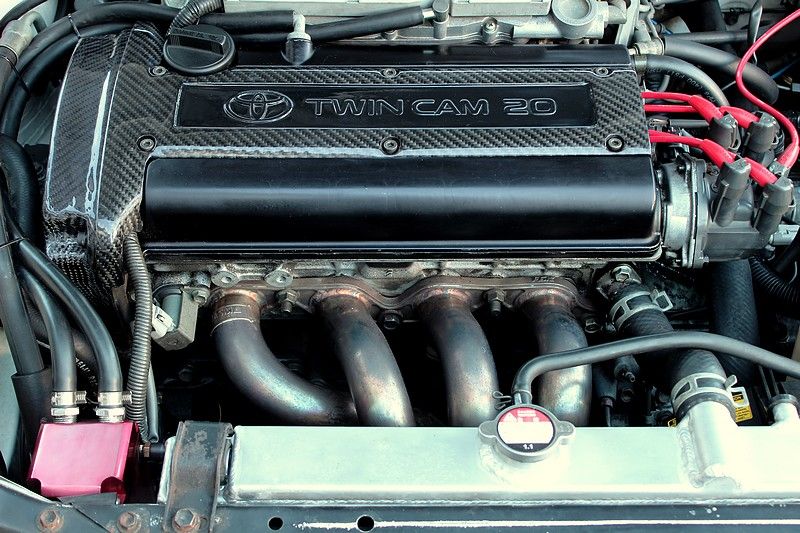
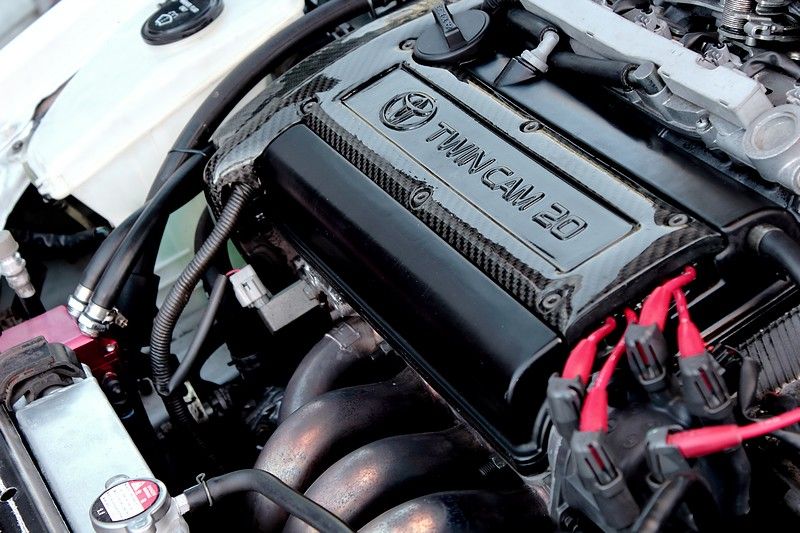
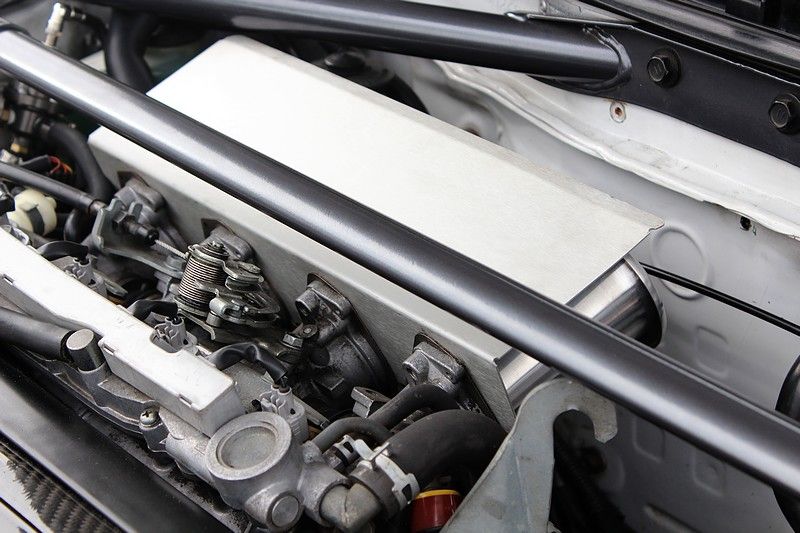
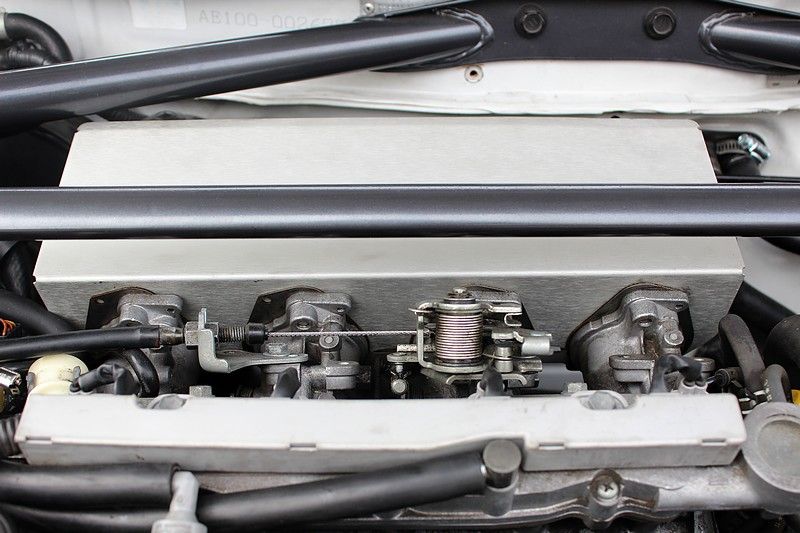
As always, here's some pics. The first 4 show the comparison between the old 110's and the new 60's, and the very last photo was taken by the metal spinner who made my trumpets, showing the clearance of a 50mm trumpet inside the stock plenum (essentially the same sort of clearance as my 60mm ones) -

IMG_5068-resized.jpg


IMG_5069-resized.jpg


IMG_5071-resized.jpg


IMG_5075-resized.jpg


IMG_5079-resized.jpg


IMG_5082-resized.jpg


50mmRamTube.jpg
 
Ok guys, change of plans yet again.......After using the 60mm trumpets all day today I began to miss my old 110mm trumpets. Although the 60's are great up top, it just felt like there was nobody home whatsoever under 5,000rpm, and since 90% of my driving is in the city this started to get on my nerves......

So off came the plenum, along with the trumpets, and an idea popped into my head. Some of you may recall that I bought a splash guard from the US for the trumpets a while back. I used it for about a week and then took it off, but today I was thinking of ways to prevent heat from entering the trumpets if I reinstalled my 110's, when it suddenly occurred to me that I could try and flip the guard upside down, effectively turning it from a splash guard into a heat shield. To my surprise, everything lined up perfectly and it cleared the strut brace with no issues.

Before going ahead with the install I removed the original 2-layer metal gasket from the stock plenum and put it between the ITB's and the shield. This not only allowed the holes to locate perfectly over the intake ports but should also help to act as a heat barrier between the ITB's and the actual trumpets.

After bolting everything in place and redoing my air supply feed (removing the pod filter from the guard and replacing it with a huge bellmouth) I finished the set-up by applying a TRD sticker I've had lying around for a while. It seems to break up the grayness a bit, without looking out of place.

The first drive was amazing - My mid-range power was back in full force and the induction noise was like music to my ears (I swear it has gotten even louder since fitting the shield). My original problem of having no filtration still remains, however the trumpets feel a lot cooler to touch after driving as the shield helps to deflect a lot of the heat away. It'll never be immune to engine bay heat without the use of a plenum, but with the help of this mod it should help to keep things in check :)

IMG_5116-resized1.jpg


IMG_5104-resized.jpg


IMG_5109-resized.jpg


IMG_5105-resized.jpg


IMG_5106-resized.jpg


IMG_5119-resized.jpg


IMG_5120-resized.jpg
 

A thread every 60 seconds


Search

Online now

Enjoying Zerotohundred?

Log-in for an ad-less experience
Top Bottom