
We have here with us a pair of severely oxidized headlights. It has been left outdoors for more than a year, exposing to rain, sun, and UV damages all year round. In result we have a fully hazed, blurry, rough surfaced headlights. The owner contacted us asking if we would be able to restore it. We took the headlights and started working on them for 2 days.
Here is severe condition of the headlight.
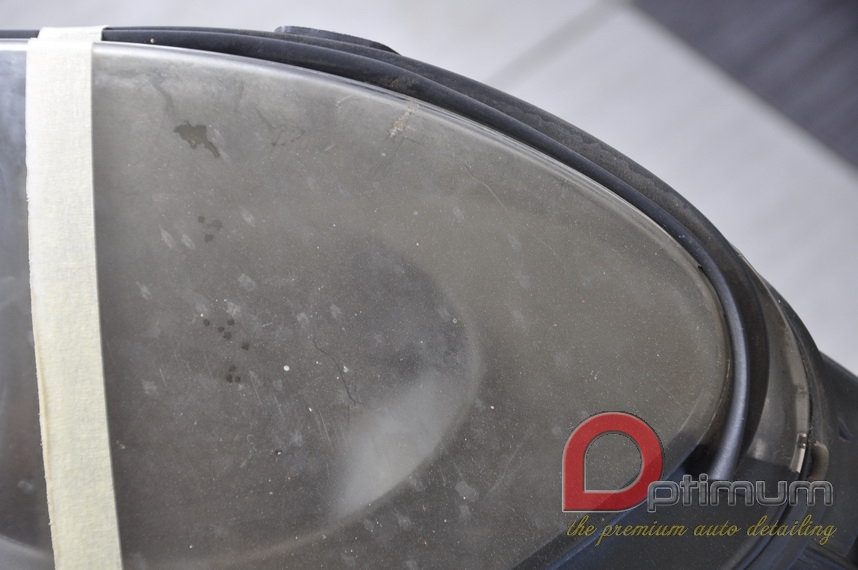
A closer look on the oxidation. Under certain angles it will show a fully yellowish headlight

Of course, we cleaned the headlight before we started the sanding process. For the sanding, we wanted to have a smooth finish and yet easy to remove the sanding marks. We started with 1800 grid and moved to 2000 grid then finally to 3000 grid. This process allows us to have a smoother finish but takes a very slow process.
Below is the headlight after completely removing all oxidation, so we tested by running the polisher over to see whats underneath.

To our surprise the headlight turned out very nice, As if it was new! All the pictures are not edited for lighting whatsoever.

Once there was a scuff here, but we were able to sand it down to a almost invincible finish, being a 1994 pair of headlights, there is bound to be some irreversible damages.

Only a small scuff and a small chip on both headlights.

After completing the sanding, polishing we wipedown the both headlights with alcohol and coated the both headlights with Opti™Lens Professional to keep the headlights as good as new.

We also inspected the headlights under the sun as if we were inspecting a car's paint to make sure there were no swirls on the plastic remain before we coated them.

On the third day, we did some water test on the lens and it turned out all nice and hydrophobic after the coating had fully cured.


Thanks for reading this short post.
Here is severe condition of the headlight.
A closer look on the oxidation. Under certain angles it will show a fully yellowish headlight
Of course, we cleaned the headlight before we started the sanding process. For the sanding, we wanted to have a smooth finish and yet easy to remove the sanding marks. We started with 1800 grid and moved to 2000 grid then finally to 3000 grid. This process allows us to have a smoother finish but takes a very slow process.
Below is the headlight after completely removing all oxidation, so we tested by running the polisher over to see whats underneath.
To our surprise the headlight turned out very nice, As if it was new! All the pictures are not edited for lighting whatsoever.
Once there was a scuff here, but we were able to sand it down to a almost invincible finish, being a 1994 pair of headlights, there is bound to be some irreversible damages.
Only a small scuff and a small chip on both headlights.
After completing the sanding, polishing we wipedown the both headlights with alcohol and coated the both headlights with Opti™Lens Professional to keep the headlights as good as new.
We also inspected the headlights under the sun as if we were inspecting a car's paint to make sure there were no swirls on the plastic remain before we coated them.
On the third day, we did some water test on the lens and it turned out all nice and hydrophobic after the coating had fully cured.
Thanks for reading this short post.


