
- Joined
- Nov 18, 2003
- Messages
- 880
- Points
- 3,063
Hi All,
Today I bring to you not a detailing journey of mine but a recent DIY that I did for my wife's Myvi. Car has been driven around for 7 years and it is giving out this "kluk kluk" sound on any uneven roads. That sound annoys me and after much research (not really, just a few read up), and it seems to point to the absorber mounts being worn out. So...... since I am taking out the mounts, might as well change the absorbers as well. More to be told at the end of this journey.
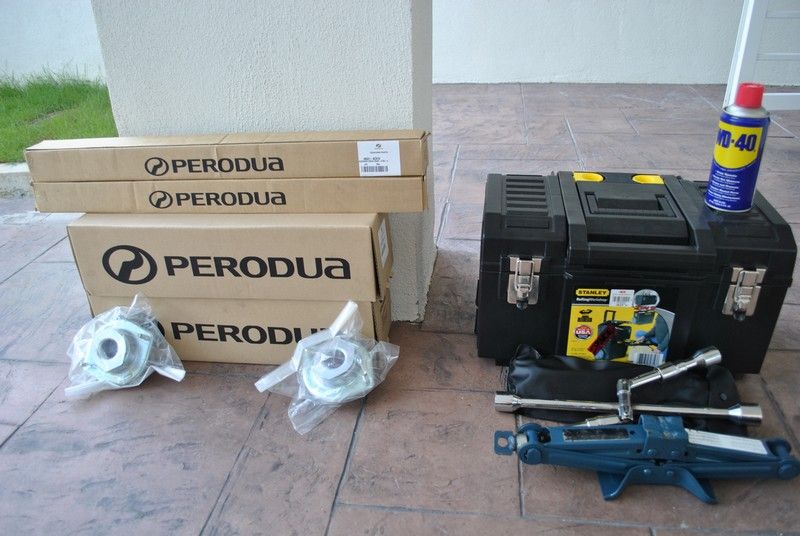
So...... this is the parts you will need. 1 pair rear absorbers, 1 pair front absorbers, 1 pair front absorber mounts and 1 pair rubber spring seat. A tool box with magical tools and wands, scissor jack and the ever so trusty WD40,
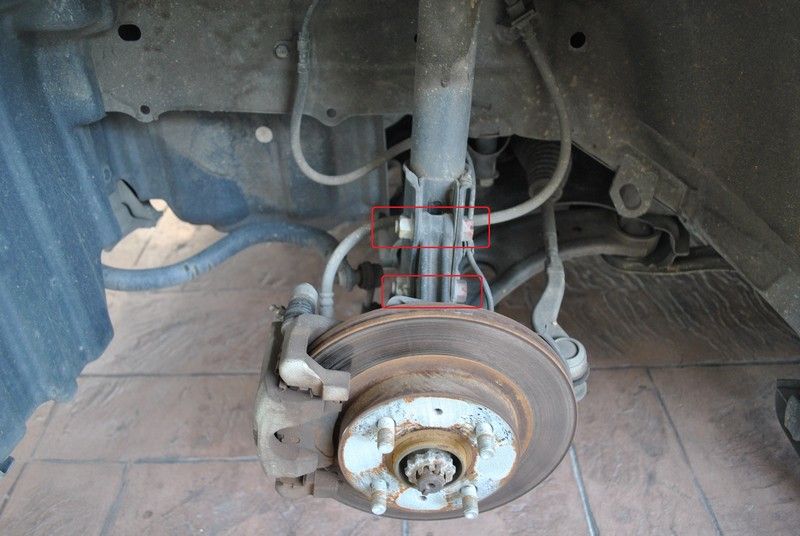
First thing to do is to.... remove the wheels. Red box is for nuts that you will need to remove.
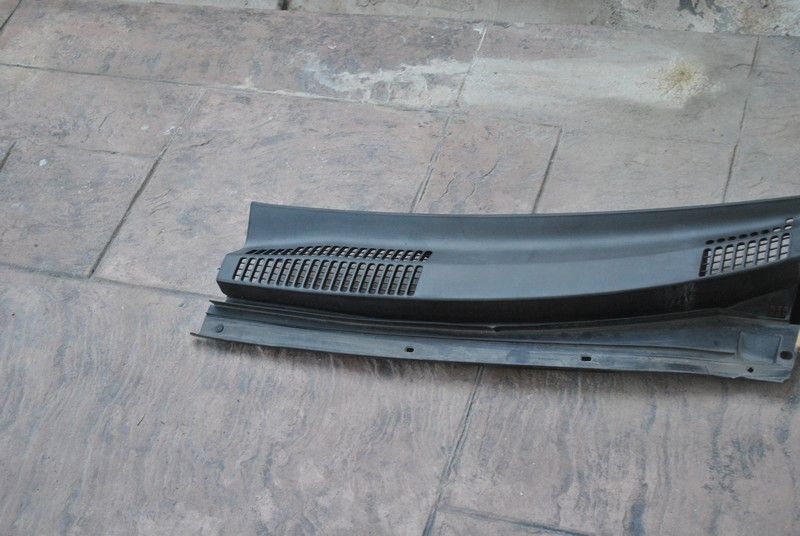
Then you will need to remove the wipers and wiper cover in order to access to the two of the nuts on the top mount.

This is the plastic wiper cover. Its held by a few clips. Just pull and it will come out.
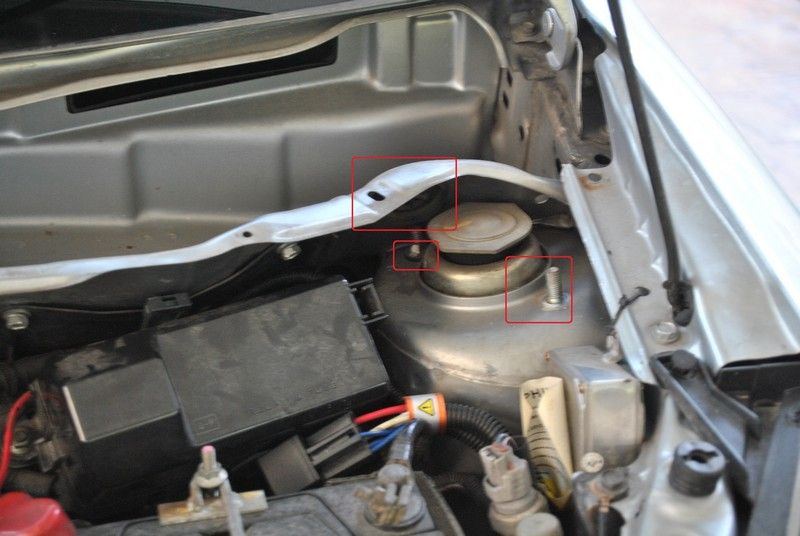
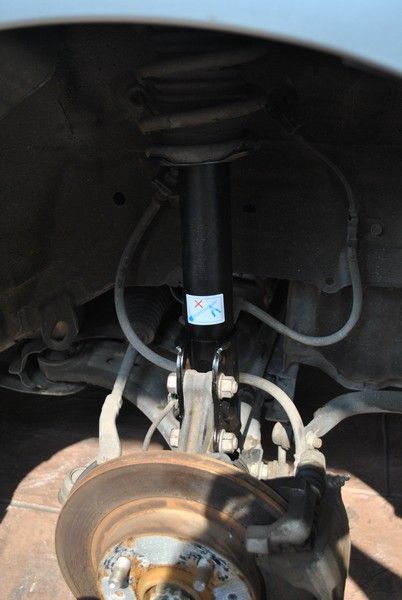
Top mount, circled in red is the two nuts you need to remove. Another red circle is a rubber cover that you need to remove to access the back nut. Just push and it will pop out.
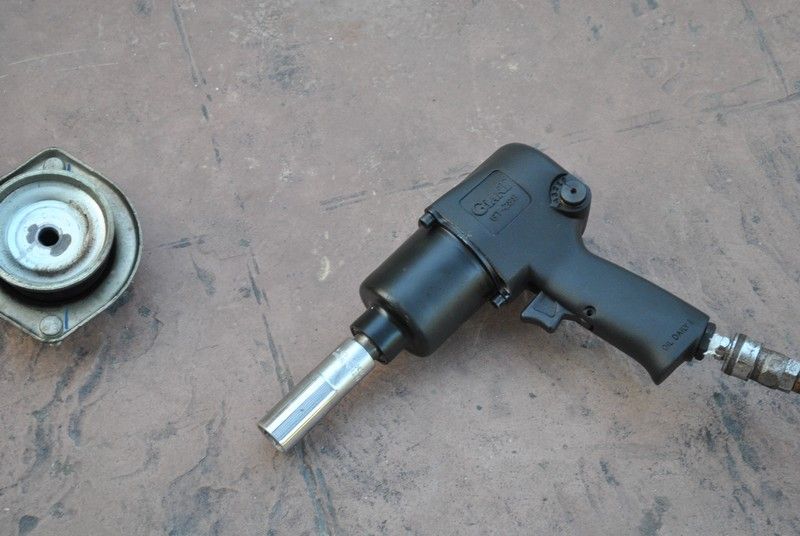
Once you got the absorber out (after removing all 4 nuts from bottom and top, you will need to angle around to find a position to remove the absorber from the bottom.). You will need a pneumatic wrench to dismantle the absorbers. Not to say its not possible with a box spanner but it sure makes things faster with a pneumatic wrench
AND........... THIS IS HOW NOT TO OPEN AN ABSORBER..... I opened it without the springs clammed hence it just shot out and luckily hit a wall.
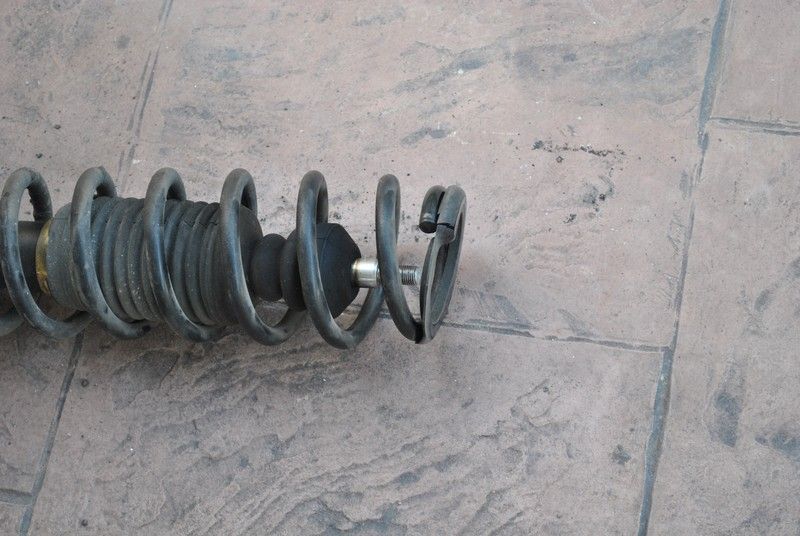
This is the inches of tension from the spring. Had a bit of a hard time compressing it after that...
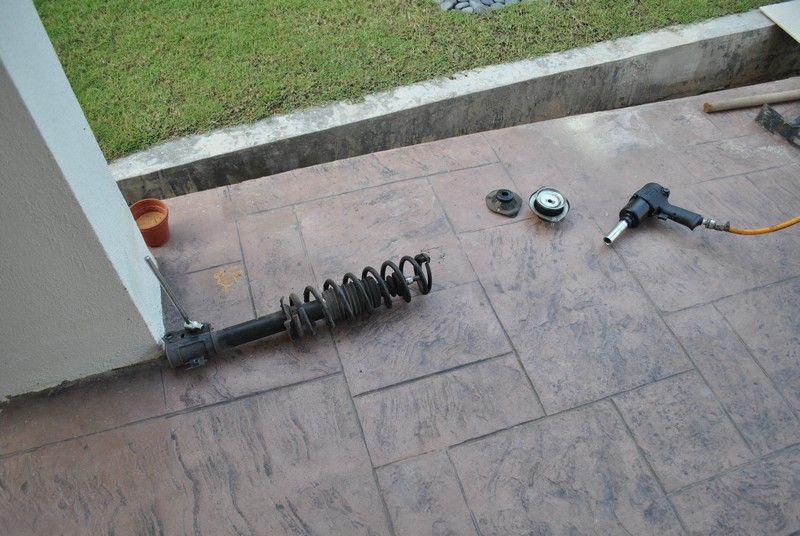
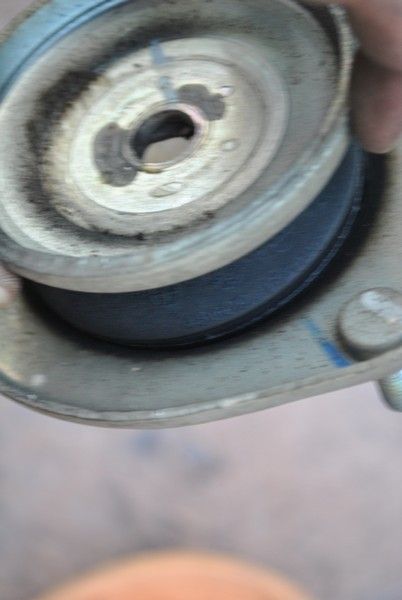
So... this is the absorber mount that needed replacing. It was basically loose and wobbling around. New one don't even move when you try to twist it.
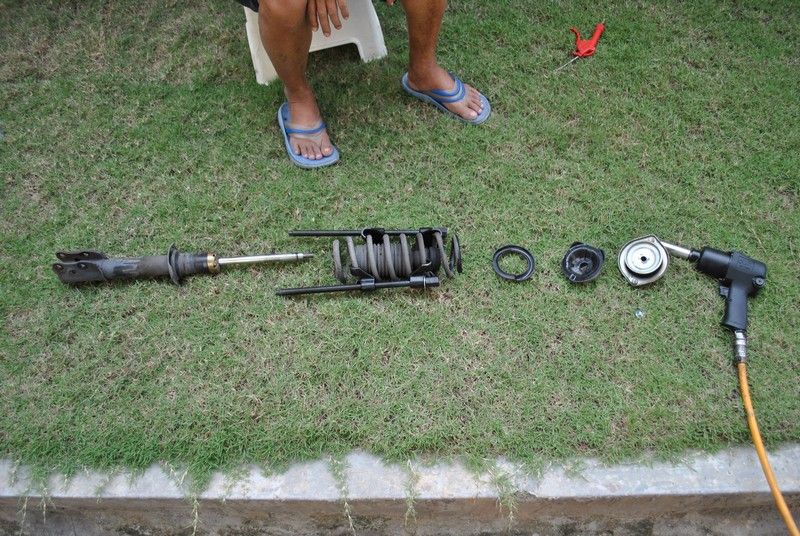
THIS is HOW we should dismantle the absorber. Coil spring compressor attached to the springs first before removing the top nut holding everything together. I am also arranging it in the order that it was dismantled in case anyone wants to do the same and sorta forgot the order of the assembly.
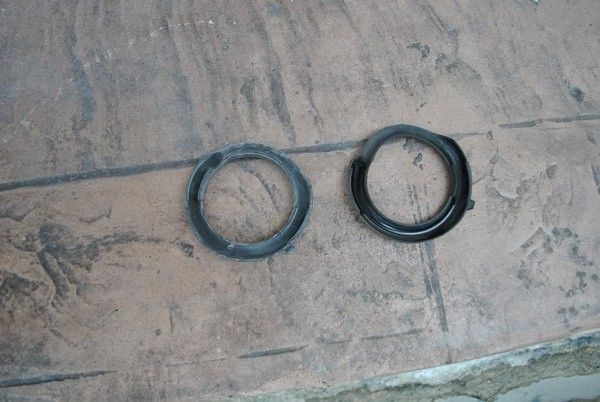
This is the rubber spring seats. Wasn't really that badly broken but heck.... for RM8 each, I will just change it together. Saves me the effort of doing all over again when it breaks next time,.
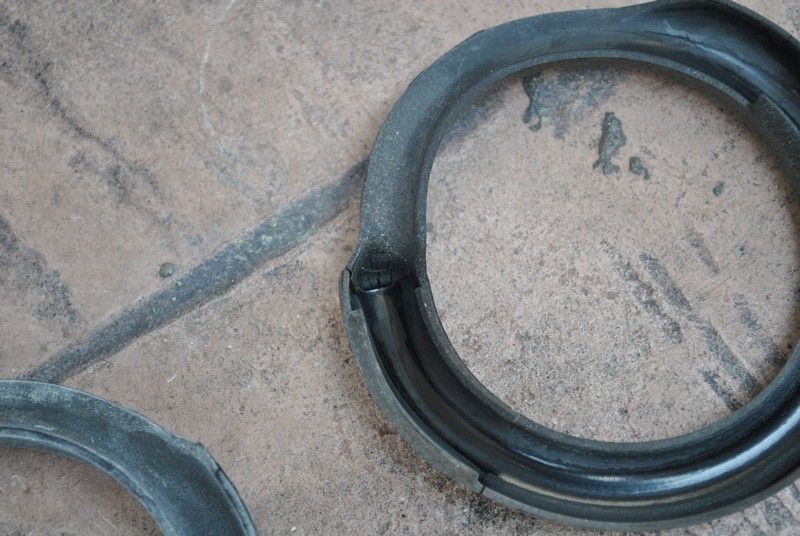
A closer look at the already starting to worn out rubber spring seats.
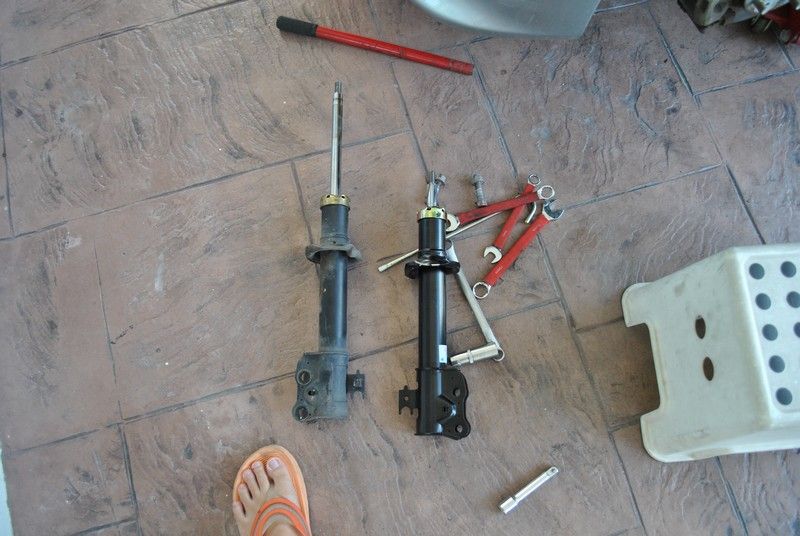
New VS Old absorbers. New one is still compressed by a pin.
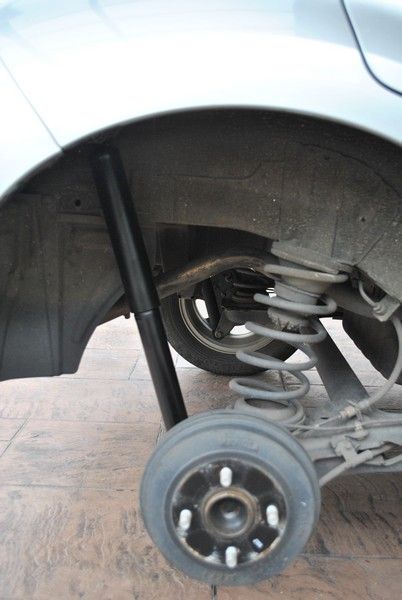
After assembling back everything the way it was removed, install it back to the car and WAALAAA, kau tim.
Now.... we move on to the rear absorbers....
OKAY... finish...... fast rite....
Why so fast you may wonder....... cause, you only need to remove this bolt...
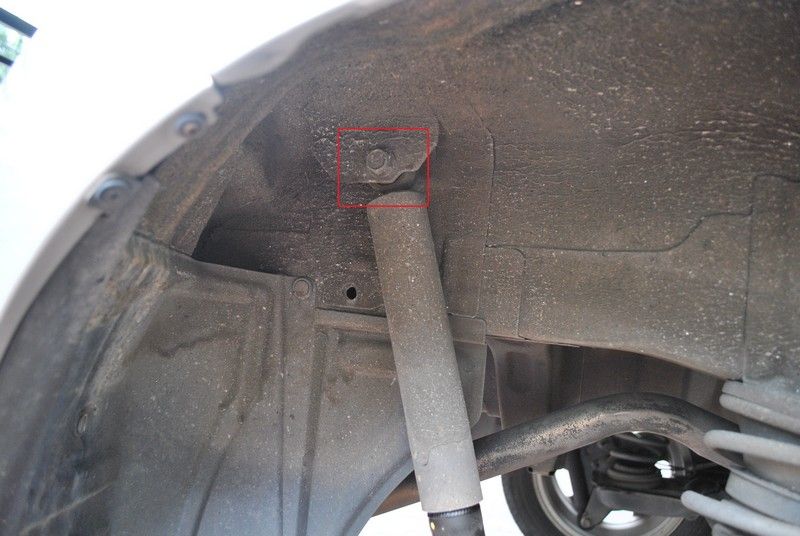
And this bolt...
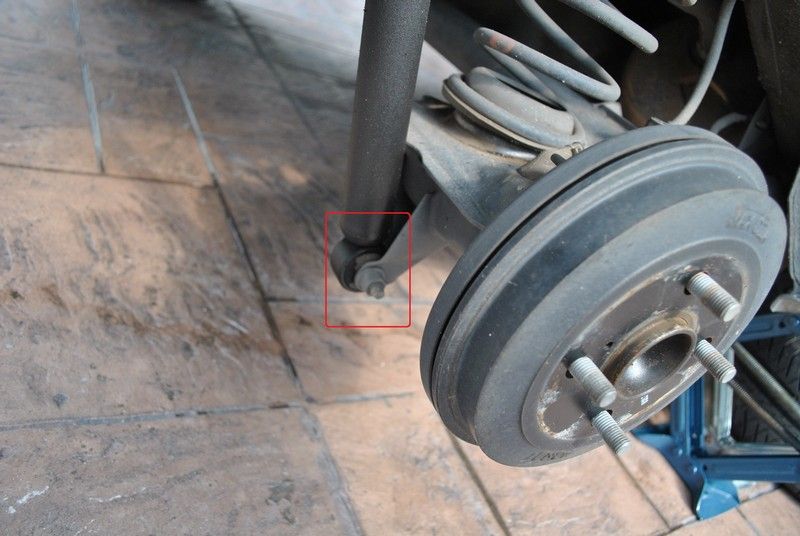
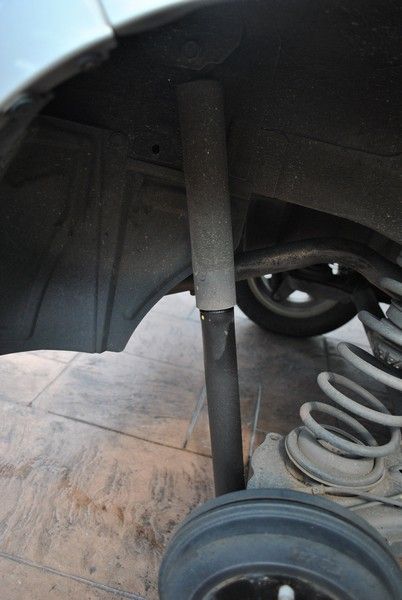
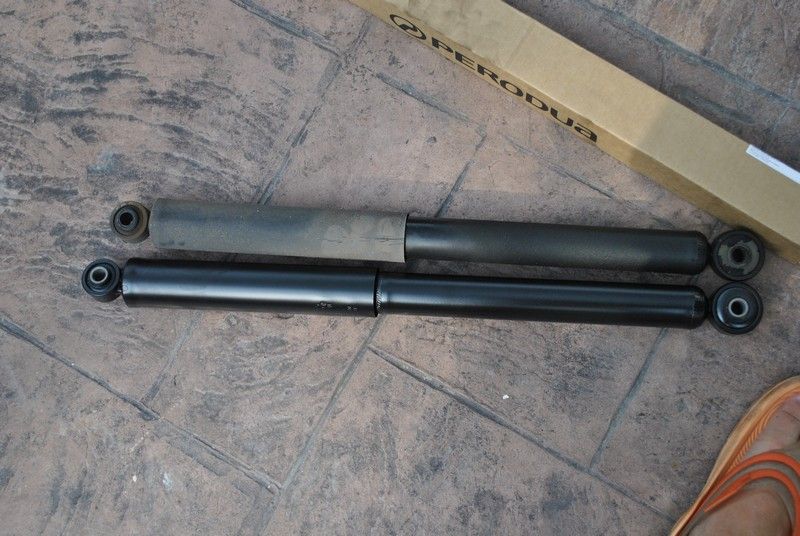
Yeap, rear absorber for Myvi is only held by two bolts. Remove, replace and reinstall. Btw, comparison of Old VS New. You will notice that the old absorber is shorter than the new one. This is because it has collapse as I will call it and does not provide any shock absorbing anymore.
Time spend: About 2 hours in total.
Things used: 100Plus isotonik drink, muscle, box spanners of various sizes, pneumatic wrench, 2.5hp air compressor to operate the pneumatic wrench, coil spring compressor, 2 scissor jack, 1 hydraulic jack.
Satisfaction level: Pretty good when the wifey says.... WEEE no more kluk kluk sound.
Note:
- Some of the tools I used here may not be available at home garage... like the pneumatic wrench, air compressor and coil spring compressor. But you can always purchase it. Hehe.
- I was lucky the Myvi's coil spring is not strong enough to break a hand, just enough to sprang everything all over the place.
- The absorbers were the original replacement... which is Kayaba. Since wifey don't really drive like a mad person, original was best for her. Comfort over performance hence I did not went the aftermarket performance absorbers.
- This was a fun DIY. Easy and straighforward. No need to think much
- I did not use my 3 tonne hydraulic jack for this DIY cause my new house's car porch is slanted a bit too much hence I opt for the scissor jack with a smaller base.
- I would however suggest anyone attempting this DIY to buy A stand and use that instead. There has been reports of hydraulic jacks and scissor jack collapsing while in use.
- Some of you all may ask... won't this DIY affect the alignment and camber..... well, it did not.
So guys and gals (if any), please leave your comments/feedback be it good, bad, gibberish and what not.
Today I bring to you not a detailing journey of mine but a recent DIY that I did for my wife's Myvi. Car has been driven around for 7 years and it is giving out this "kluk kluk" sound on any uneven roads. That sound annoys me and after much research (not really, just a few read up), and it seems to point to the absorber mounts being worn out. So...... since I am taking out the mounts, might as well change the absorbers as well. More to be told at the end of this journey.
So...... this is the parts you will need. 1 pair rear absorbers, 1 pair front absorbers, 1 pair front absorber mounts and 1 pair rubber spring seat. A tool box with magical tools and wands, scissor jack and the ever so trusty WD40,
First thing to do is to.... remove the wheels. Red box is for nuts that you will need to remove.
Then you will need to remove the wipers and wiper cover in order to access to the two of the nuts on the top mount.
This is the plastic wiper cover. Its held by a few clips. Just pull and it will come out.
Top mount, circled in red is the two nuts you need to remove. Another red circle is a rubber cover that you need to remove to access the back nut. Just push and it will pop out.
Once you got the absorber out (after removing all 4 nuts from bottom and top, you will need to angle around to find a position to remove the absorber from the bottom.). You will need a pneumatic wrench to dismantle the absorbers. Not to say its not possible with a box spanner but it sure makes things faster with a pneumatic wrench
AND........... THIS IS HOW NOT TO OPEN AN ABSORBER..... I opened it without the springs clammed hence it just shot out and luckily hit a wall.
This is the inches of tension from the spring. Had a bit of a hard time compressing it after that...
So... this is the absorber mount that needed replacing. It was basically loose and wobbling around. New one don't even move when you try to twist it.
THIS is HOW we should dismantle the absorber. Coil spring compressor attached to the springs first before removing the top nut holding everything together. I am also arranging it in the order that it was dismantled in case anyone wants to do the same and sorta forgot the order of the assembly.
This is the rubber spring seats. Wasn't really that badly broken but heck.... for RM8 each, I will just change it together. Saves me the effort of doing all over again when it breaks next time,.
A closer look at the already starting to worn out rubber spring seats.
New VS Old absorbers. New one is still compressed by a pin.
After assembling back everything the way it was removed, install it back to the car and WAALAAA, kau tim.
Now.... we move on to the rear absorbers....
OKAY... finish...... fast rite....
Why so fast you may wonder....... cause, you only need to remove this bolt...
And this bolt...
Yeap, rear absorber for Myvi is only held by two bolts. Remove, replace and reinstall. Btw, comparison of Old VS New. You will notice that the old absorber is shorter than the new one. This is because it has collapse as I will call it and does not provide any shock absorbing anymore.
Time spend: About 2 hours in total.
Things used: 100Plus isotonik drink, muscle, box spanners of various sizes, pneumatic wrench, 2.5hp air compressor to operate the pneumatic wrench, coil spring compressor, 2 scissor jack, 1 hydraulic jack.
Satisfaction level: Pretty good when the wifey says.... WEEE no more kluk kluk sound.
Note:
- Some of the tools I used here may not be available at home garage... like the pneumatic wrench, air compressor and coil spring compressor. But you can always purchase it. Hehe.
- I was lucky the Myvi's coil spring is not strong enough to break a hand, just enough to sprang everything all over the place.
- The absorbers were the original replacement... which is Kayaba. Since wifey don't really drive like a mad person, original was best for her. Comfort over performance hence I did not went the aftermarket performance absorbers.
- This was a fun DIY. Easy and straighforward. No need to think much
- I did not use my 3 tonne hydraulic jack for this DIY cause my new house's car porch is slanted a bit too much hence I opt for the scissor jack with a smaller base.
- I would however suggest anyone attempting this DIY to buy A stand and use that instead. There has been reports of hydraulic jacks and scissor jack collapsing while in use.
- Some of you all may ask... won't this DIY affect the alignment and camber..... well, it did not.
So guys and gals (if any), please leave your comments/feedback be it good, bad, gibberish and what not.
 and i didnt remove the absorber from knuckle...because just replacing the topmount..and didnt want to mess with alignment too much....


 DarkAccoon if this makes u feels like me hijacking your thread....just that since it was the similar car....so i share it here..hope u were ok with that

