Safe and effective watermark removal on glass!
Happy New Year BTW everyone!
Waterspot/mark is a very common problem. Most cars are constantly being subjected to the daily harshness of acid rain, contaminants in the air, hard water, etc and left off drying in the blazing sun. The severity of water spot/mark usually depends on how well the surface of the paint/glass is being protected. A severe waterspot/mark usually stems from residue/chemicals in the water droplets/streaks reacting with the surface (paint/glass/plastic/rubber) and leaving a very unsightly mark.
This article that I am posting here has nothing to do with paint correction but treating the effects on glass instead. My daily driver, my K-car, has been under constant abuse day in and out and left in the open 24/7. With little or no protection except a weekly car wash for the past 9-years, one can expect all sort of problems. This is also my guinea pig on my journey venturing into the wonderful world of detailing. Watermarks is present on all windows. Some windows more severe, some less. The thing that bugs me the most is when driving in the morning or heavy rain. The waterspots/marks causes poor visibility. Even the effectiveness of the wipe blade is reduced. The window on the driver and passenger side is blurred and thus causing problems when trying to view the side mirrors.
Ok, less talk and more action. I am going to depict the watermark problem, corrective action and subsequent protection to the glass surface in the following pictures with description for one of my car windows. The sequence of correction to remove the watermark starts from the least aggressive method first as the severity of the watermark is unknown.
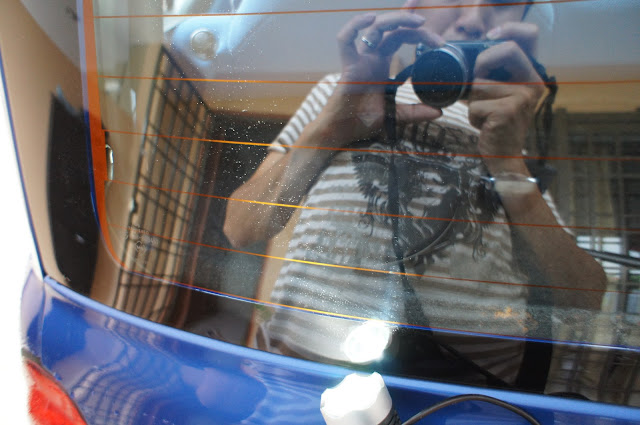
First of all, let's take a look at the test subject. A window that has been left unwashed for a day.
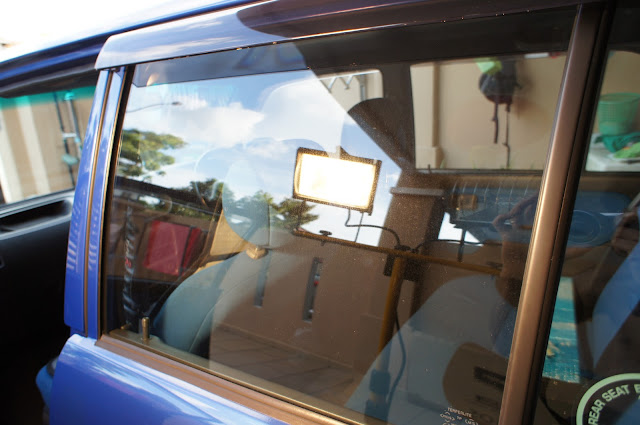
Figure 1: Test subject, unwashed window
Not too bad or dirty. However, there are still minute particles and dirt which I will clean up quickly with my regular combo:
1. Optimum no-rinse wash aka ONR
2. Cheap wooly MF for ONRing the glass
3. Osren white chamois for drying off the glass
4. Osren premium microfiber towel to buff dry and residual water and pick up any lint left behind
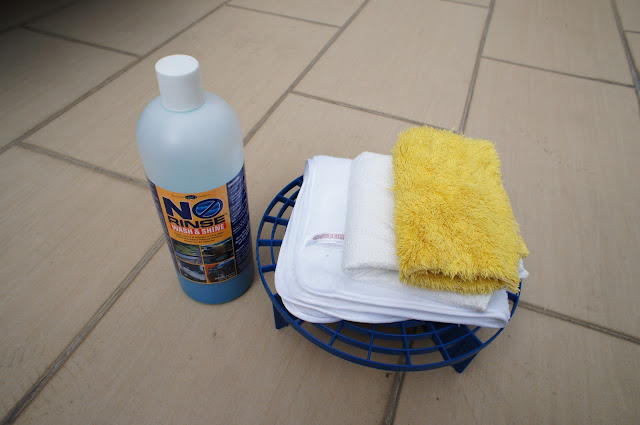
Figure 2: ONR kit
Here is a pic after cleaning the glass with ONR. You can clearly see watermarks/spots all over the glass. ONR stands no chance in removing the watermarks.
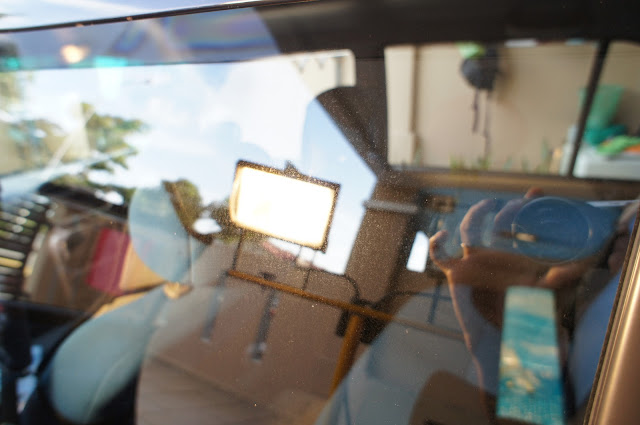
Figure 3: After ONR wash, watermarks still visible
Next, I use the following:
1. Optimum no-rinse clay lube ratio
2. Soft-99 detailing clay
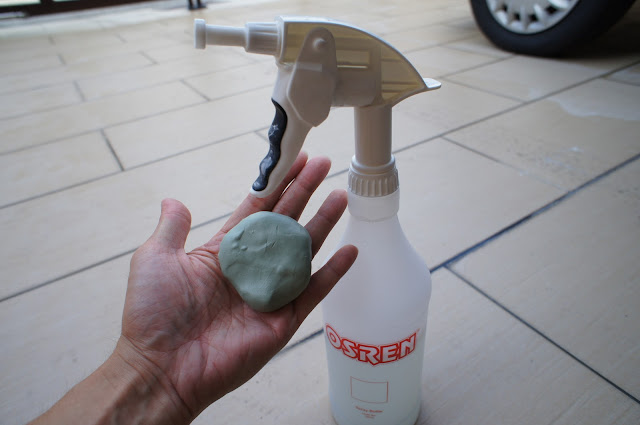
Figure 4: Clay and clay lube to see if it does any good to the watermarks
After claying, the glass did feel smoother with the clay picking up some embedded surface contaminants. However watermarks are still visible.
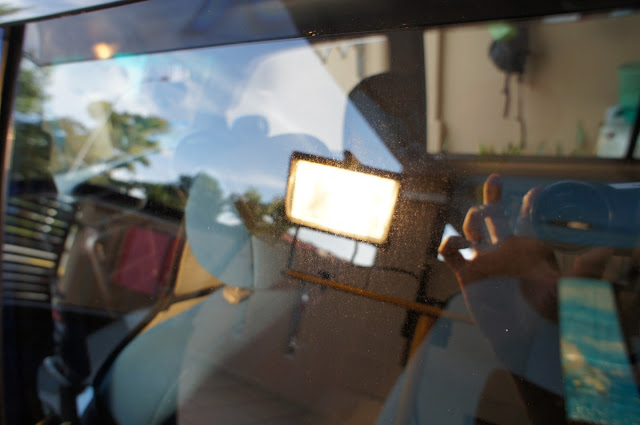
Figure 5: After ONR wash, watermarks still visible
Next up in my arsenal, OPC 1:3 diluted ratio
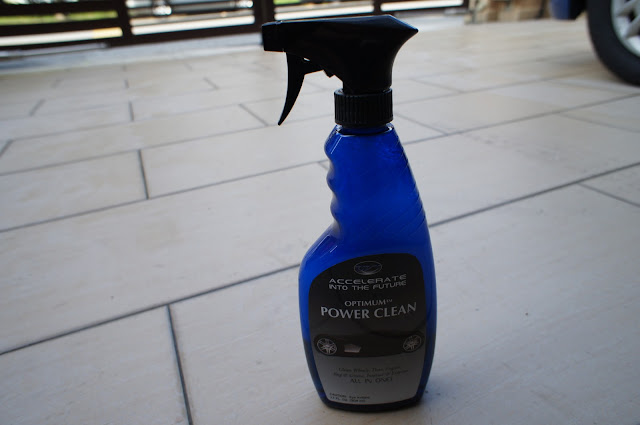
Figure 6: OPC 1:3 diluted
After using OPC 1:3, there are some visible contaminants picked up by observing the MF cloth. It is not a solution to the water streaks. But lets inspect for watermark/spot on a dry surface.
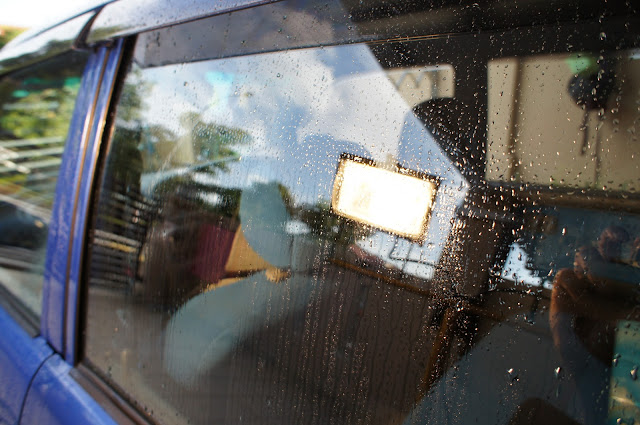
Figure 7: After washing off OPC 1:3, water streaks clearly visible. This bothers me the most.
After drying... watermarks/spots still there. Already done several OPC 1:3 cleaning and wipe downs but to no avail. Guess the water marks is already etched in.

Figure 8: Water marks still visible after OPC 1:3 cleaning
Now, from reading forums and asking people around, there is usually two solutions which people would recommend:
1. Acid based cleaner - Good in removing watermark/spot but never use it on a scratched glass or wiper area - the acid may seep in through the crevices and cause more problems. Might cause hazing to the glass. Might eat or damage paintwork/plastic/rubber, etc if not handled with care. Dangerous to skin. Need to keep running water at bay to wash off ASAP after use. Handle with great care!!!!!
2. Glass polishing - Polishing is by means of using abrasives to remove a thin layer off the surface in order to remove imperfection. Problem here glass is a very hard material. The front car windscreen is usually laminated glass and made up of softer glass. All the rest is usually tempered glass which is way harder. Based on my experience, the regular paint compounds with the harshest rotary pads seems like using very fine polish on glass - not much correction. You would need rocks or diamonds to really give glass any cut. There are special glass polish/compounds which contains Cerium Oxide but is a little hard for me to obtain at the moment. There are also other tools and abrasives out there that designed for polishing glass.
Knowing the options available to me from above, I chose #2. The acid based cleaners are simply too dangerous to my linking and the outcome is a bit unpredictable. So I went to Osren to find out more on what they have in store to help me solve my watermark problems. The safest prescribed remedy:
1. Osren abrasive powder based watermark remover
2. 3M microfine sanding pads
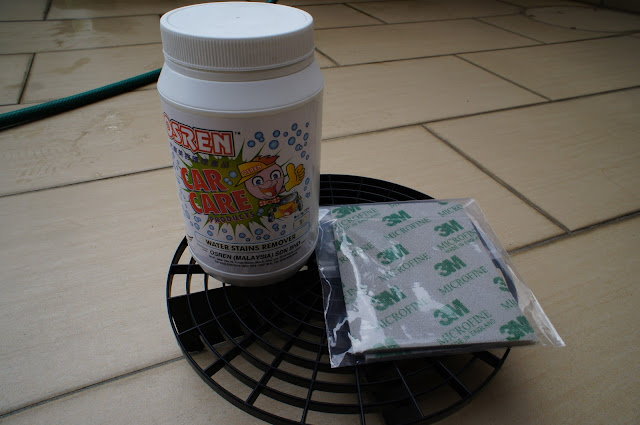
Figure 9: Osren abrasive powder based watermark remover and 3M microfine sanding pads to the rescue
Osren abrasive watermark remover is pretty simple and safe to use. All you needed to do is mist the glass surface work area, spread some abrasive powder on a damp sanding pad and work on the area. Not too wet and not too dry. If the pad do get dry after working on the surface for a period of time, spray some water not on the glass but on the back of the pad to get going. This prevents the sanding slurry from running all over the place. One tip is to cling wrap the metal panels underneath the glass to prevent marring the paintwork and the messy clean up process. Work on horizontal lines, then vertical lines to ensure even and edge-to-edge coverage. Wash down properly once you think you are done!
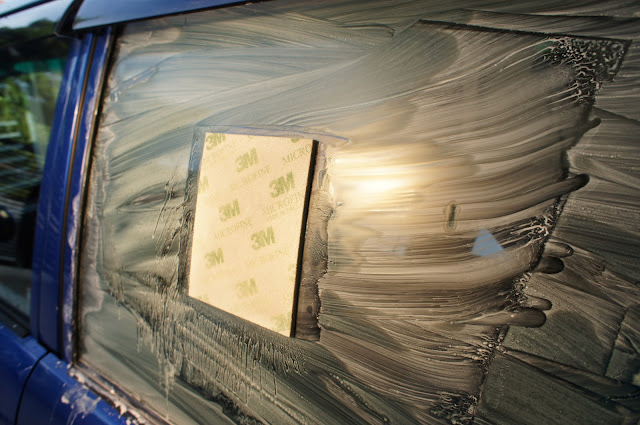
Figure 10: Sanding slurry
After using the abrasives, be sure to do a proper clean down on the glass and all other panels underneath the window. You really don't want the harsh abrasives to mar the paint work!
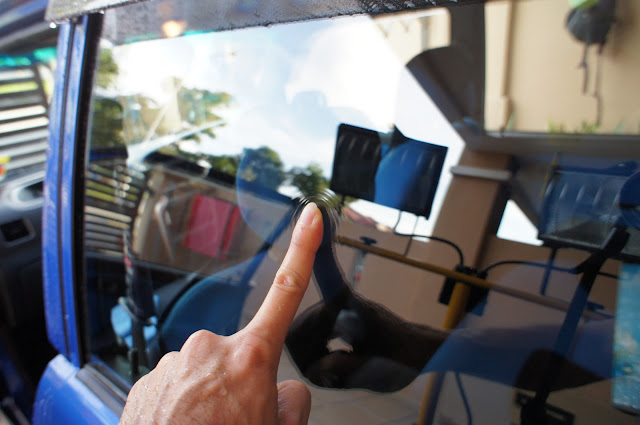
Figure 11: Check out the zero water beading on the glass surface after sanding down with the abrasives! Notice the water tension surrounding my finger!
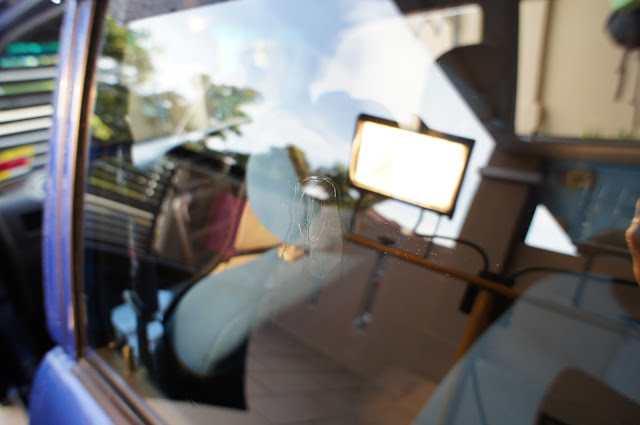
Figure 12: After removing my finger...
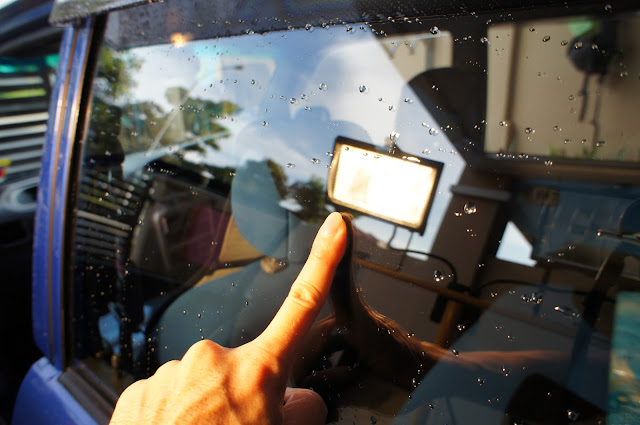
Figure 13: After a quick wipedown with ONR, Tadaaaaa! Water beads return!
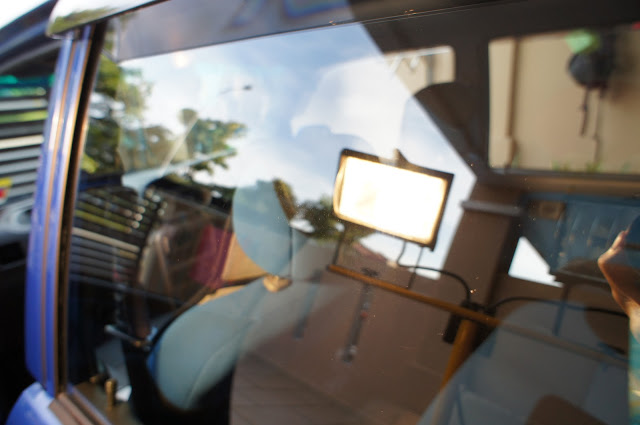
Figure 14: Water spots/marks gone!
After the sanding process, there is almost no watermark/spots to be found! Glass appears clearer and very very smooth - better than after claying. What is left behind is the scratches and pits on the glass. I've done on a test spot, no matter what pressure or amount of abrasives used, it is almost impossible to level out scratches and pits on the glass. For that, you would need some real glass cutting compound.
I did notice that the scratches/pits is visible with a strong white LED back light. If possible shine along the edge of the glass.
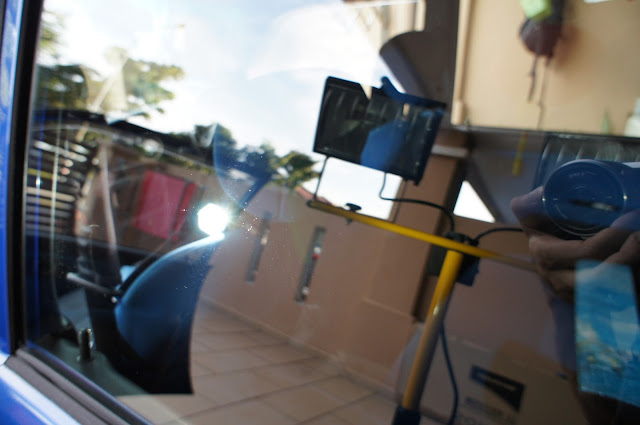
Figure 15: Notice the pits on the glass highlighted by the LED backlight?
And lastly, the final protection with Opti-seal and the short nap side of Osren's premium MF towel.
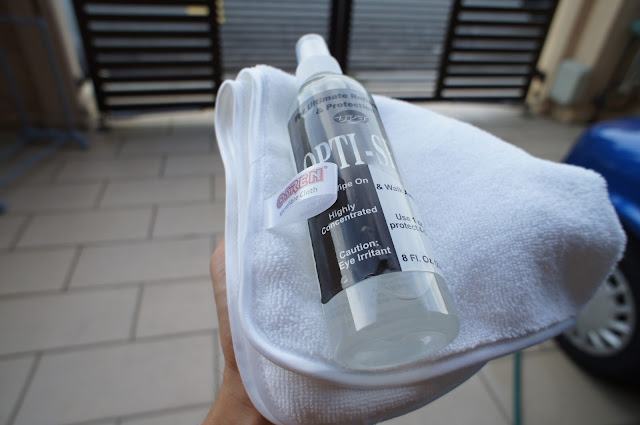
Figure 16: Opti-seal for protection
Thanks for viewing.
Disclaimer:
- I've tested only on tempered glass on my car. Don't know if the abrasives would cause scratches on laminated glass.
- This is a DIY project. Always do a test spot first.
- Don't blame me if something bad happens! Share what you know.
- No I'm not selling any of the products or providing any services! Don't ask me for price!
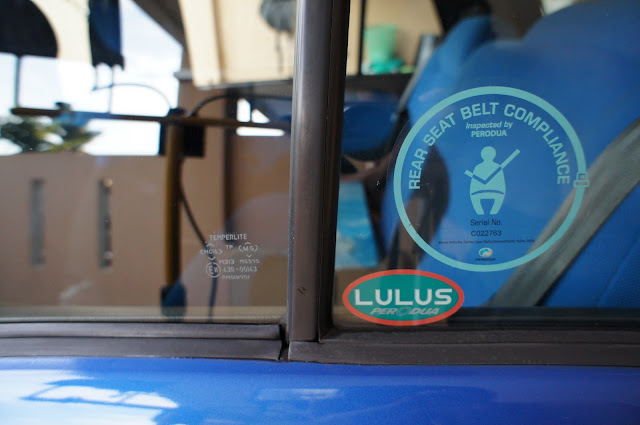
Figure 17: Tested on temperlite glass. Oh, yeah it is Jan 01, 2012. Buckle up on the rear!!!
All feedback appreciated!
Happy New Year BTW everyone!
Waterspot/mark is a very common problem. Most cars are constantly being subjected to the daily harshness of acid rain, contaminants in the air, hard water, etc and left off drying in the blazing sun. The severity of water spot/mark usually depends on how well the surface of the paint/glass is being protected. A severe waterspot/mark usually stems from residue/chemicals in the water droplets/streaks reacting with the surface (paint/glass/plastic/rubber) and leaving a very unsightly mark.
This article that I am posting here has nothing to do with paint correction but treating the effects on glass instead. My daily driver, my K-car, has been under constant abuse day in and out and left in the open 24/7. With little or no protection except a weekly car wash for the past 9-years, one can expect all sort of problems. This is also my guinea pig on my journey venturing into the wonderful world of detailing. Watermarks is present on all windows. Some windows more severe, some less. The thing that bugs me the most is when driving in the morning or heavy rain. The waterspots/marks causes poor visibility. Even the effectiveness of the wipe blade is reduced. The window on the driver and passenger side is blurred and thus causing problems when trying to view the side mirrors.
Ok, less talk and more action. I am going to depict the watermark problem, corrective action and subsequent protection to the glass surface in the following pictures with description for one of my car windows. The sequence of correction to remove the watermark starts from the least aggressive method first as the severity of the watermark is unknown.
First of all, let's take a look at the test subject. A window that has been left unwashed for a day.
Figure 1: Test subject, unwashed window
Not too bad or dirty. However, there are still minute particles and dirt which I will clean up quickly with my regular combo:
1. Optimum no-rinse wash aka ONR
2. Cheap wooly MF for ONRing the glass
3. Osren white chamois for drying off the glass
4. Osren premium microfiber towel to buff dry and residual water and pick up any lint left behind
Figure 2: ONR kit
Here is a pic after cleaning the glass with ONR. You can clearly see watermarks/spots all over the glass. ONR stands no chance in removing the watermarks.
Figure 3: After ONR wash, watermarks still visible
Next, I use the following:
1. Optimum no-rinse clay lube ratio
2. Soft-99 detailing clay
Figure 4: Clay and clay lube to see if it does any good to the watermarks
After claying, the glass did feel smoother with the clay picking up some embedded surface contaminants. However watermarks are still visible.
Figure 5: After ONR wash, watermarks still visible
Next up in my arsenal, OPC 1:3 diluted ratio
Figure 6: OPC 1:3 diluted
After using OPC 1:3, there are some visible contaminants picked up by observing the MF cloth. It is not a solution to the water streaks. But lets inspect for watermark/spot on a dry surface.
Figure 7: After washing off OPC 1:3, water streaks clearly visible. This bothers me the most.
After drying... watermarks/spots still there. Already done several OPC 1:3 cleaning and wipe downs but to no avail. Guess the water marks is already etched in.
Figure 8: Water marks still visible after OPC 1:3 cleaning
Now, from reading forums and asking people around, there is usually two solutions which people would recommend:
1. Acid based cleaner - Good in removing watermark/spot but never use it on a scratched glass or wiper area - the acid may seep in through the crevices and cause more problems. Might cause hazing to the glass. Might eat or damage paintwork/plastic/rubber, etc if not handled with care. Dangerous to skin. Need to keep running water at bay to wash off ASAP after use. Handle with great care!!!!!
2. Glass polishing - Polishing is by means of using abrasives to remove a thin layer off the surface in order to remove imperfection. Problem here glass is a very hard material. The front car windscreen is usually laminated glass and made up of softer glass. All the rest is usually tempered glass which is way harder. Based on my experience, the regular paint compounds with the harshest rotary pads seems like using very fine polish on glass - not much correction. You would need rocks or diamonds to really give glass any cut. There are special glass polish/compounds which contains Cerium Oxide but is a little hard for me to obtain at the moment. There are also other tools and abrasives out there that designed for polishing glass.
Knowing the options available to me from above, I chose #2. The acid based cleaners are simply too dangerous to my linking and the outcome is a bit unpredictable. So I went to Osren to find out more on what they have in store to help me solve my watermark problems. The safest prescribed remedy:
1. Osren abrasive powder based watermark remover
2. 3M microfine sanding pads
Figure 9: Osren abrasive powder based watermark remover and 3M microfine sanding pads to the rescue
Osren abrasive watermark remover is pretty simple and safe to use. All you needed to do is mist the glass surface work area, spread some abrasive powder on a damp sanding pad and work on the area. Not too wet and not too dry. If the pad do get dry after working on the surface for a period of time, spray some water not on the glass but on the back of the pad to get going. This prevents the sanding slurry from running all over the place. One tip is to cling wrap the metal panels underneath the glass to prevent marring the paintwork and the messy clean up process. Work on horizontal lines, then vertical lines to ensure even and edge-to-edge coverage. Wash down properly once you think you are done!
Figure 10: Sanding slurry
After using the abrasives, be sure to do a proper clean down on the glass and all other panels underneath the window. You really don't want the harsh abrasives to mar the paint work!
Figure 11: Check out the zero water beading on the glass surface after sanding down with the abrasives! Notice the water tension surrounding my finger!
Figure 12: After removing my finger...
Figure 13: After a quick wipedown with ONR, Tadaaaaa! Water beads return!
Figure 14: Water spots/marks gone!
After the sanding process, there is almost no watermark/spots to be found! Glass appears clearer and very very smooth - better than after claying. What is left behind is the scratches and pits on the glass. I've done on a test spot, no matter what pressure or amount of abrasives used, it is almost impossible to level out scratches and pits on the glass. For that, you would need some real glass cutting compound.
I did notice that the scratches/pits is visible with a strong white LED back light. If possible shine along the edge of the glass.
Figure 15: Notice the pits on the glass highlighted by the LED backlight?
And lastly, the final protection with Opti-seal and the short nap side of Osren's premium MF towel.
Figure 16: Opti-seal for protection
Thanks for viewing.
Disclaimer:
- I've tested only on tempered glass on my car. Don't know if the abrasives would cause scratches on laminated glass.
- This is a DIY project. Always do a test spot first.
- Don't blame me if something bad happens! Share what you know.
- No I'm not selling any of the products or providing any services! Don't ask me for price!
Figure 17: Tested on temperlite glass. Oh, yeah it is Jan 01, 2012. Buckle up on the rear!!!
All feedback appreciated!
Last edited: