- Joined
- Feb 8, 2007
- Messages
- 474
- Points
- 1,543
http://a3.sphotos.ak.fbcdn.net/hphotos-ak-snc6/252579_2012537346303_1029851627_2401974_4218572_n.jpg
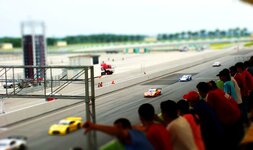
'(00): Who hasn't seen thousands of picture galleries of the recent Super GT, but with pictures that stand out like boys over toys, Tilt shifting can turn your pictures of objects into scale models in a diorama. Check out these pictures made by skazareth.
http://a1.sphotos.ak.fbcdn.net/hphotos-ak-snc6/252586_2012538466331_1029851627_2401982_2032051_n.jpg
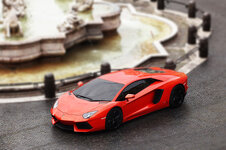
Ignore the thumb-down miniature prick, certain pictures can look more convincing as miniature models
Check the Video Below from the Post: Drift through tilt shift video
YouTube - FD Sonoma: Tilt-Shift Formula Drift
http://a6.sphotos.ak.fbcdn.net/hphotos-ak-snc6/253502_2012538666336_1029851627_2401984_4964113_n.jpg
1:24 scale Sepang diorama of Turn 9
http://a5.sphotos.ak.fbcdn.net/hphotos-ak-snc6/252806_2012538186324_1029851627_2401980_1211675_n.jpg
Learn how to apply tilt-shift to your photos and share with us!
Choose the right photo
It is important to choose right photo for this effect to look great. As you are creating miniature effect and want it to look as real as possible.
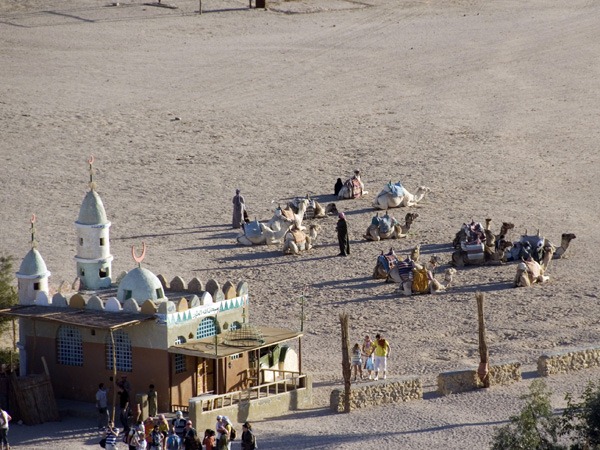
And will turn into this:
Select area for blur effect
First of all look at your photo and think about what area will look great as a miniature. I think I will go with the middle of image with the people and camels.
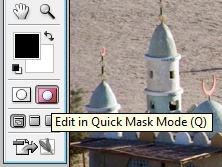
Select Quick mask mode in Photoshop
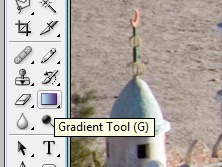
Go and get Gradient Tool
From Gradient type select Reflected Gradient

Now go and select focus area in your image. The area you want to be in focus will appear in red after applying gradient. It should look something like this:
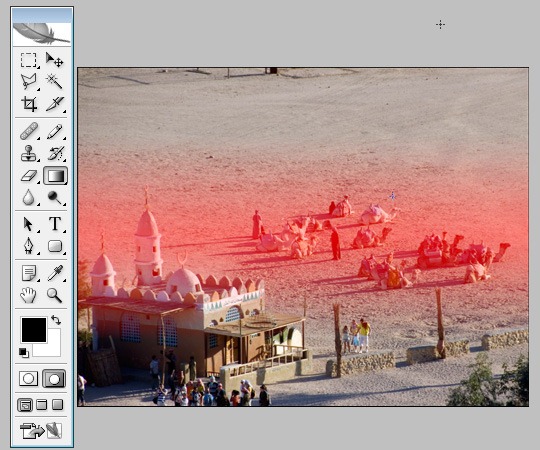
Selecting back to Standard mode should select area for applying blur effect.
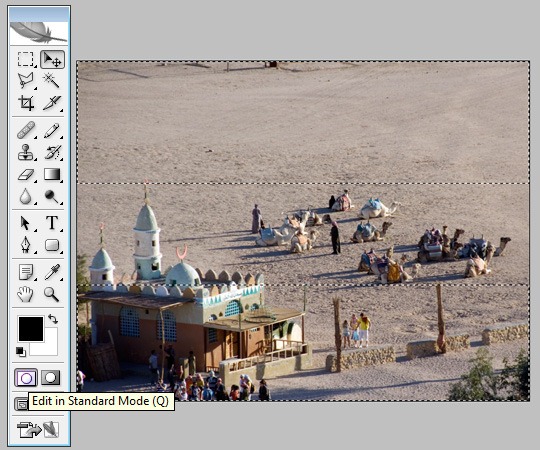
Apply blur effect
For blur effect you can use Lens blur from the filter menu. Play with the radius setting to see which value brings best effect – for this picture I set my radius value to about 30.
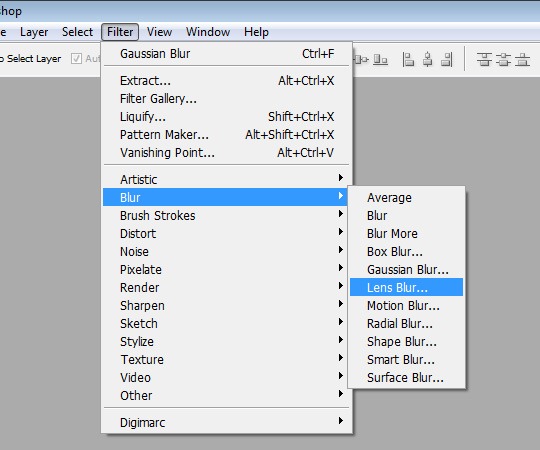
Tune up the final image.
Only thing I have don to the final image is spiced up the color with Saturation option as it gives better feel of miniature world. If you need you can play with brightness, curves, contrast and other options to give to the picture final touch.
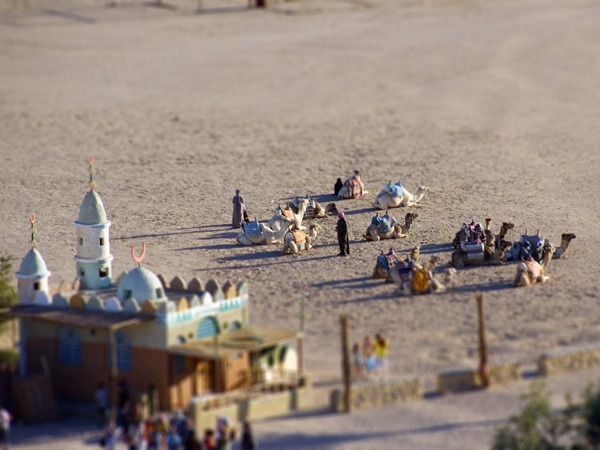
Here is the final image:
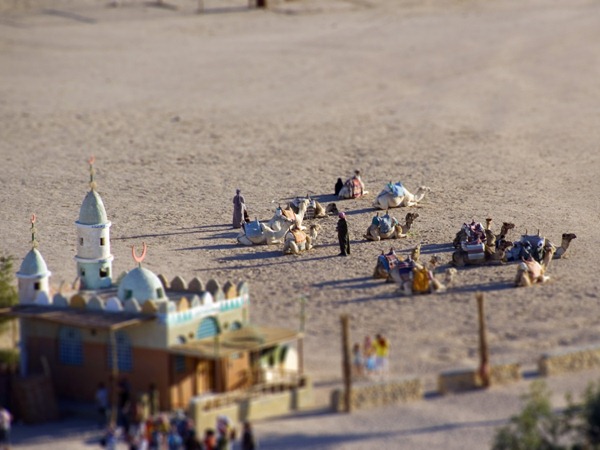
From: http://www.photoble.com/photoshop-tutorials/create-tilt-shift-miniature-effect-in-photoshop
More Examples:
http://www.vincentlaforet.com/
http://www.vincentlaforet.com/
http://www.vincentlaforet.com/
http://media.smashingmagazine.com/images/tilt-shift-photography/train2.jpg
And a Video:
YouTube - Tilt-shift technique test
From http://www.smashingmagazine.com/2008/11/16/beautiful-examples-of-tilt-shift-photography/
'(00): Who hasn't seen thousands of picture galleries of the recent Super GT, but with pictures that stand out like boys over toys, Tilt shifting can turn your pictures of objects into scale models in a diorama. Check out these pictures made by skazareth.
http://a1.sphotos.ak.fbcdn.net/hphotos-ak-snc6/252586_2012538466331_1029851627_2401982_2032051_n.jpg
Ignore the thumb-down miniature prick, certain pictures can look more convincing as miniature models
Check the Video Below from the Post: Drift through tilt shift video
YouTube - FD Sonoma: Tilt-Shift Formula Drift
http://a6.sphotos.ak.fbcdn.net/hphotos-ak-snc6/253502_2012538666336_1029851627_2401984_4964113_n.jpg
1:24 scale Sepang diorama of Turn 9
http://a5.sphotos.ak.fbcdn.net/hphotos-ak-snc6/252806_2012538186324_1029851627_2401980_1211675_n.jpg
Learn how to apply tilt-shift to your photos and share with us!
Choose the right photo
It is important to choose right photo for this effect to look great. As you are creating miniature effect and want it to look as real as possible.
- Choose shot form above (remember, you are looking at miniature world).
- Choose panorama shot with different objects – houses, cars, people etc. looks amazing if you apply this effect on them.

And will turn into this:

Select area for blur effect
First of all look at your photo and think about what area will look great as a miniature. I think I will go with the middle of image with the people and camels.
Select Quick mask mode in Photoshop

Go and get Gradient Tool

From Gradient type select Reflected Gradient

Now go and select focus area in your image. The area you want to be in focus will appear in red after applying gradient. It should look something like this:

Selecting back to Standard mode should select area for applying blur effect.

Apply blur effect
For blur effect you can use Lens blur from the filter menu. Play with the radius setting to see which value brings best effect – for this picture I set my radius value to about 30.

Tune up the final image.
Only thing I have don to the final image is spiced up the color with Saturation option as it gives better feel of miniature world. If you need you can play with brightness, curves, contrast and other options to give to the picture final touch.
Here is the final image:

From: http://www.photoble.com/photoshop-tutorials/create-tilt-shift-miniature-effect-in-photoshop
More Examples:
http://www.vincentlaforet.com/
http://www.vincentlaforet.com/
http://www.vincentlaforet.com/
http://media.smashingmagazine.com/images/tilt-shift-photography/train2.jpg
And a Video:
YouTube - Tilt-shift technique test
From http://www.smashingmagazine.com/2008/11/16/beautiful-examples-of-tilt-shift-photography/

