Hi guys and all detailing senior practitioner, and KC...
Here are some pictures of my first time, DIY wet sanding and rotary... **Parental Advisory (18F)**: What you are about to see is nothing like what sifus and seniors here did. This is a first attempt.
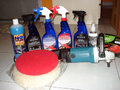
The day I got my warriors assembled, I was so excited!!!

The night before, I tried to ask my friends if anyone is willing to let me try on their car... Nobody was convenient. God is good. I thank God for that because what would happen would have been disastrous.
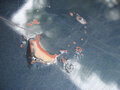
Morning, 9am. Went out to look for scrap bonnet. Chop shop wanted to chop me for RM150. Finally, went to a paint and body shop owned by a friend and he sold to me for RM30. No bonnet available, so he gave me a wira trunk hood. Here goes...
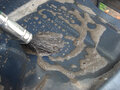
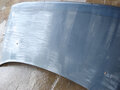
The hood was really beaten up and dirty with dust, soil, and grease. It looks perfect and undamaged at first because of the amount of dirt that covered it... Even damaged my car's interior when I was transporting it back. Sprayed with water and used OPC full strength. After seeing how much OPC i've used and the dirt remaining, I got no choice but to resort to detergent...

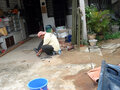
Really inconvenient because house is undergoing renovation. Had to work beside this metal grinding guy with sparks flying all over... Thank God the sun was kind and weather was cool today and without rain!

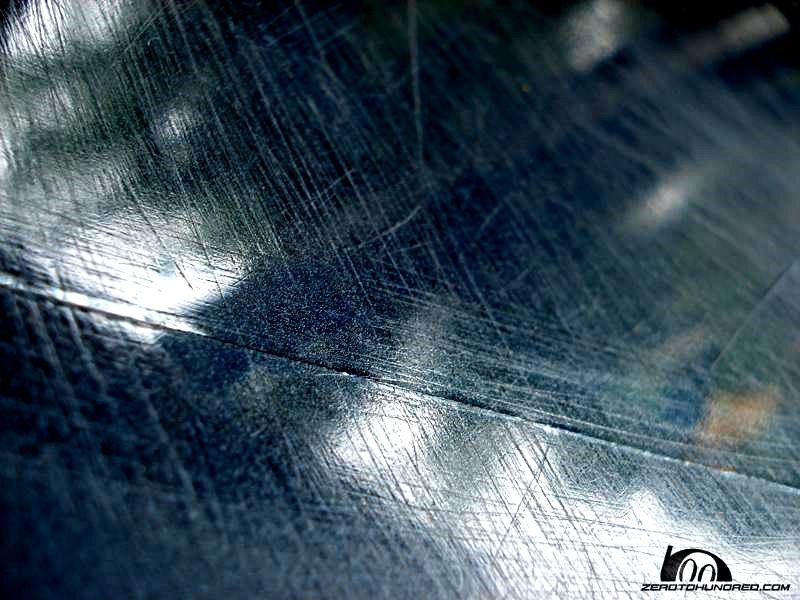
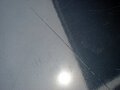
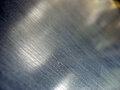
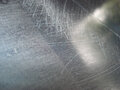
After the aggressive cleaning and the ONR, the imperfections started to show up!!! Countless of deep scratches as if people use the hood to operate a pan knife/cutter blade.

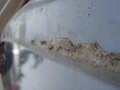
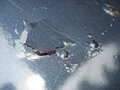
Rust spot, body fillers, gum, what ever you name...

This is the thing that gave me hell and took the most time removing it. The double sided tape for the mini spoiler (wira). The gum is sticking so tough onto the paint. And yet when I scrub it, the sponge breaks off leaving the sticky part to it. I even tried to sand it starting from 400 grit. But seeing the rate, I think this is impossible to finish today. So I drove off to buy more aggressive sandpaper.

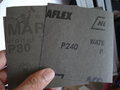
Here... So what I used was 80, 240, 400, 800, 1000. KC asked to narrow down to 1500, 2000, then 2500 but there is none available here! Hard to find stuff in KK! What to do?

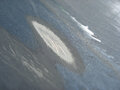
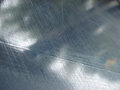
Some of the damages on the hood... For this scratch, I have sanded it down till if feels smooth to the touch... But it is still visible... why why why????


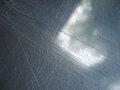
After wet sanding the whole hood, I felt that I made a big mistake... How to remove these scratches? But I cannot chose to not sand because if I don't, how to smoothen out the scratches?

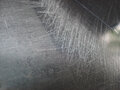
More scratches from sanding...

Really screwed up hood from my sanding...

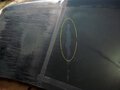
This is what you call sanding super fail! But I had to sand this aggressively to remove that double sided tape. Until some places are sanded through into the metal... OMG...

And now the rotary part... I am totally astounded by this rotary... I never expected Makita is this much of a heavyweight! After every pass, I was panting! And while spinning, it is as if it tried to swing my had away... Had to wrestle with it and it wasn't easy.... I was constantly losing control and being controlled by the machine... Damn... Fishbonezken was right... seeing it and doing it is a totally different thing :joyman:... I have to say this is hard and requires energy, stamina, and practice.
After 2 passes of OHC and wool pad; 2 passes of OHP and wool pad; 2 passes of OHC with cutting pad; 2 passes of OHP with cutting pad... Speed 1 to spread, 2 to work, SPEED 3 when I was really pissed off, then back down to 1.
No use... My OHC sprayer spoilt... So had to open the bottle and rub the compound on the wool.

Even the rusted spot smoothen out to a smooth touch. But the scratches persisted!

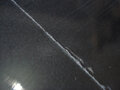
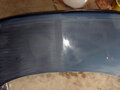
After I tore off the dividing tape... Tada!!!! Quoting KC: "Now you see it, now you don't". But mine is "now you see it, now you see it clearer". Haha....


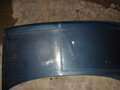
50/50. Left undone, right done. As you can see, no difference.

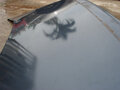
Try and compare with before sanding, compound, polish... Looks like just washing with ONR is better. At least still got a tree reflection...
This is my post for today... Lesson learned... KC said never use 80 grit to sand paint because it is for iron rod... Haha... Good and sad lesson...
I would like to clarify, this post is in no way defaming the products used. It is my first trial and I need tons of practice. I believe the machine, the optimum products, are remarkable... The proof is pictures of ONR and OPC at work. This first time, I totally screw up because I used 80 grit. I never expected this... Want to upload pictures also malu la... But the reason I upload is that I really appreciate if you guys, detailers, and KC can give some input, correct me, educate me... I will not give up...
Thank you...
Here are some pictures of my first time, DIY wet sanding and rotary... **Parental Advisory (18F)**: What you are about to see is nothing like what sifus and seniors here did. This is a first attempt.
The day I got my warriors assembled, I was so excited!!!
The night before, I tried to ask my friends if anyone is willing to let me try on their car... Nobody was convenient. God is good. I thank God for that because what would happen would have been disastrous.
Morning, 9am. Went out to look for scrap bonnet. Chop shop wanted to chop me for RM150. Finally, went to a paint and body shop owned by a friend and he sold to me for RM30. No bonnet available, so he gave me a wira trunk hood. Here goes...
The hood was really beaten up and dirty with dust, soil, and grease. It looks perfect and undamaged at first because of the amount of dirt that covered it... Even damaged my car's interior when I was transporting it back. Sprayed with water and used OPC full strength. After seeing how much OPC i've used and the dirt remaining, I got no choice but to resort to detergent...
Really inconvenient because house is undergoing renovation. Had to work beside this metal grinding guy with sparks flying all over... Thank God the sun was kind and weather was cool today and without rain!
After the aggressive cleaning and the ONR, the imperfections started to show up!!! Countless of deep scratches as if people use the hood to operate a pan knife/cutter blade.
Rust spot, body fillers, gum, what ever you name...
This is the thing that gave me hell and took the most time removing it. The double sided tape for the mini spoiler (wira). The gum is sticking so tough onto the paint. And yet when I scrub it, the sponge breaks off leaving the sticky part to it. I even tried to sand it starting from 400 grit. But seeing the rate, I think this is impossible to finish today. So I drove off to buy more aggressive sandpaper.
Here... So what I used was 80, 240, 400, 800, 1000. KC asked to narrow down to 1500, 2000, then 2500 but there is none available here! Hard to find stuff in KK! What to do?
Some of the damages on the hood... For this scratch, I have sanded it down till if feels smooth to the touch... But it is still visible... why why why????
After wet sanding the whole hood, I felt that I made a big mistake... How to remove these scratches? But I cannot chose to not sand because if I don't, how to smoothen out the scratches?
More scratches from sanding...
Really screwed up hood from my sanding...
This is what you call sanding super fail! But I had to sand this aggressively to remove that double sided tape. Until some places are sanded through into the metal... OMG...
And now the rotary part... I am totally astounded by this rotary... I never expected Makita is this much of a heavyweight! After every pass, I was panting! And while spinning, it is as if it tried to swing my had away... Had to wrestle with it and it wasn't easy.... I was constantly losing control and being controlled by the machine... Damn... Fishbonezken was right... seeing it and doing it is a totally different thing :joyman:... I have to say this is hard and requires energy, stamina, and practice.
After 2 passes of OHC and wool pad; 2 passes of OHP and wool pad; 2 passes of OHC with cutting pad; 2 passes of OHP with cutting pad... Speed 1 to spread, 2 to work, SPEED 3 when I was really pissed off, then back down to 1.
No use... My OHC sprayer spoilt... So had to open the bottle and rub the compound on the wool.
Even the rusted spot smoothen out to a smooth touch. But the scratches persisted!
After I tore off the dividing tape... Tada!!!! Quoting KC: "Now you see it, now you don't". But mine is "now you see it, now you see it clearer"
. Haha....50/50. Left undone, right done. As you can see, no difference.
Try and compare with before sanding, compound, polish... Looks like just washing with ONR is better. At least still got a tree reflection...
This is my post for today... Lesson learned... KC said never use 80 grit to sand paint because it is for iron rod... Haha... Good and sad lesson...
I would like to clarify, this post is in no way defaming the products used. It is my first trial and I need tons of practice. I believe the machine, the optimum products, are remarkable... The proof is pictures of ONR and OPC at work. This first time, I totally screw up because I used 80 grit. I never expected this... Want to upload pictures also malu la... But the reason I upload is that I really appreciate if you guys, detailers, and KC can give some input, correct me, educate me... I will not give up...
Thank you...
Attachments
-
 280.4 KB Views: 1,489
 -
 356.7 KB Views: 1,094
 -
 334.9 KB Views: 1,059
 -
 231.6 KB Views: 1,086
 -
 206.2 KB Views: 1,038
 -
 241.3 KB Views: 1,026
 -
 295.3 KB Views: 1,026
 -
 335.2 KB Views: 1,159
 -
 403.6 KB Views: 979
 -
 252.6 KB Views: 972
 -
 238.7 KB Views: 980
 -
 276 KB Views: 1,007
 -
 295.2 KB Views: 1,062
 -
 323.5 KB Views: 916
 -
 312.6 KB Views: 954
 -
 283.2 KB Views: 963
 -
 268.4 KB Views: 962
 -
 199.4 KB Views: 937
 -
 210.5 KB Views: 1,091
Last edited:

 clear coat is not thick as a buku latihan, imagine our clear coat the thickness is only like a piece of newspaper that thick. so we have to be extra careful on it and be more gentle. and the most important thing is to be patient, dont care about the result how it would be, just be patient with the process you trying to archive. once you archive the thing you want, the result will turn out great by itself. im like you too, not to say im better than anyone, im still a learner and still learning now. i ripped off few times before during wet sanding process, that moment i know wet sanding isnt that easy thing to do. after all the hardwork learning wet sanding, non-stop practicing and slowly i gain more experience and finally i did it. some really deep scratches are cannot be remove by wet sanding, cause its alredi deep. why? 1st, our paint have clear coat which is the top layer, 2nd is the base coat (color coat) 3rd primer and 4th is the body panel. if the scratches alredi cut through the base coat the only way to fix is re-paint the whole panel. why kc said the sandpaper minimum you have to start with 1500grit to 3000grit? cause we must smoothen up the sand scratches so the compound will work easily for you, result really macam yes! i hope you could continue the wet sanding process and turn out great one day. tons of practice and must remember the panel must always wet during wet sanding. i'll be looking forward to your wet sanding process. must be better than me okay! believe yourself! if your heart is there, no matter how hard it will be, you'll archive it one day. my word of wisdom :ciao: