

- Feb 13, 2006
- 166
- 274
- 1,563
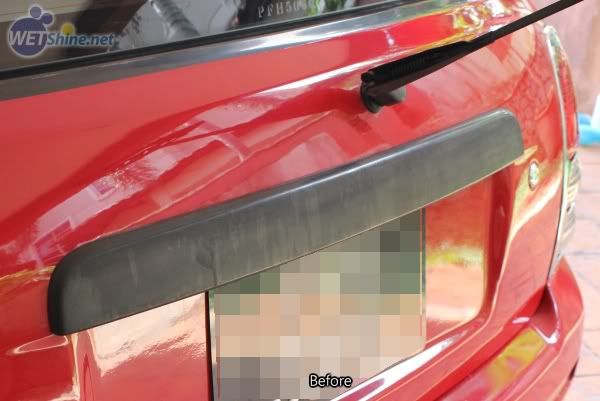
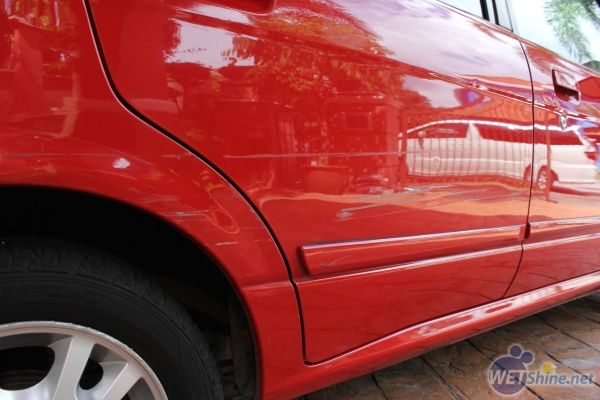
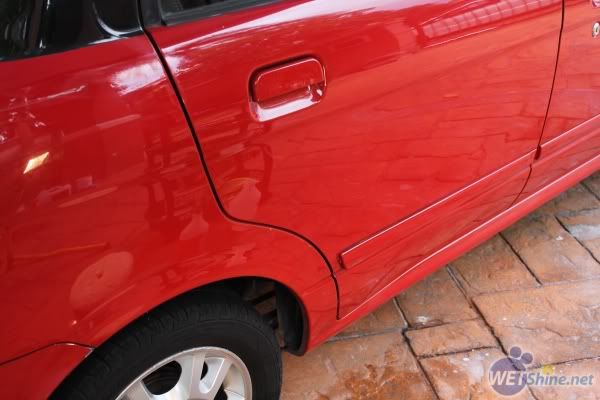
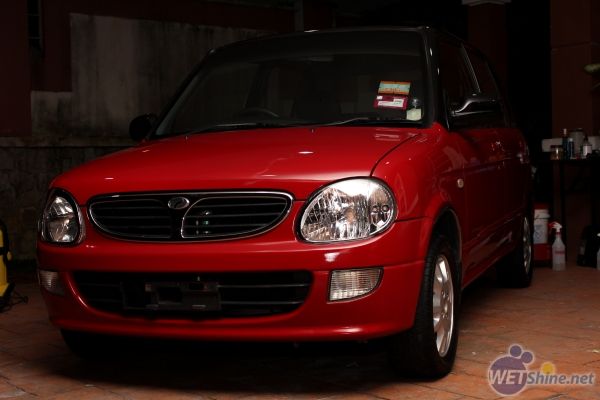
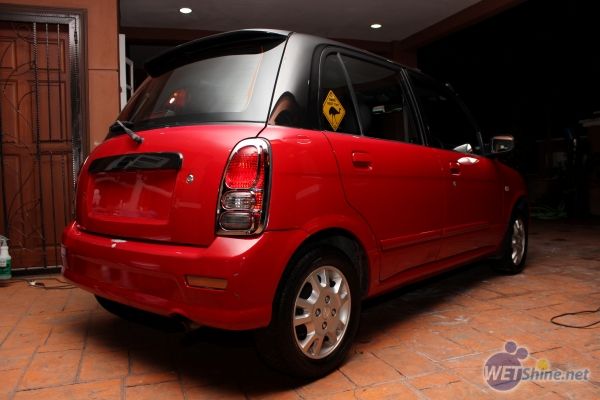
The car upon arrival.


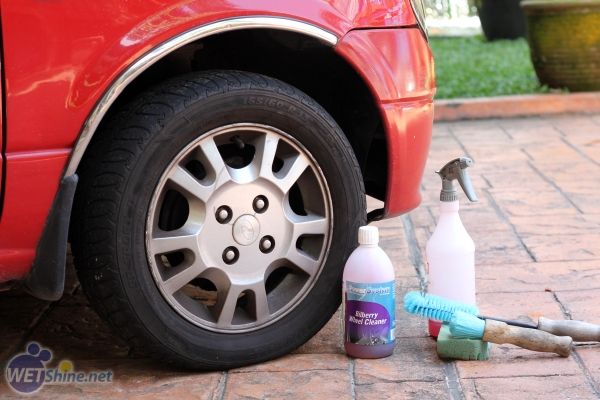
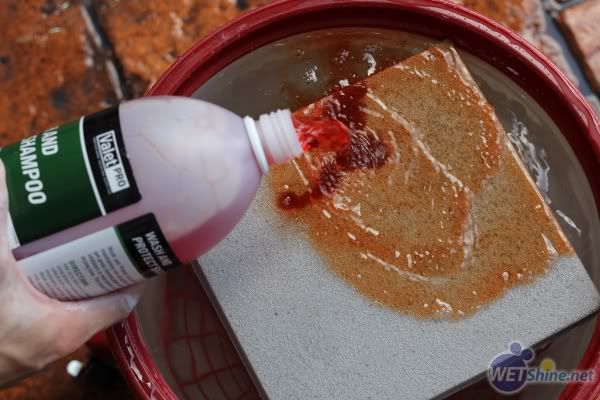
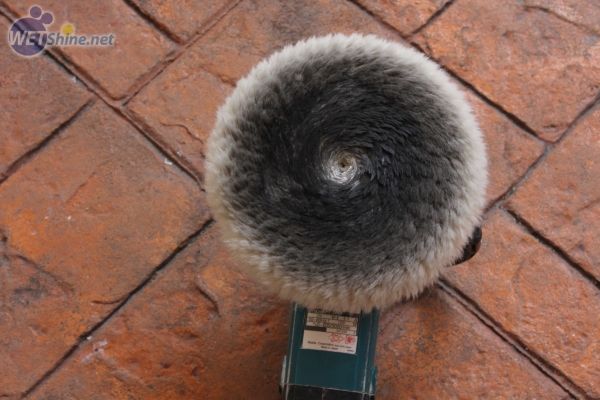
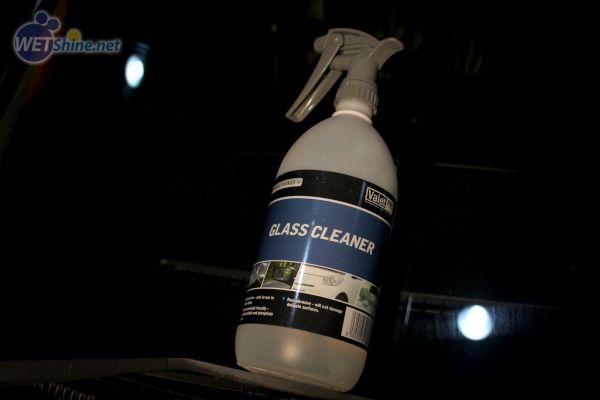
Some of the products to be used.

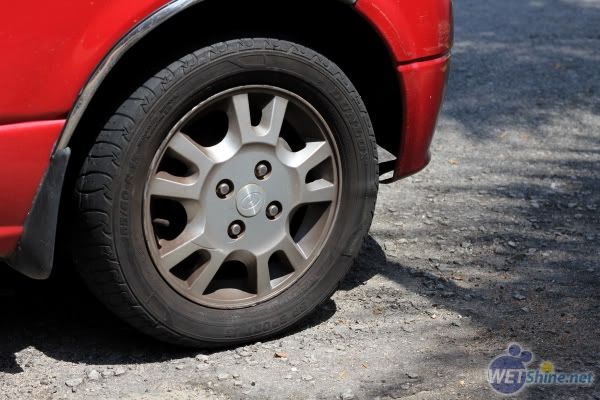
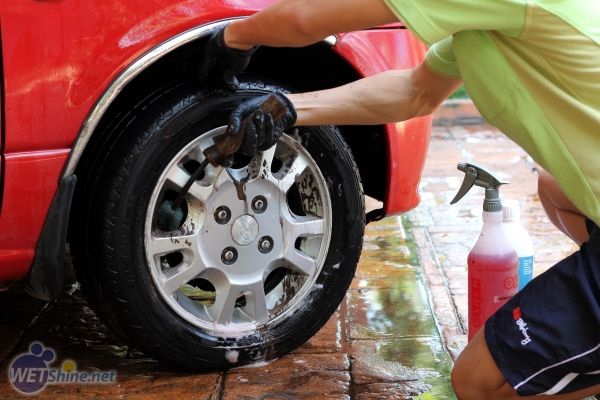
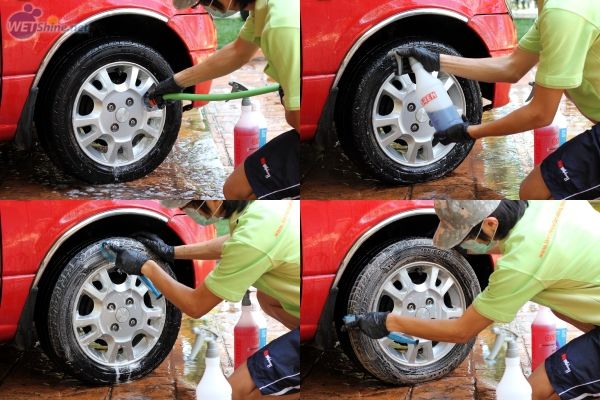
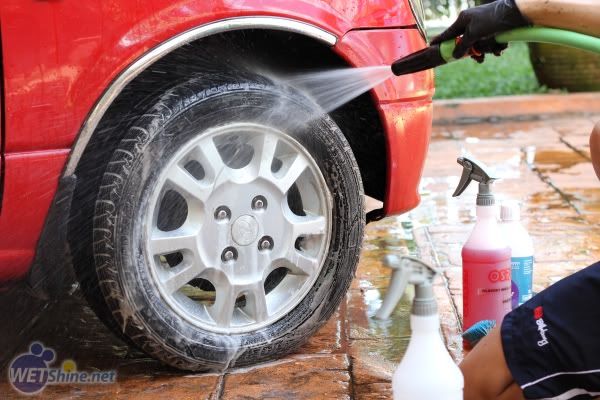
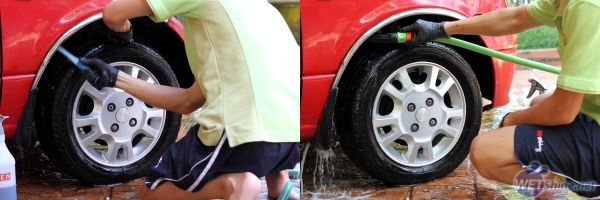
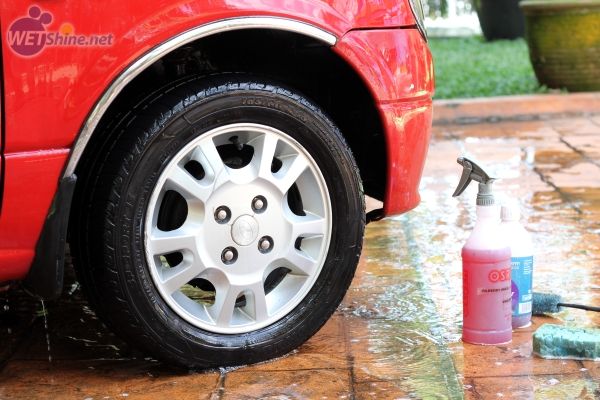
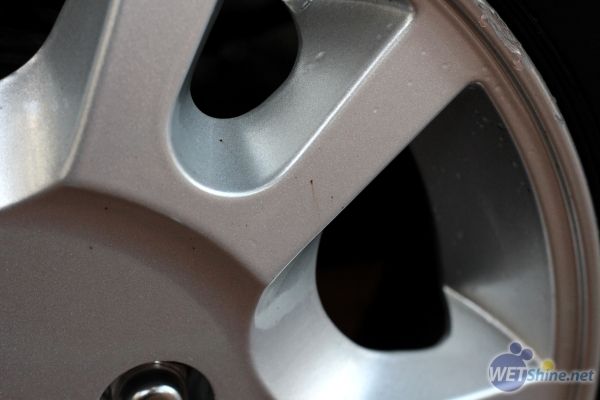
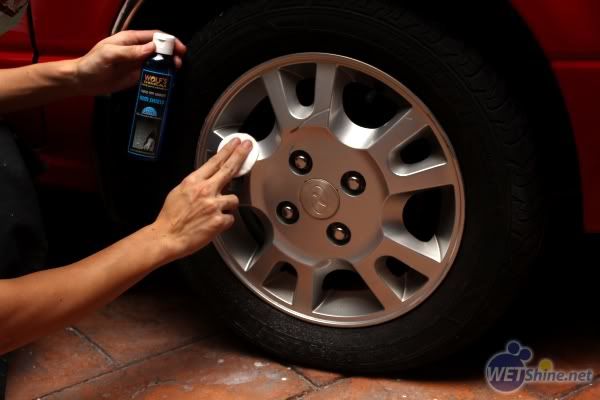
So let's start off by getting the wheel, tires and wheel wells cleaned. Wheels cleaned with ValetPRO Bilberry Wheel Cleaner (diluted 3:1), tires and wheel wells cleaned with Osren Degreaser FX (diluted 2:1). Brushes used ValetPRO Chemical Resistant Soft Brush and ValetPro Long Reach Wheel Brush.
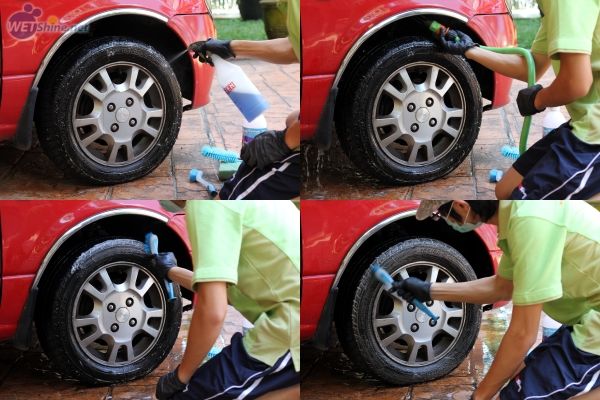
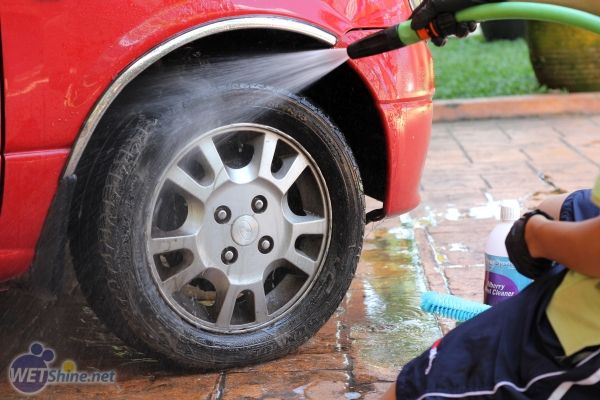
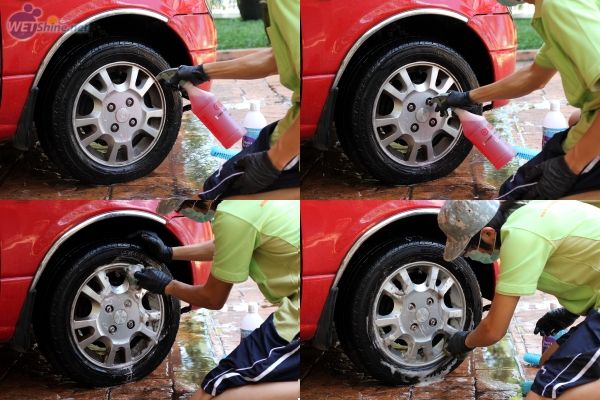
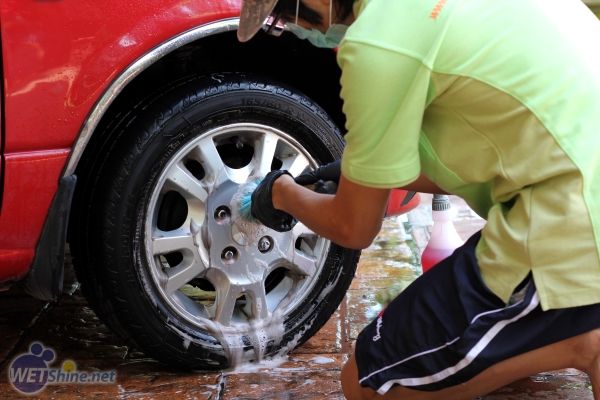
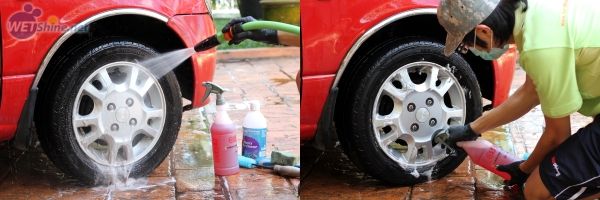
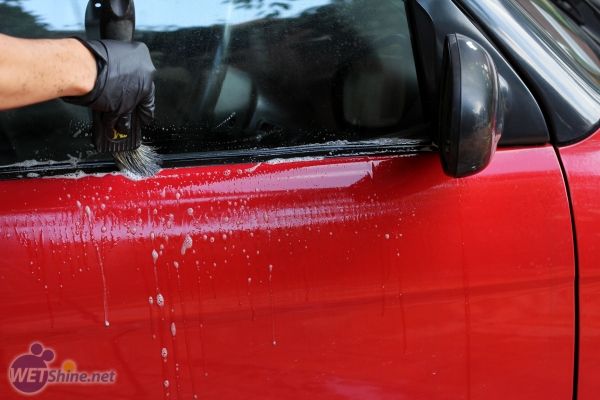
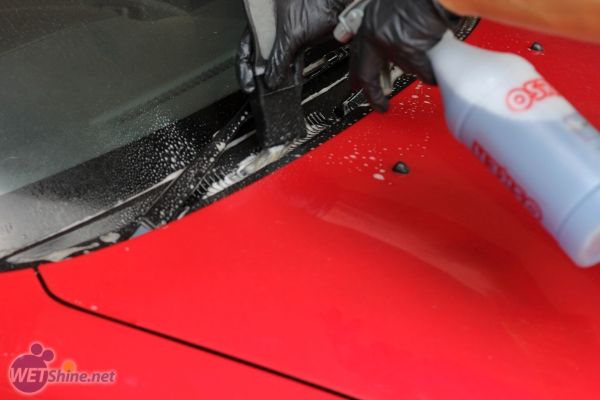
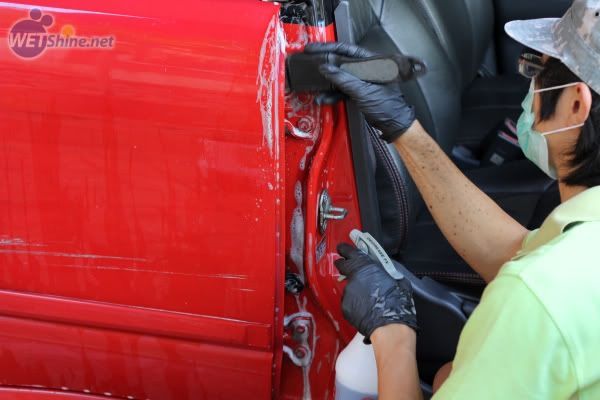
Panel gaps, rubber and plastic trim brushed with Osren Degreaser FX (diluted 2:1).
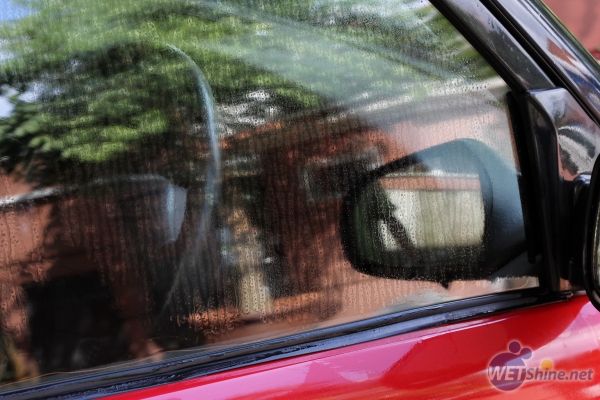
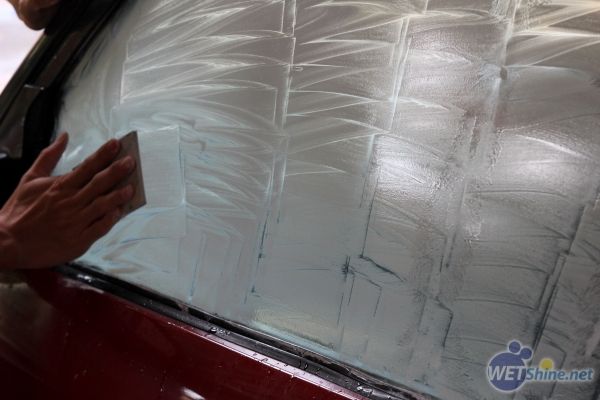
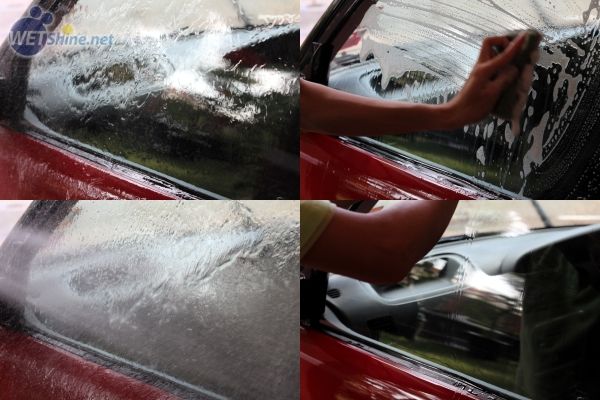
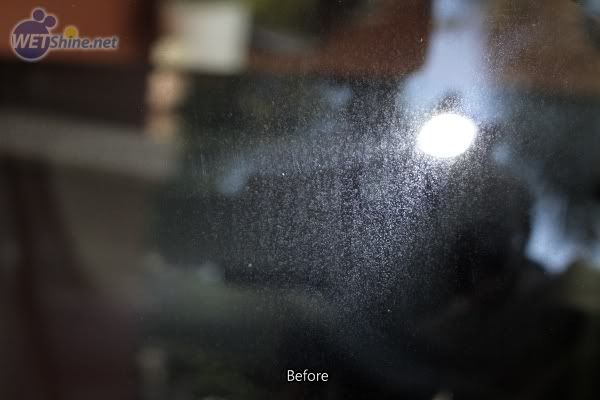
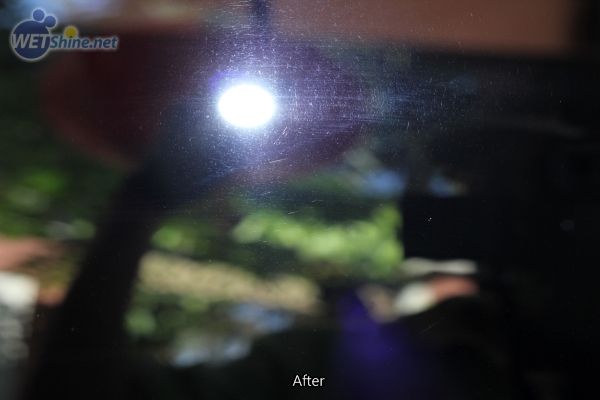
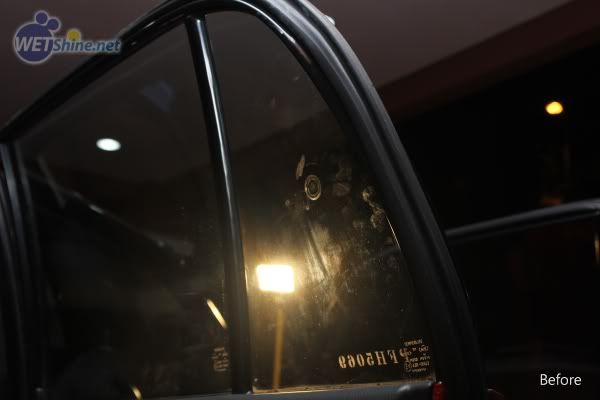
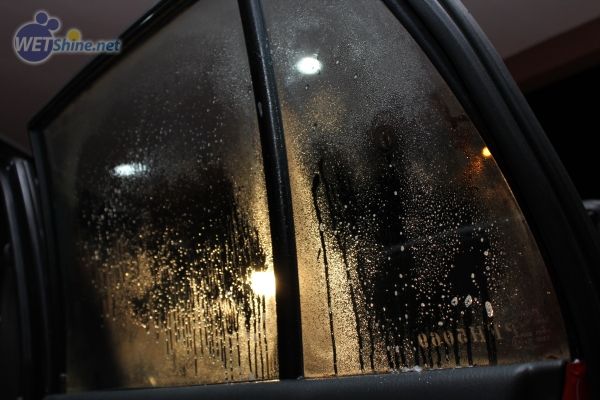
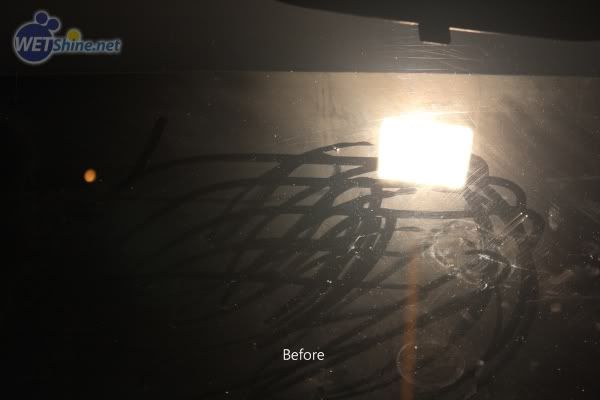
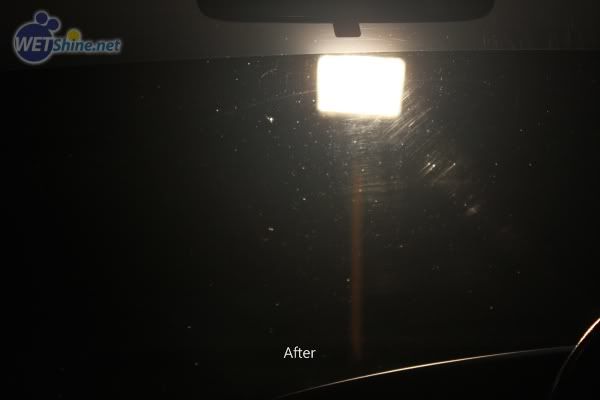
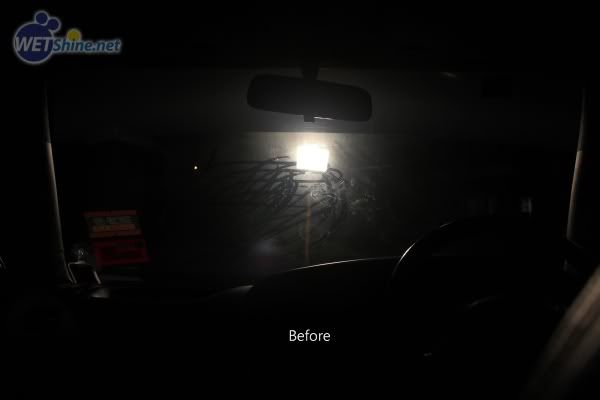
Then I noticed all the glass had watermark etchings, so I used Osren's Watermark Remover powder and a 3M Microfine sanding sponge. My technique still needs to be improved on this one as it didn't fully remove all the watermarks, but did significantly reduce it and cleaned the glass, preparing it for coating. Firstly, scrubbed with the sponge and powder, rewashed with shampoo and squeegeed dry.

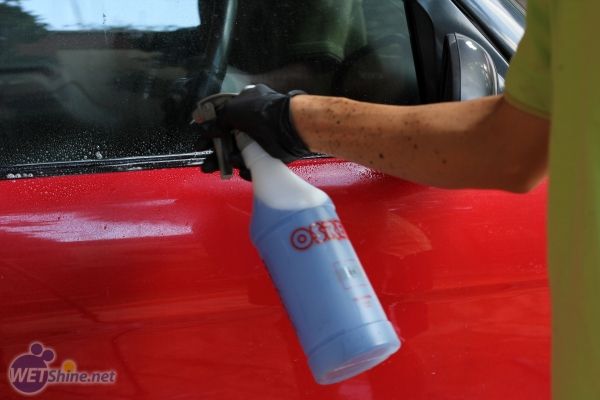
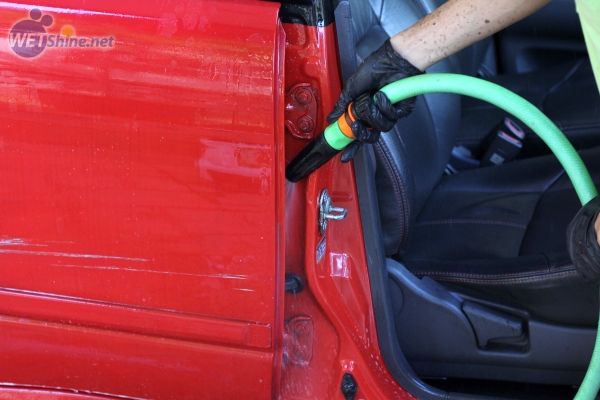
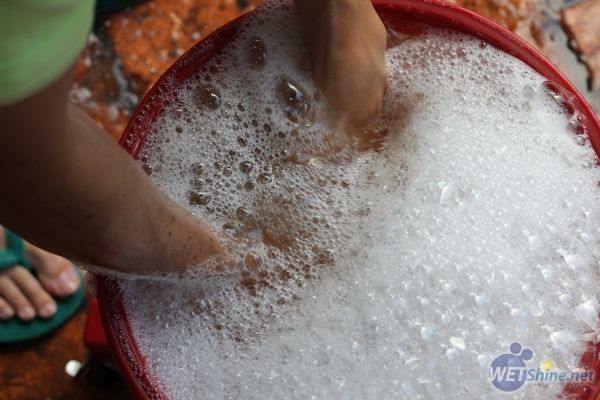
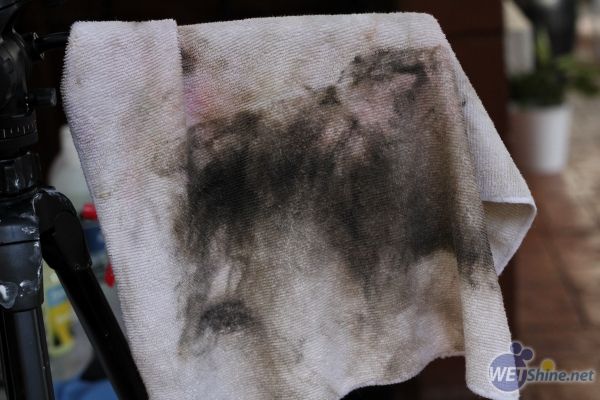
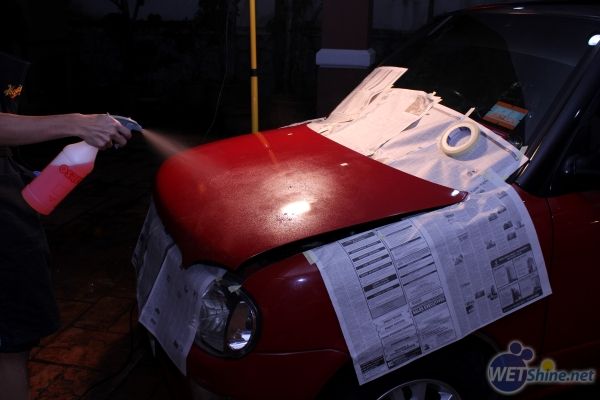
Car is then washed with ValetPRO Wash and Protect shampoo, followed by Osren Tar Remover on lower panels and wheels, lastly paintwork smoothened with Osren Magic Clay Cloth.
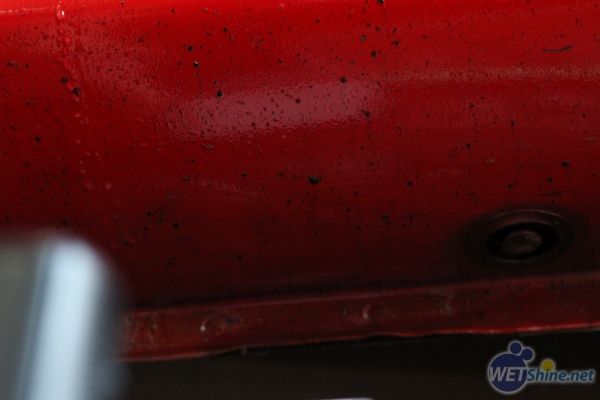
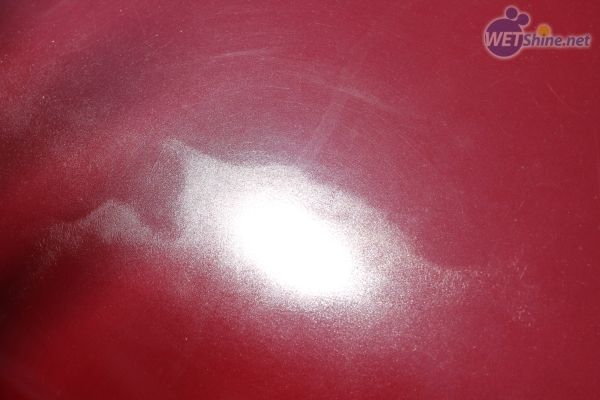
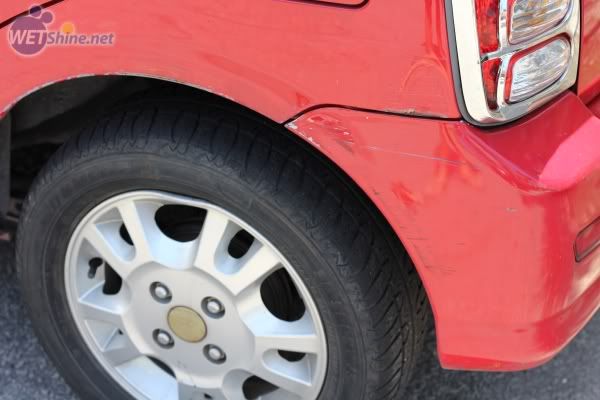
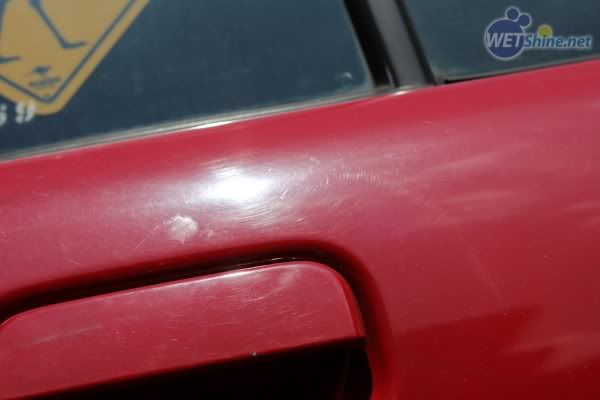
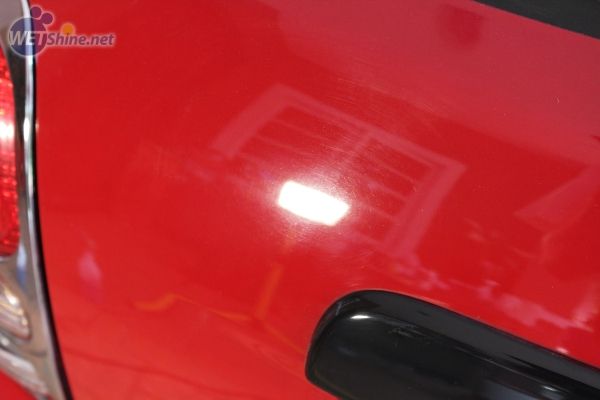
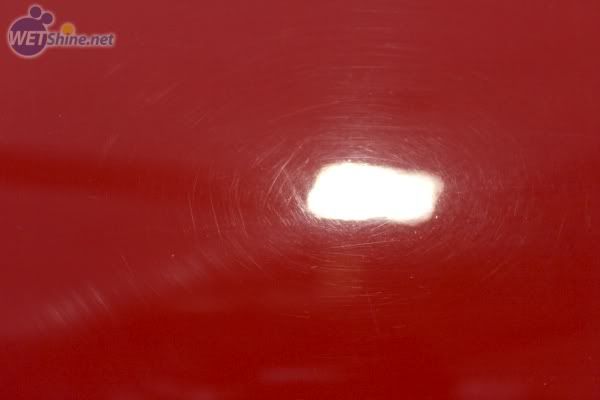
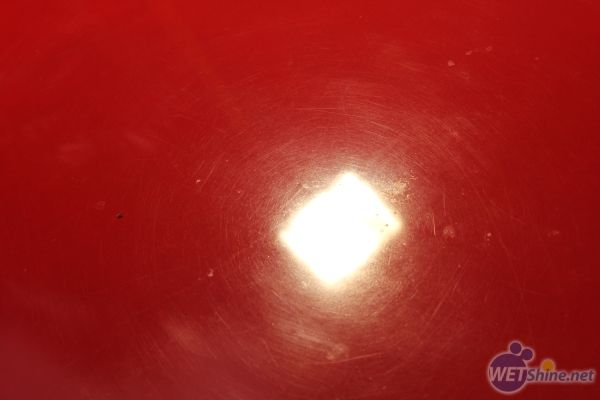
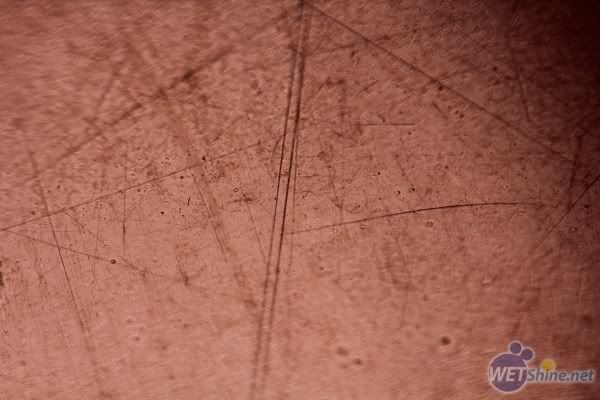
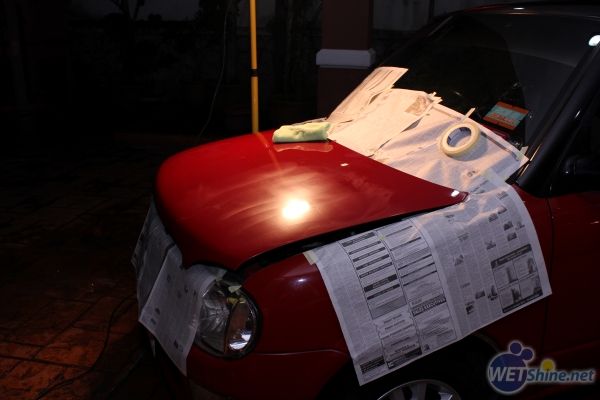
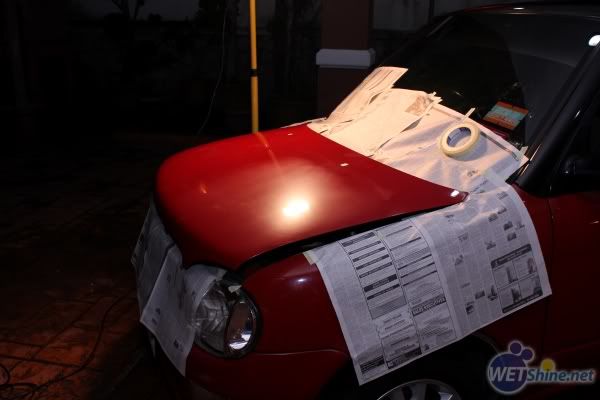
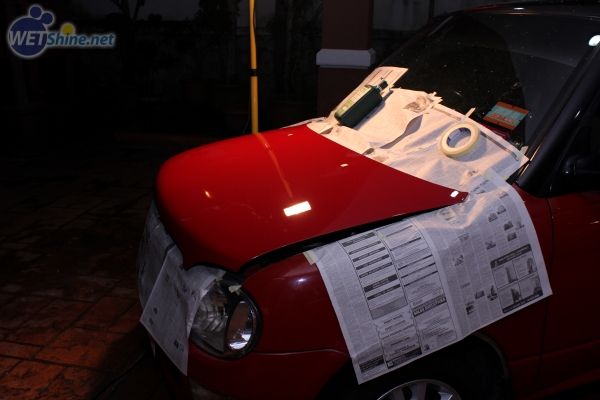
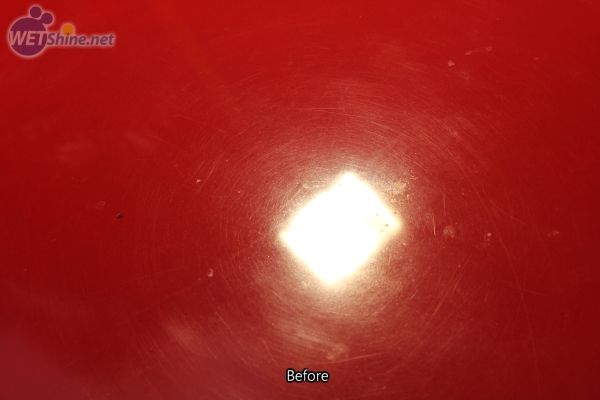
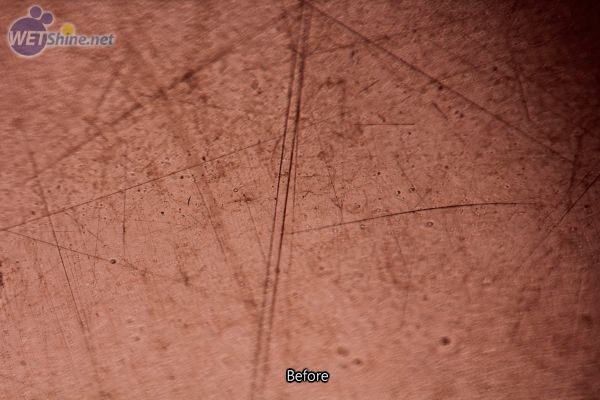
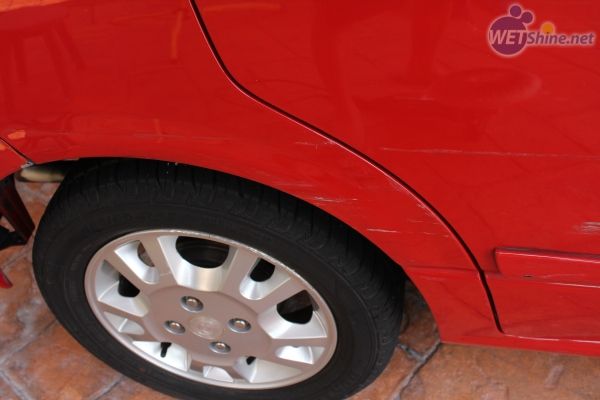
With the paint squeaky clean, we now inspect it. Bonnet was in the worst condition, the other panels had the usual swirling, embedded dirt, and water marks. The single stage black painted panels were oxidized and looked grey.

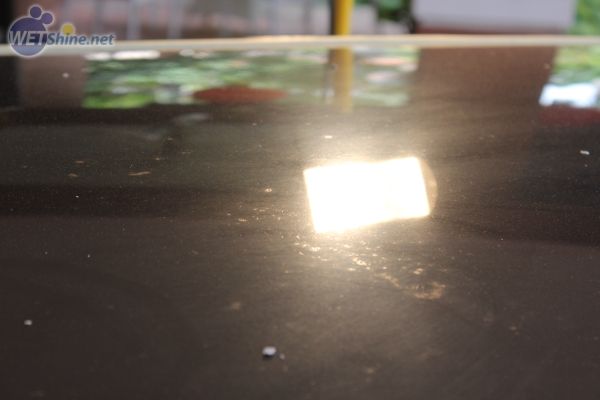

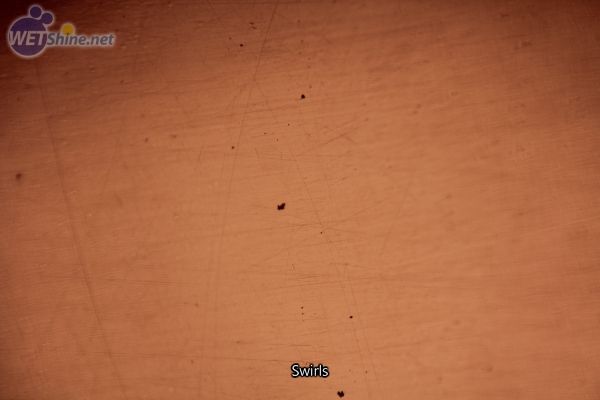
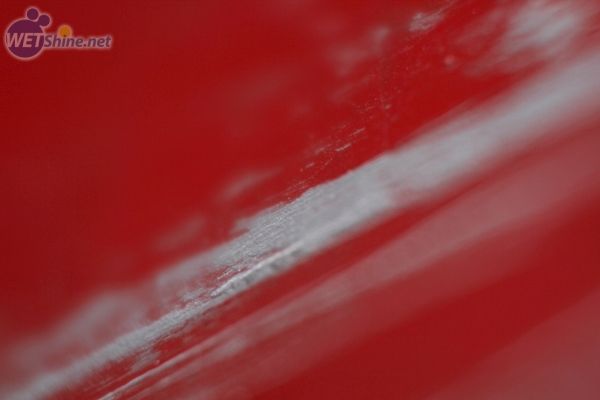
Macro shot of the swirls above.
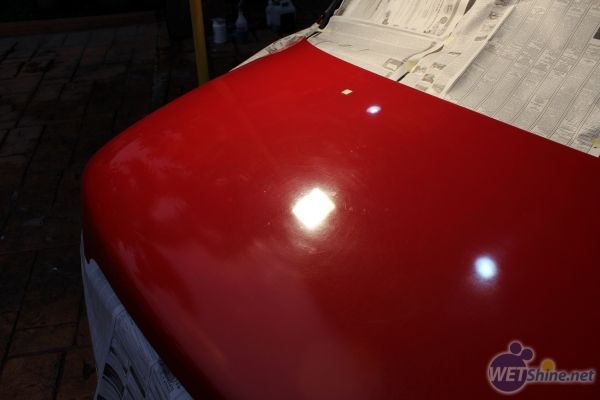
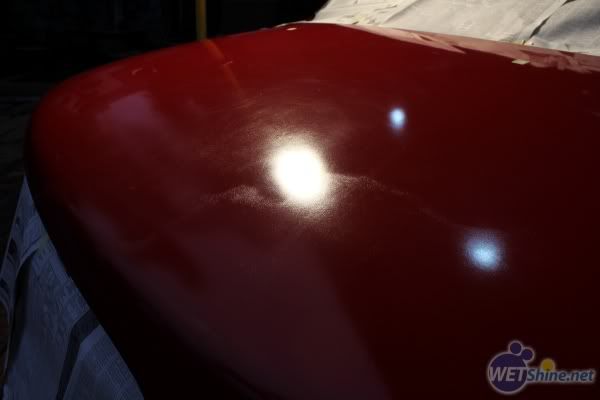
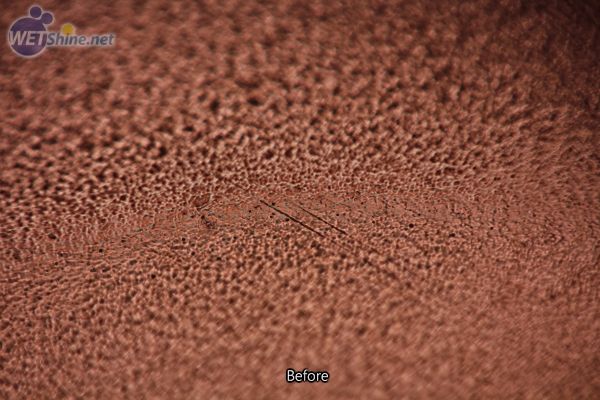
So I decided to start on the bonnet first. The right side have been repainted and I don't know why it has faded so badly, especially around the area where it 'blends' with the original paint. Let's take a closer look.
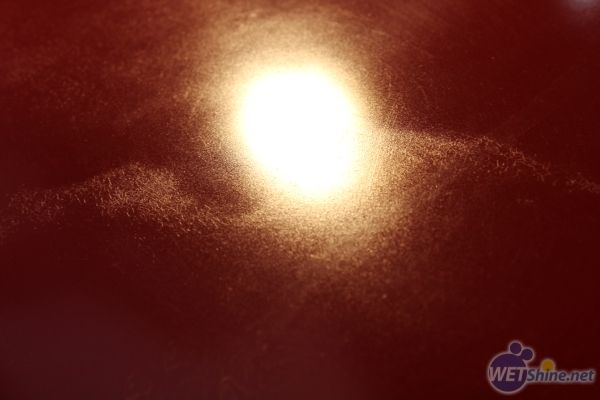
Ouch... now let's take an even closer look.
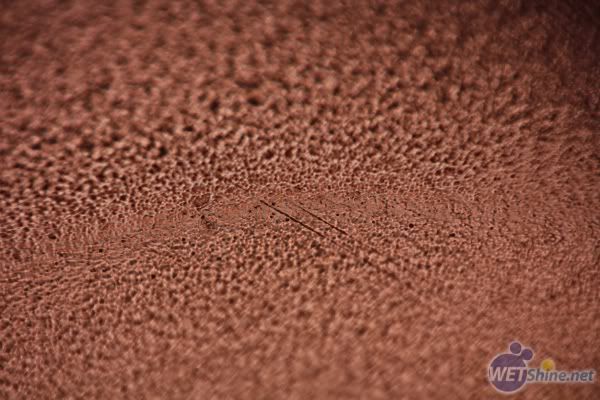
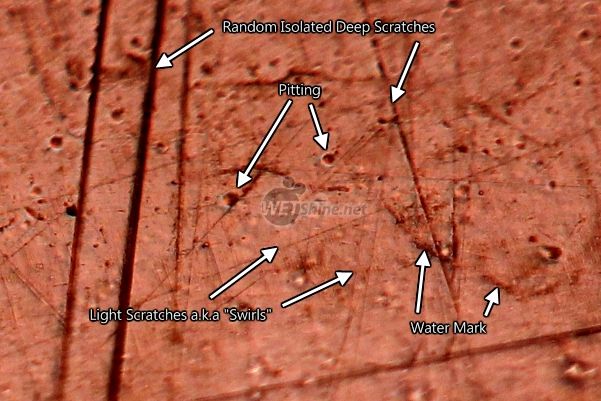
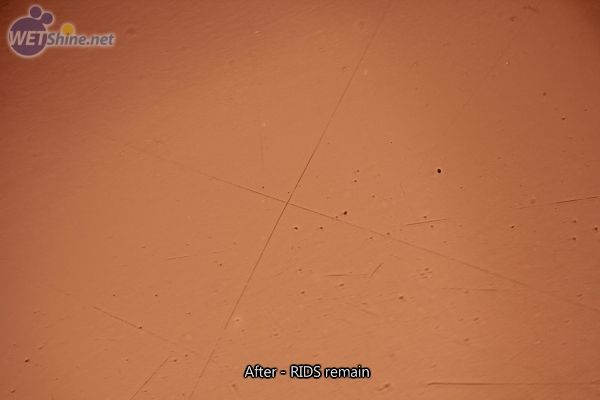
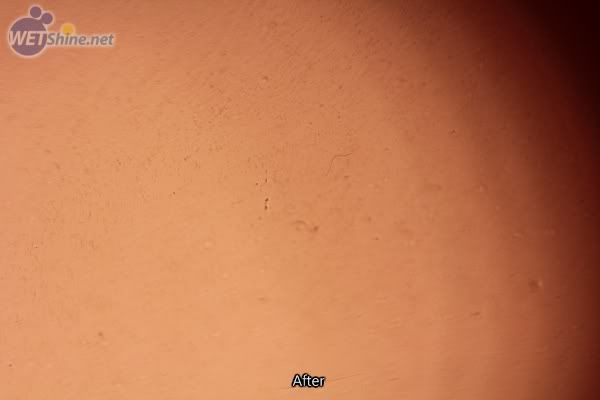
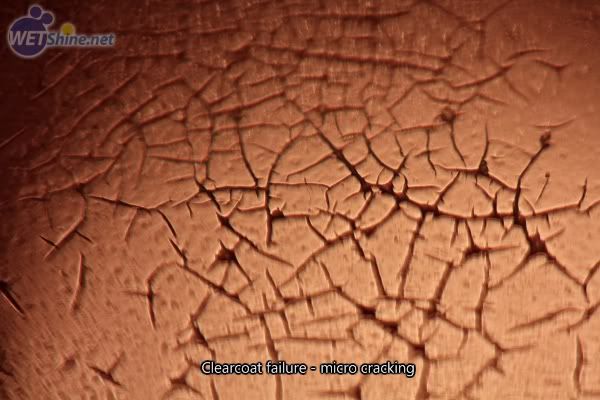
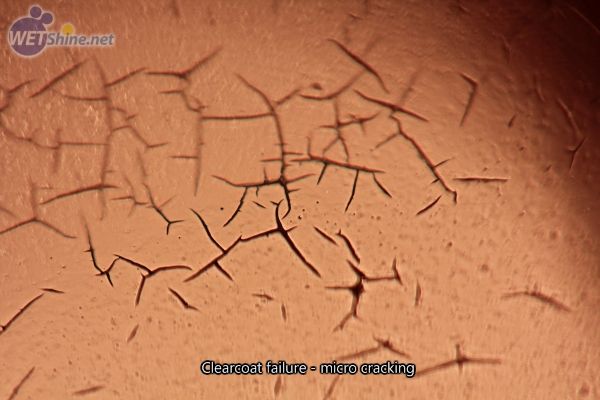
Yikes! That's the area that has been repainted, I assume it is cheap clearcoat and it has 'bubbled' over the years, thus giving it the faded look. The non repainted areas had RIDS, swirls, pitting, watermark etching and embedded dirt, the typical symptoms of neglected paint.

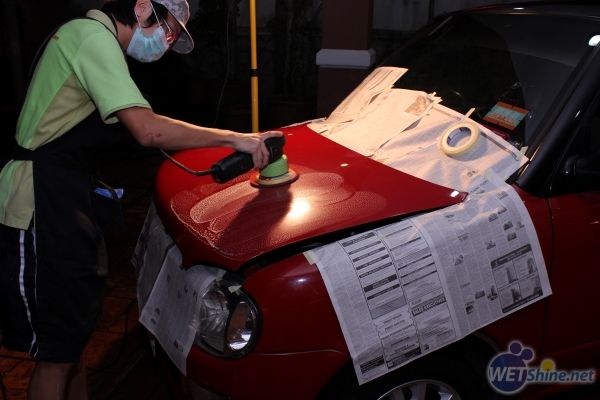
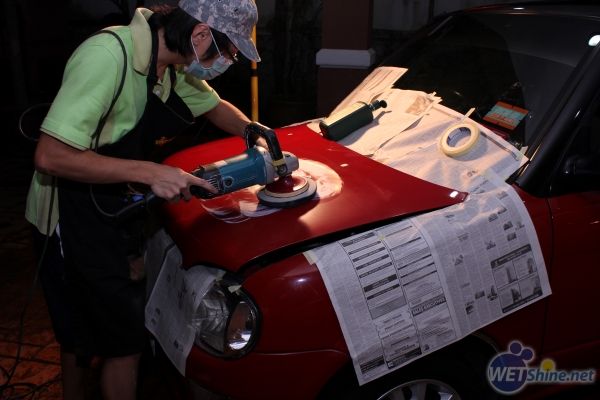
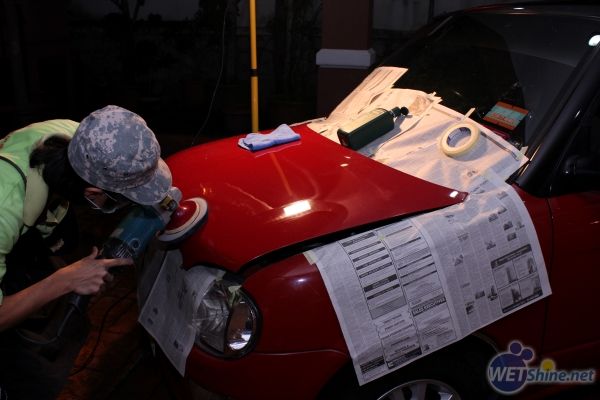
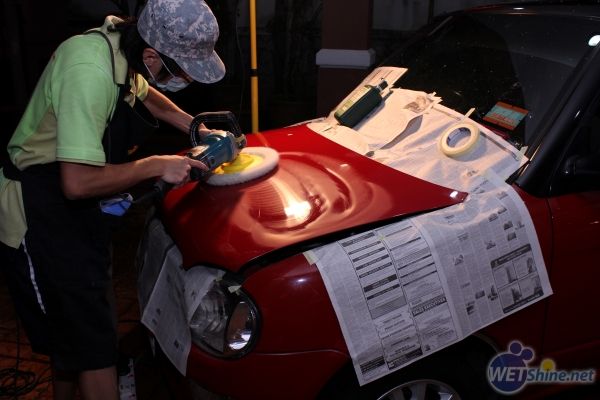
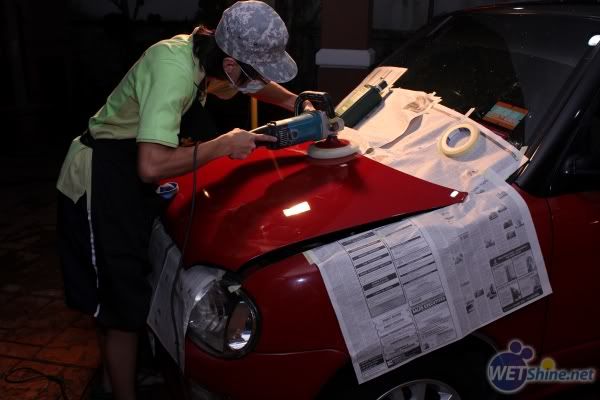
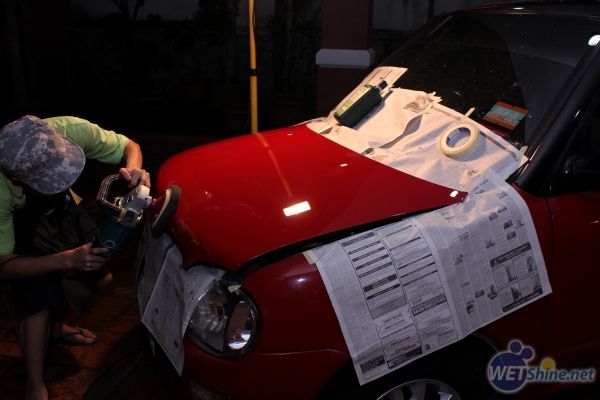
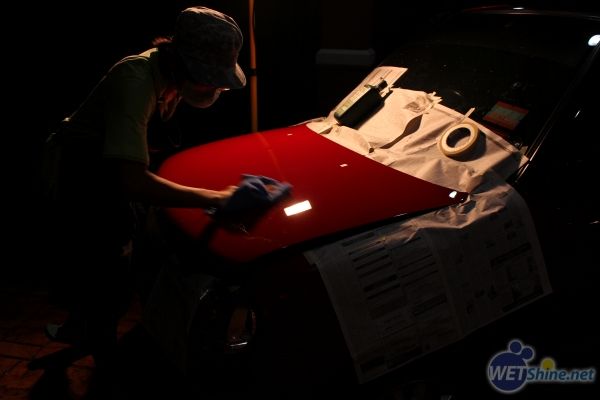
After seeing the bubbling photo, I wanted to give the bonnet a proper cutting. So the process for it was:
(1) Sanding with Mirka Abralon 2000 grit / Speed 2 / Dodo Juice Buff Daddy (Das6 DA)
(2) Sanding with Mirka Abralon 4000 grit / Speed 2 / Dodo Juice Buff Daddy (Das6 DA)
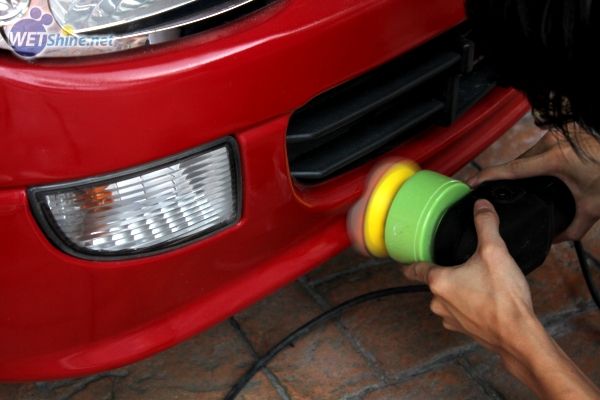
(3) Compound with Osren Velvet Pad and Osren P40 Compound / 1500 rpm / Makita 9227C Rotary
(4) Compound with Meguiar's #105 Ultra Cut Compound and Lake Country 4-ply wool pad / 1500 rpm / Makita 9227C Rotary
(5) Polished with Meguiar's #105 Ultra Cut Compound and Lake Country White Polishing pad / 1500 rpm / Makita 9227C Rotary
(6) Polished with Meguiar's #205 Ultra Finishing Polish and Lake Country Black Finishing pad / 900 rpm / Makita 9227C rotary


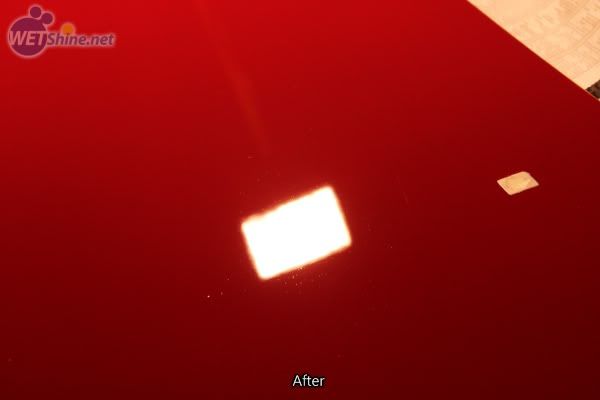

The rest of the car received the same steps except for the sanding and velvet pad.

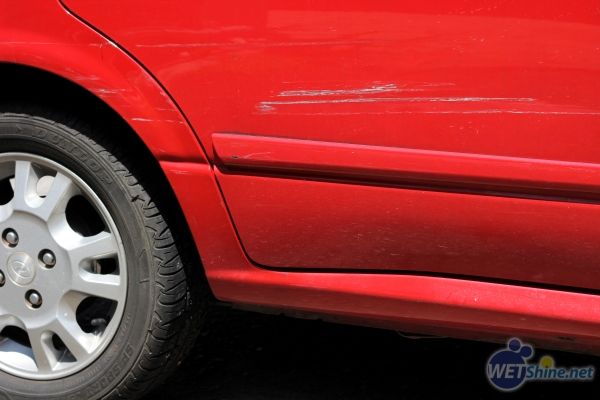
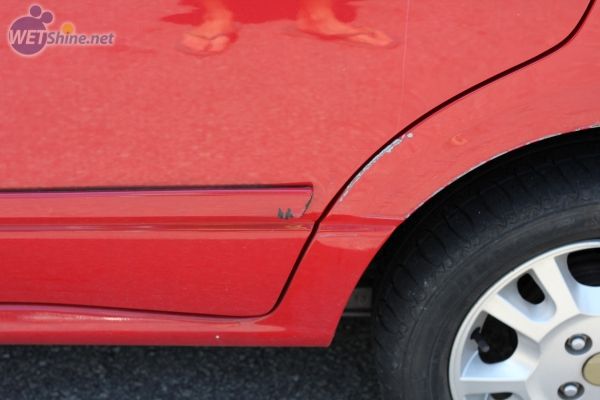
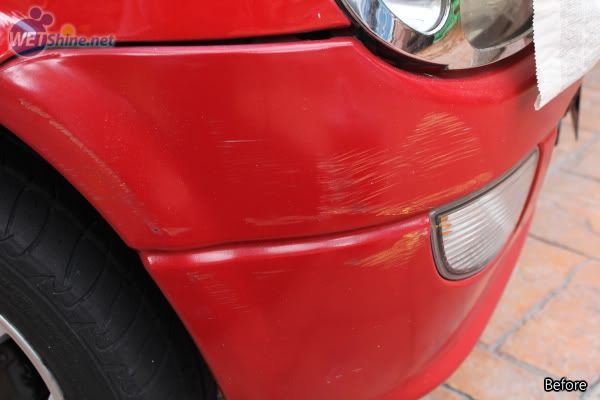
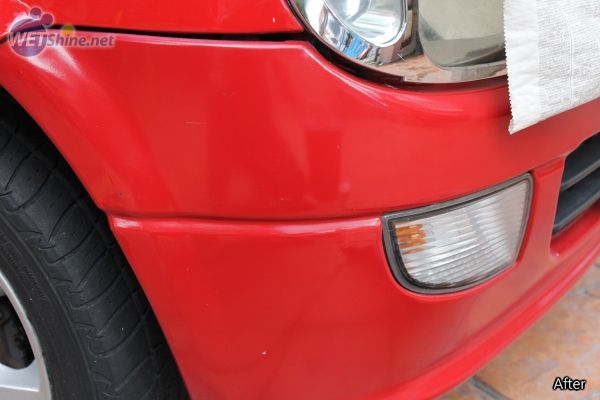
Paint transfer on the driver's side door and rear fender were wet sanded with 2000 grit sandpaper and polished.
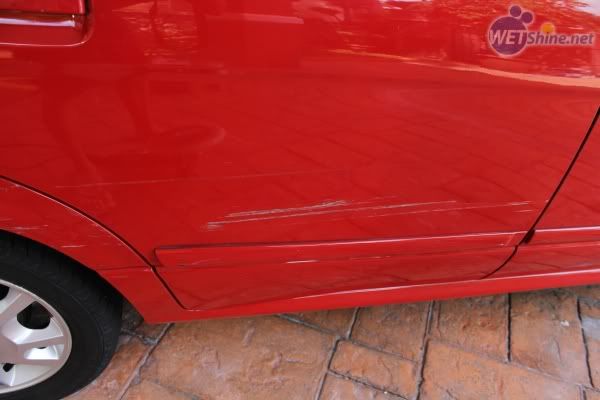
So how do you know if it is paint transfer which is above the surface and not a scratch beneath the paint? If you look closely, you can see the 'scratch/scuff' is on the surface, and as you run your fingers across it, you will feel that it is 'sticking out' from the paint, then you know you have a chance to fix the problem.
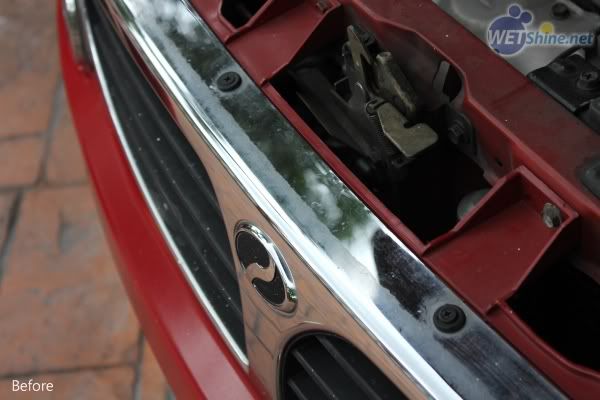
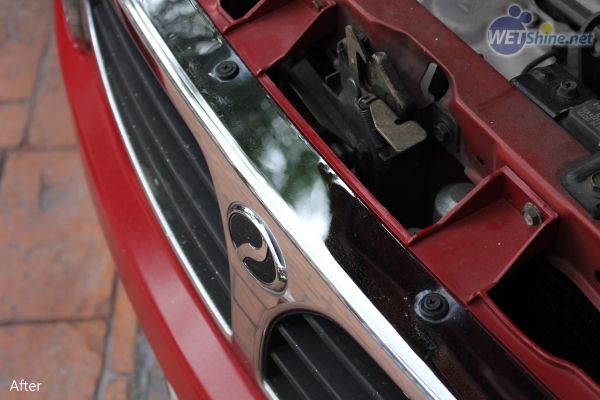
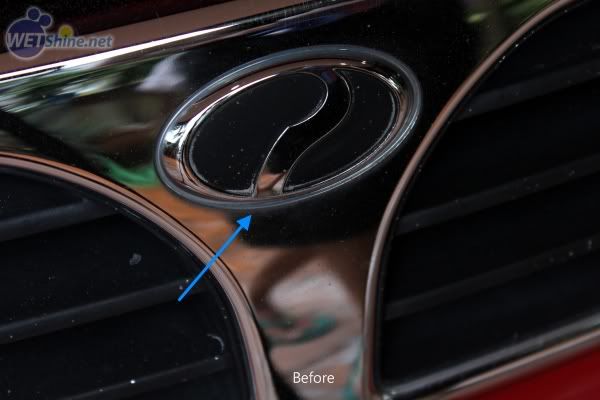
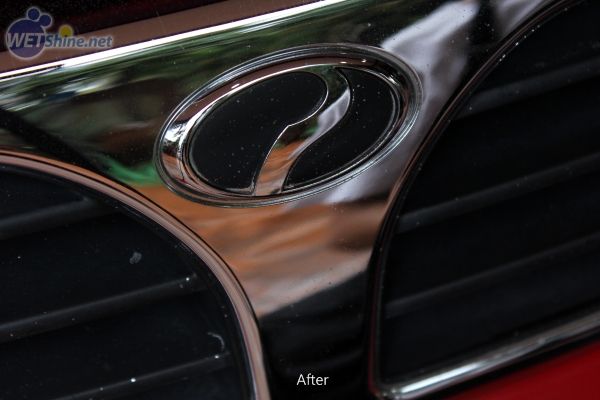
Water stains around the chrome area were removed with Osren StainX(acid).
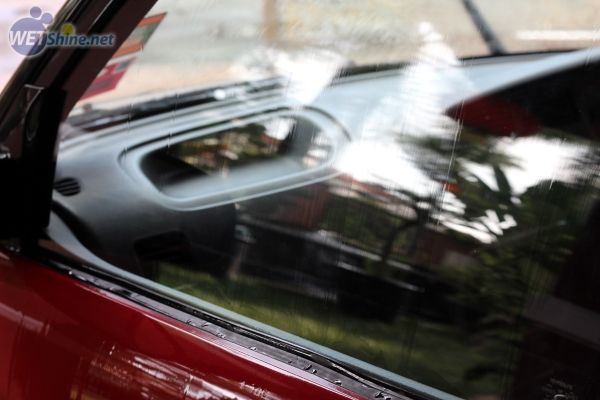
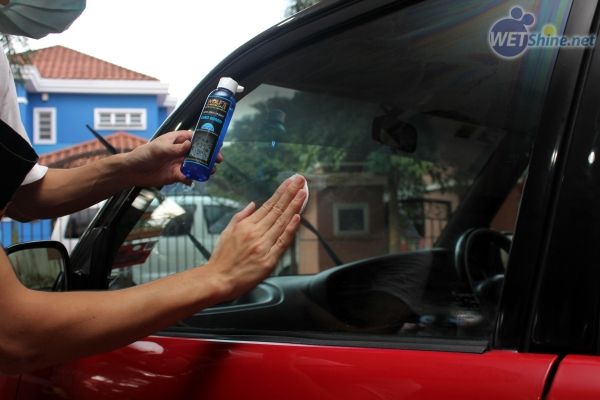
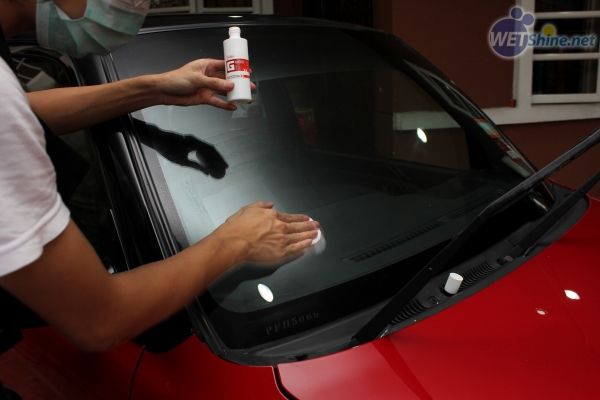
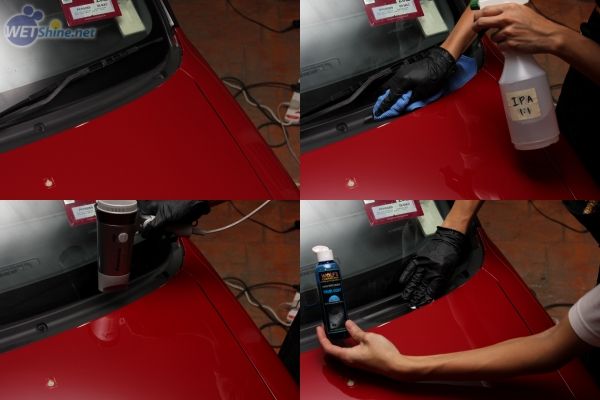
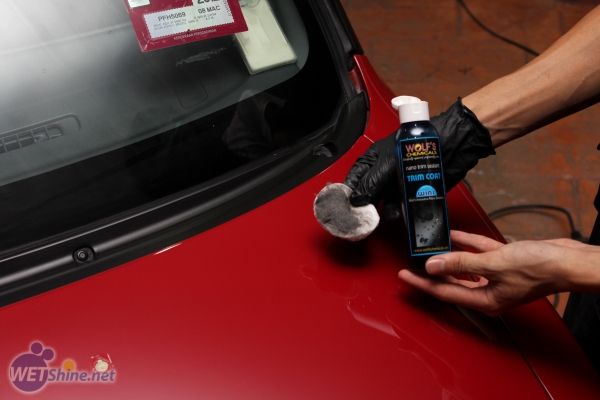
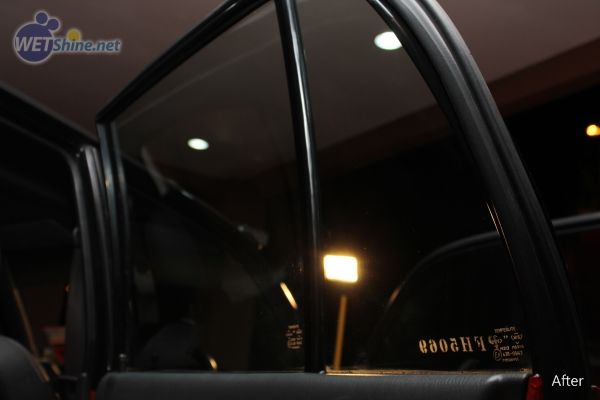
Side windows coated with Wolf's Chemicals Glass Guard while the front and rear glass which had wipers were coated with GTechniq G1 ClearVision Smart Glass. Wiper cowl trim dressed with Wolf's Chemicals Trim Coat and wheels with Wolf's Chemicals Rim Shield.

I then moved to the interior, was rushing for time at this stage and didn't take much photos. Process was:
(1) ValetPRO Glass Cleaner on all glass.
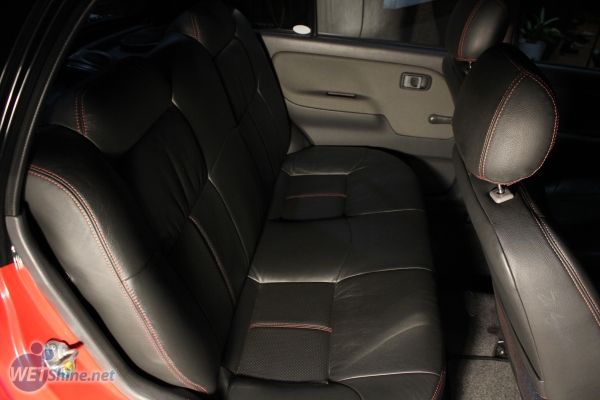
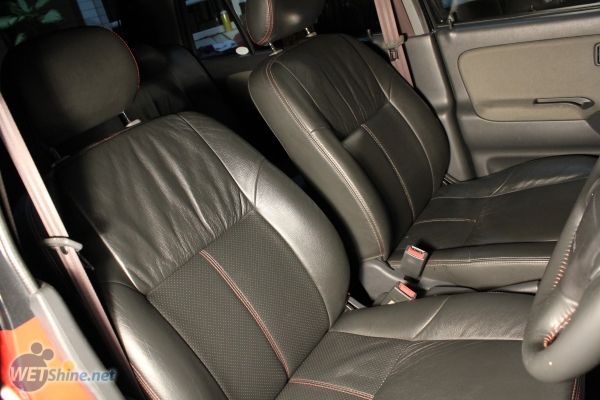
(2) Meguiar's All Purpose Cleaner on vinyl seats and all plastic trim.
(3) Vinyl seats conditioned with ValetPRO Argus Leather and Vinyl Cream.
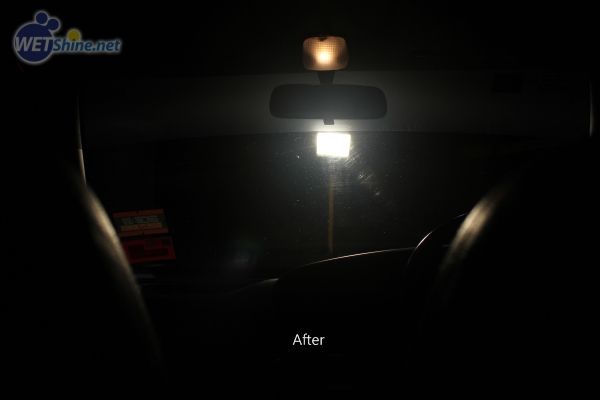
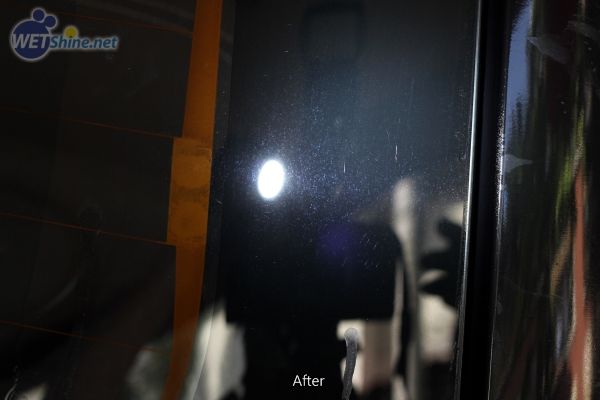
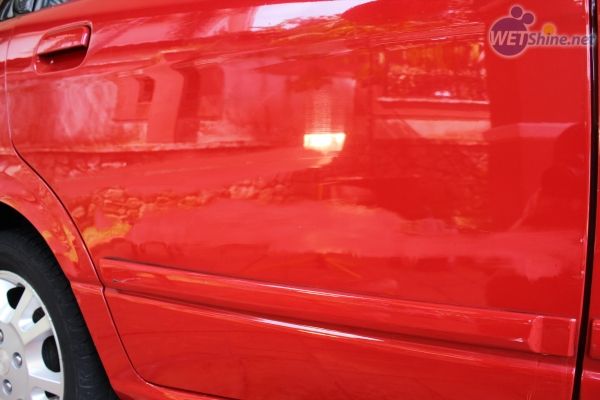
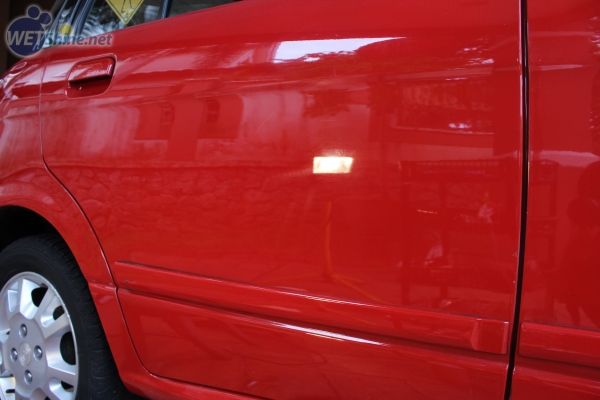
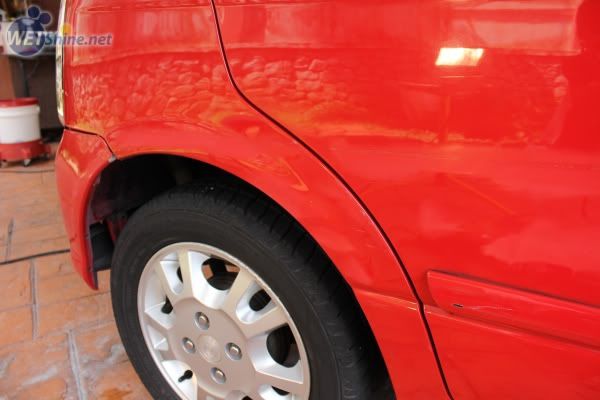
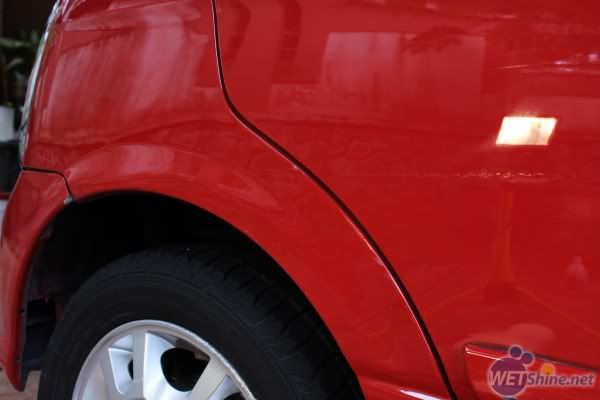
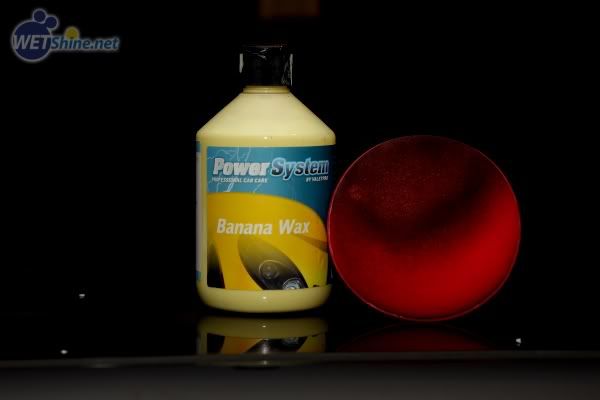
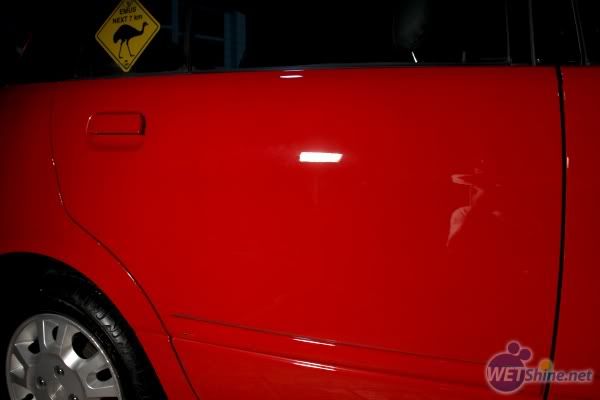
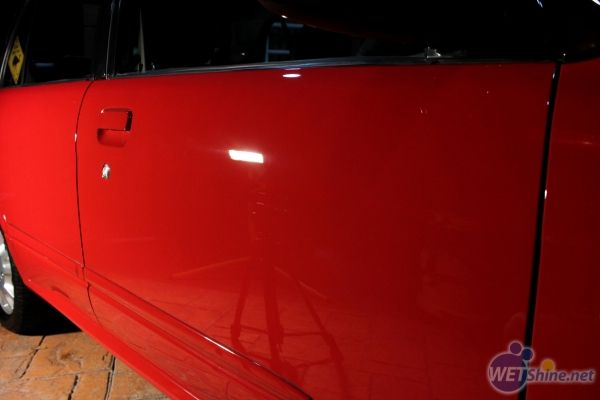
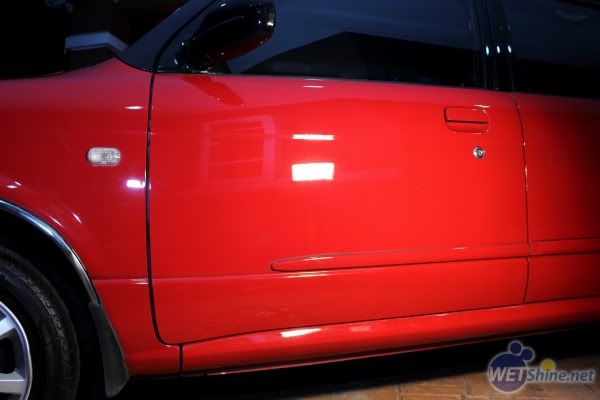
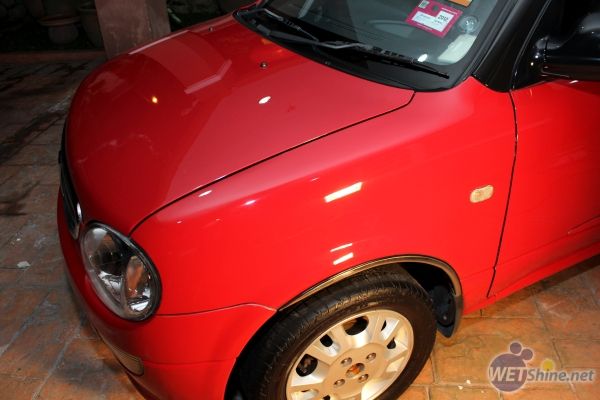
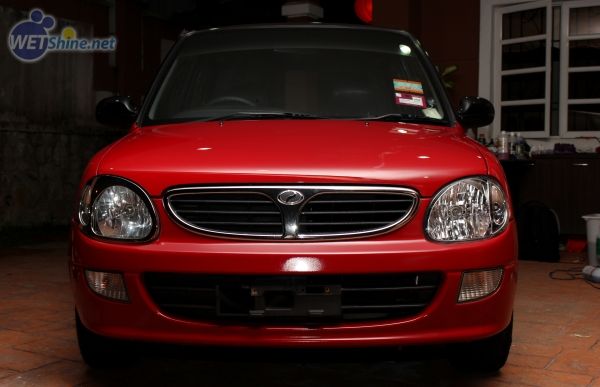
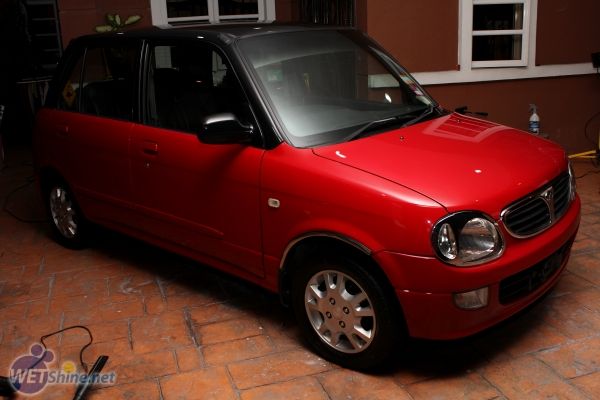
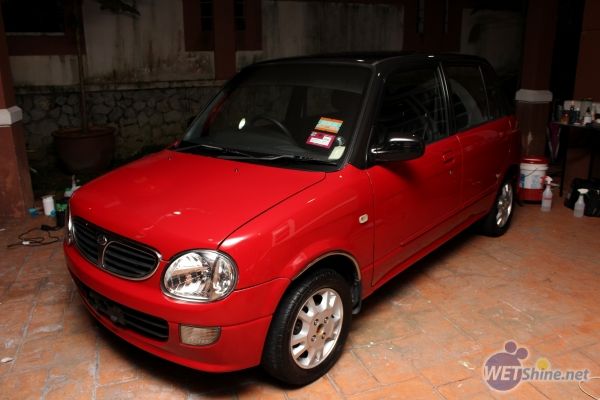
With all the little bits and pieces done, final step is to dress the tires with ValetPRO Traditional Tire Dressing and paintwork waxed with ValetPRO Banana Wax, a carnauba liquid wax. Enjoy the after photos! Please excuse the slight haziness on the paintwork as the wax was applied at night right after the rain, the very humid air made it slow for the wax to dry and cure.

Thanks for looking! Your feedback is appreciated.
May the good times and treasures of the present become the golden memories of tomorrow. Wish you lots of love, joy and happiness. Happy New Year!!!
P.S. This write-up took longer than I thought...started at 11.30pm, it is now 5.40am... O.O
Some of the products to be used.
So let's start off by getting the wheel, tires and wheel wells cleaned. Wheels cleaned with ValetPRO Bilberry Wheel Cleaner (diluted 3:1), tires and wheel wells cleaned with Osren Degreaser FX (diluted 2:1). Brushes used ValetPRO Chemical Resistant Soft Brush and ValetPro Long Reach Wheel Brush.
Panel gaps, rubber and plastic trim brushed with Osren Degreaser FX (diluted 2:1).
Then I noticed all the glass had watermark etchings, so I used Osren's Watermark Remover powder and a 3M Microfine sanding sponge. My technique still needs to be improved on this one as it didn't fully remove all the watermarks, but did significantly reduce it and cleaned the glass, preparing it for coating. Firstly, scrubbed with the sponge and powder, rewashed with shampoo and squeegeed dry.
Car is then washed with ValetPRO Wash and Protect shampoo, followed by Osren Tar Remover on lower panels and wheels, lastly paintwork smoothened with Osren Magic Clay Cloth.
With the paint squeaky clean, we now inspect it. Bonnet was in the worst condition, the other panels had the usual swirling, embedded dirt, and water marks. The single stage black painted panels were oxidized and looked grey.
Macro shot of the swirls above.
So I decided to start on the bonnet first. The right side have been repainted and I don't know why it has faded so badly, especially around the area where it 'blends' with the original paint. Let's take a closer look.
Ouch... now let's take an even closer look.
Yikes! That's the area that has been repainted, I assume it is cheap clearcoat and it has 'bubbled' over the years, thus giving it the faded look. The non repainted areas had RIDS, swirls, pitting, watermark etching and embedded dirt, the typical symptoms of neglected paint.
After seeing the bubbling photo, I wanted to give the bonnet a proper cutting. So the process for it was:
(1) Sanding with Mirka Abralon 2000 grit / Speed 2 / Dodo Juice Buff Daddy (Das6 DA)
(2) Sanding with Mirka Abralon 4000 grit / Speed 2 / Dodo Juice Buff Daddy (Das6 DA)
(3) Compound with Osren Velvet Pad and Osren P40 Compound / 1500 rpm / Makita 9227C Rotary
(4) Compound with Meguiar's #105 Ultra Cut Compound and Lake Country 4-ply wool pad / 1500 rpm / Makita 9227C Rotary
(5) Polished with Meguiar's #105 Ultra Cut Compound and Lake Country White Polishing pad / 1500 rpm / Makita 9227C Rotary
(6) Polished with Meguiar's #205 Ultra Finishing Polish and Lake Country Black Finishing pad / 900 rpm / Makita 9227C rotary
The rest of the car received the same steps except for the sanding and velvet pad.
Paint transfer on the driver's side door and rear fender were wet sanded with 2000 grit sandpaper and polished.
So how do you know if it is paint transfer which is above the surface and not a scratch beneath the paint? If you look closely, you can see the 'scratch/scuff' is on the surface, and as you run your fingers across it, you will feel that it is 'sticking out' from the paint, then you know you have a chance to fix the problem.
Water stains around the chrome area were removed with Osren StainX(acid).
Side windows coated with Wolf's Chemicals Glass Guard while the front and rear glass which had wipers were coated with GTechniq G1 ClearVision Smart Glass. Wiper cowl trim dressed with Wolf's Chemicals Trim Coat and wheels with Wolf's Chemicals Rim Shield.
I then moved to the interior, was rushing for time at this stage and didn't take much photos. Process was:
(1) ValetPRO Glass Cleaner on all glass.
(2) Meguiar's All Purpose Cleaner on vinyl seats and all plastic trim.
(3) Vinyl seats conditioned with ValetPRO Argus Leather and Vinyl Cream.
With all the little bits and pieces done, final step is to dress the tires with ValetPRO Traditional Tire Dressing and paintwork waxed with ValetPRO Banana Wax, a carnauba liquid wax. Enjoy the after photos! Please excuse the slight haziness on the paintwork as the wax was applied at night right after the rain, the very humid air made it slow for the wax to dry and cure.
Thanks for looking! Your feedback is appreciated.
May the good times and treasures of the present become the golden memories of tomorrow. Wish you lots of love, joy and happiness. Happy New Year!!!
P.S. This write-up took longer than I thought...started at 11.30pm, it is now 5.40am... O.O


