

- Mar 3, 2005
- 8,180
- 3,678
- 5,213
This mod has been around for a very long time and many have tried it and done it so I thought of posting a guide for the forum as well.
Tools:
1. Cutter knife
2. Masking tape
3. Flat screwdriver
4. Sealant for rigid plastic or headlights use
5. P240 or finer grid sandpaper (1500 and 2000 not recommended)
6. Heat gun or hair dryer (heat gun is a better choice as it cuts the time for heating)
7. Some cloth
8. Tooth brush
9. Wrapping film
10. Glove
11. PLENTY of TIME AND PATIENCE......
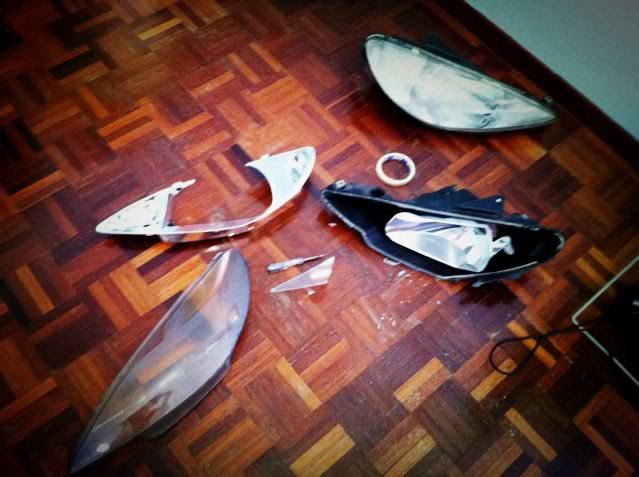
Step1. Removing the headlights
1st remove all the bulbs from the headlight unit. Then you need to wrap your flat screwdriver with the masking tape and cloth to avoid scratching the lens.
Since I do not have a heat gun so I resort to using the hair dryer. Start at the sharp edges if your headlights are like mine as the smaller section is easier to pry open. As you heat around the section you can start to slowly slid the flat screwdriver into the gap and pry it gently. Work your way along the gap slowly. For those clip area you need to pray up the clip gently and heating it at the same time so it soften and make it easier to pry. You will soon be able to remove the lens.
Something like this.
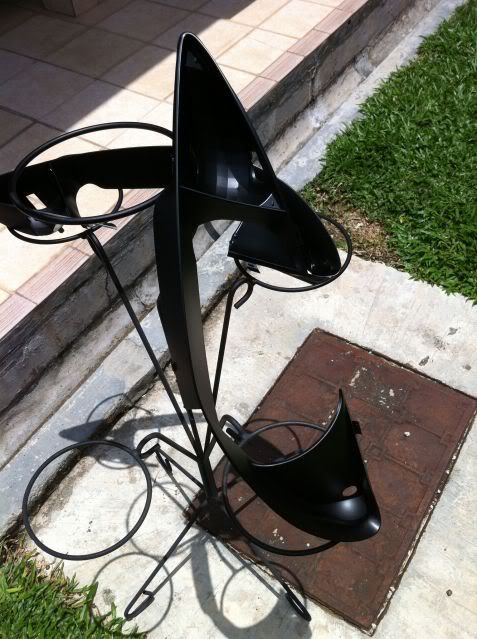
Step2. Painting the fascia
If your headlights are old. This will be a good time to refurbished it also. Since the fascia is chromed. Use the sandpaper to sand off the chrome so that the paints can stick better to the bare plastic surface. Take you time when you sand don't rush. After that, wash the fascia with soapy water and dry it properly before you paint. ON the painting side, You can choose any colour you want so just spray paint it layer by layer don't be overzealous on the painting to avoid eye drop effect on the fascia. Wait for the 1st layer to dry before painting the 2nd layer.
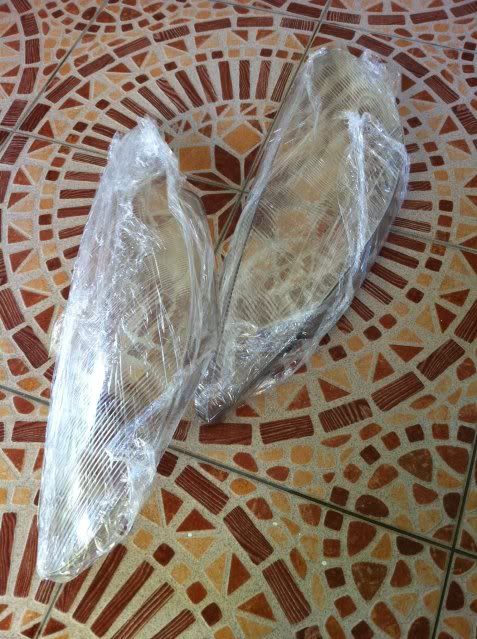
Step3. Cleaning the lens
The lens are sure to be dirty on the inside so wash it with soapy water and by using a tooth brush on those hard to reach edges. After washing it, dry it properly with a cloth without leaving any water mark on the lens. Then you wrap the lens up with wrapping film to avoid dust or other dirty stuff from collecting or settling on your lens. When you go and do step 4.
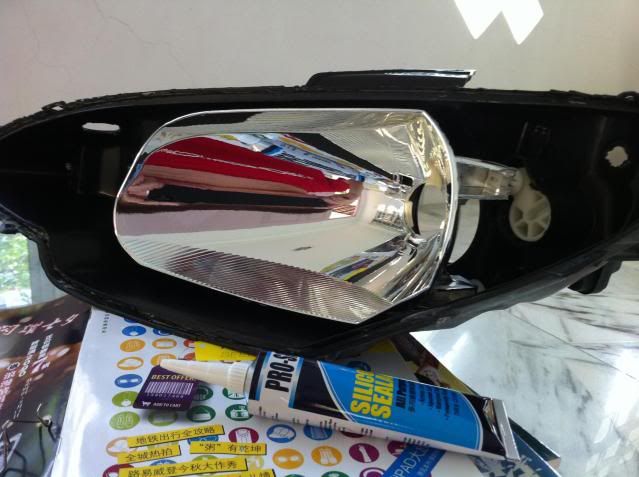
Step4. Removing the old sealant
This step is the most time consuming because you will need a clean surface for the new sealant that you are going to apply when you fix everything back. A clean contacting surface will avoid the problem of water entering into your headlights. Here you will need the cutter knife, sandpaper. Then start removing those old sealant. You only use the sandpaper to clean off the residue when you are almost done. Then using the tooth brush, you wash the sealant area so that the sealant line is clean. You can also clean the reflector at this time.
Step5. Reassembly
Put on a glove. After all the tedious and tiring work. It's now time to put everything back. Apply the new sealant along the sealant gap around the headlight unit I used 1.5 tube of sealant. Try to fill the gap with enough sealant and not too less because it will not seal properly. Then put the lens and the newly painted fascia back, Press the lens firmly. if can try to get another friend or person to help you to wrap or tape the headlights up because you want to have a nice and tight bond of the sealant and the lens. This is how I did it. Wrap the whole thing up with wrapping film tightly. You can remove the wrapping film after 1 hour and let the sealant cure for 24 hours.
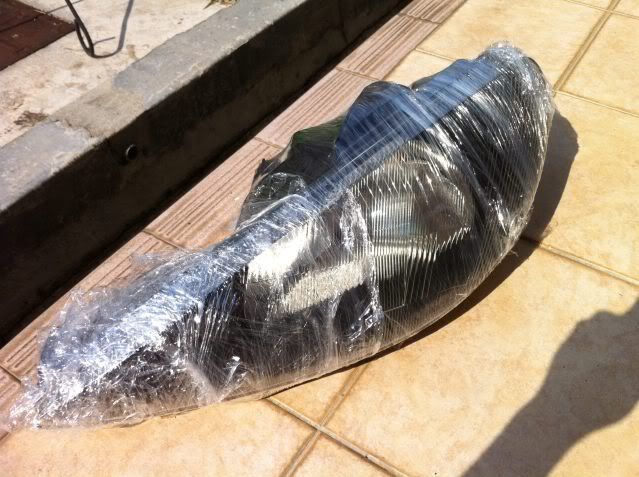
Result.

The important points for this DIY is:
1. Old sealant must be remove & sealant area must be properly cleaned and prep for the new sealant.
2. Application of sealant should be adequate. about 3/4 of the height of the sealant line. Excessive sealant can be wipe off not a problem.
3. Patience. Don't rush. I took 1 whole day to do this.
Ps. Sorry for the lack of detail pic as forgot to stop and take pics..
Tools:
1. Cutter knife
2. Masking tape
3. Flat screwdriver
4. Sealant for rigid plastic or headlights use
5. P240 or finer grid sandpaper (1500 and 2000 not recommended)
6. Heat gun or hair dryer (heat gun is a better choice as it cuts the time for heating)
7. Some cloth
8. Tooth brush
9. Wrapping film
10. Glove
11. PLENTY of TIME AND PATIENCE......
Step1. Removing the headlights
1st remove all the bulbs from the headlight unit. Then you need to wrap your flat screwdriver with the masking tape and cloth to avoid scratching the lens.
Since I do not have a heat gun so I resort to using the hair dryer. Start at the sharp edges if your headlights are like mine as the smaller section is easier to pry open. As you heat around the section you can start to slowly slid the flat screwdriver into the gap and pry it gently. Work your way along the gap slowly. For those clip area you need to pray up the clip gently and heating it at the same time so it soften and make it easier to pry. You will soon be able to remove the lens.
Something like this.
Step2. Painting the fascia
If your headlights are old. This will be a good time to refurbished it also. Since the fascia is chromed. Use the sandpaper to sand off the chrome so that the paints can stick better to the bare plastic surface. Take you time when you sand don't rush. After that, wash the fascia with soapy water and dry it properly before you paint. ON the painting side, You can choose any colour you want so just spray paint it layer by layer don't be overzealous on the painting to avoid eye drop effect on the fascia. Wait for the 1st layer to dry before painting the 2nd layer.
Step3. Cleaning the lens
The lens are sure to be dirty on the inside so wash it with soapy water and by using a tooth brush on those hard to reach edges. After washing it, dry it properly with a cloth without leaving any water mark on the lens. Then you wrap the lens up with wrapping film to avoid dust or other dirty stuff from collecting or settling on your lens. When you go and do step 4.
Step4. Removing the old sealant
This step is the most time consuming because you will need a clean surface for the new sealant that you are going to apply when you fix everything back. A clean contacting surface will avoid the problem of water entering into your headlights. Here you will need the cutter knife, sandpaper. Then start removing those old sealant. You only use the sandpaper to clean off the residue when you are almost done. Then using the tooth brush, you wash the sealant area so that the sealant line is clean. You can also clean the reflector at this time.
Step5. Reassembly
Put on a glove. After all the tedious and tiring work. It's now time to put everything back. Apply the new sealant along the sealant gap around the headlight unit I used 1.5 tube of sealant. Try to fill the gap with enough sealant and not too less because it will not seal properly. Then put the lens and the newly painted fascia back, Press the lens firmly. if can try to get another friend or person to help you to wrap or tape the headlights up because you want to have a nice and tight bond of the sealant and the lens. This is how I did it. Wrap the whole thing up with wrapping film tightly. You can remove the wrapping film after 1 hour and let the sealant cure for 24 hours.
Result.
The important points for this DIY is:
1. Old sealant must be remove & sealant area must be properly cleaned and prep for the new sealant.
2. Application of sealant should be adequate. about 3/4 of the height of the sealant line. Excessive sealant can be wipe off not a problem.
3. Patience. Don't rush. I took 1 whole day to do this.
Ps. Sorry for the lack of detail pic as forgot to stop and take pics..
Last edited:


