My MR2 turbo upgrade project

Green06

Known Member
Senior Member
Thread starter
Apr 17, 2006
141
14
3,018
Pahang
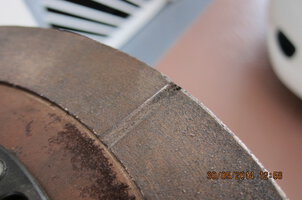
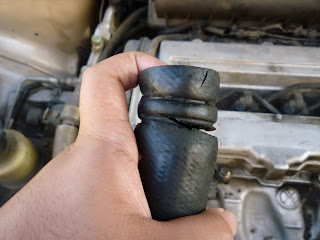
Aisay man....changing the head in my own house car porch is a real pain in the ..#@%. No 2 or 4 post lift is a real challenge. DIY is where all the fun & frustration start.....take my own sweet time. No w/shop wants to do it for me, so have to do it myself. Adjusting the valve clearance is another time & patience test, you get frustrated fumbling with the tool and maths calculation.
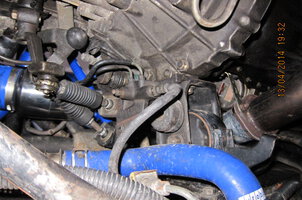
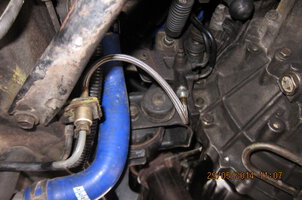
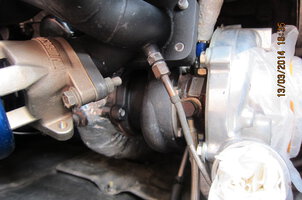
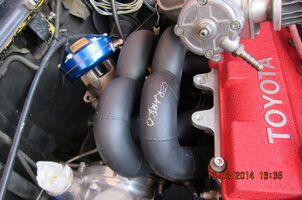
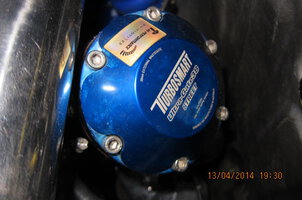
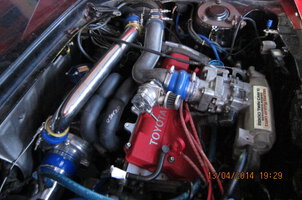
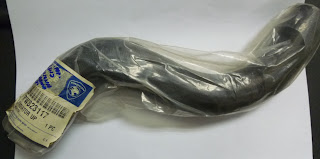
Next is the turbo & exhaust mod............it will be next time.......hang in there and waiting for my writeup.......interesting I promise...as there are too many to mod, wait and see.
Well, someone is going to say where & why take so long to do my project. Well, you see,.......I got distracted and got into the following projects:-
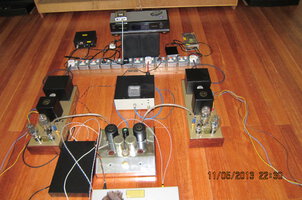
Photo 1. Have to redo my hifi room flooring, the wooden flooring was devastated by termite attack, so have to refloor on my own alone, no help from anyone. Lucky me have friend in the sawmill business that got me the wooden plank, took me a long time to get them replaced last December 2012. See all the tube amps???.... all built by me ( DIY ).
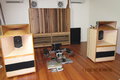
Photo 2. See the wooden horn ?? that was carved by myself a few years back ( 2011 ) and the big speaker -- 15 " that pair of speaker made in the 70s. I made the wooden box.
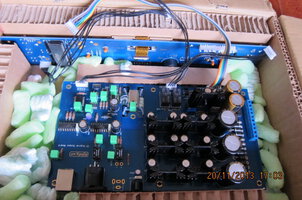
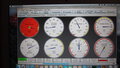
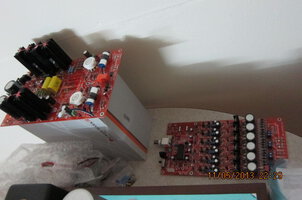
Photo 3. DAC kit, waiting to be finished and cry to be completed soon, well, have to wait.
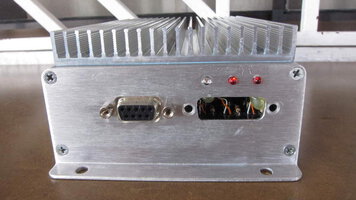
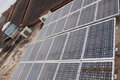
Photo 4. Solar PV !!!!!! hey I go GREEN........when are you going to do something for the global warming? & future generation ?
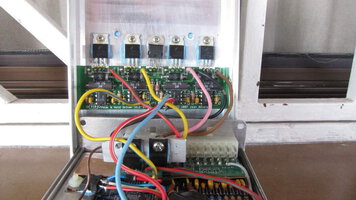
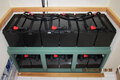
Photo 5. My battery bank, the most expensive part of a Solar electric system.

You see.......all these took up all my time away from my 2 project. Mood change .....things got changed.
 

Attachments

Green06

Known Member
Senior Member
Thread starter
Apr 17, 2006
141
14
3,018
Pahang
The solar panel is not that expensive, the batteries cost a leg & a hand.:rolleyes:
 

Green06

Known Member
Senior Member
Thread starter
Apr 17, 2006
141
14
3,018
Pahang
Also got my header ceramic coated and installed. A lot of piping work when replacing the former header to this one which involves a lot of modification of pipe and numerous trial & error of fitting problem when doing this on my own at home without any welding facilities. Have to do piece by piece and visit the welding shop numerous time as the car is stranded at home on stands. A lot time and effort put in. Car is in running condition now after been sleeping for a long time.
 

Attachments

Green06

Known Member
Senior Member
Thread starter
Apr 17, 2006
141
14
3,018
Pahang
My next coming project of upgrading..........Standalone DIY MegaSquirt ECU....to replace the OEM ECU and to do away with AFM unit, this might take sometime to install and others coming soon.......See photos, ECU & wiring harness ready and will be doing wasted spark ( distributor less)........my plan/goal.
 

Attachments

Green06

Known Member
Senior Member
Thread starter
Apr 17, 2006
141
14
3,018
Pahang
Oop! one wrong photo.......earlier post, that was my DIY Top loading CD player main control board for my HiFi........
Here it is the photo of my ignition coil that will replace the OEM and goes distributor less with wasted spark.
 

Attachments

Last edited:

Green06

Known Member
Senior Member
Thread starter
Apr 17, 2006
141
14
3,018
Pahang
Sent my OS Giken twin plate clutch for upgrade with BRclutch, expecting arrival today...........will need to get it installed soon.
Will post photos once received to share what they do.
 

ixeo

4,000 RPM
Senior Member
Jun 26, 2005
4,788
3,080
5,213
KL, Malaysia
This is not so much about the car..but the labor of love. MR2. ahh.. would look great in dark blue
 

Green06

Known Member
Senior Member
Thread starter
Apr 17, 2006
141
14
3,018
Pahang
Not bad of a job however could be more professional if they were to work the details such as remove the machining burrs and wash the parts after completion. Otherwise would be great piece of work when someone would take all the trouble to make such a cheap alternative than buying the OEM imports.
Here are the photos...........yet to get it installed and test out. Will need some run in to perform well.
 

Attachments

ken yeang

6,000 RPM
Senior Member
Feb 2, 2006
6,617
1,327
1,713
Also got my header ceramic coated and installed. A lot of piping work when replacing the former header to this one which involves a lot of modification of pipe and numerous trial & error of fitting problem when doing this on my own at home without any welding facilities. Have to do piece by piece and visit the welding shop numerous time as the car is stranded at home on stands. A lot time and effort put in. Car is in running condition now after been sleeping for a long time.
what thickness of those header did you use?
 

tgkuamir

Senior Member
Nov 26, 2006
3
0
1,501
My next coming project of upgrading..........Standalone DIY MegaSquirt ECU....to replace the OEM ECU and to do away with AFM unit, this might take sometime to install and others coming soon.......See photos, ECU & wiring harness ready and will be doing wasted spark ( distributor less)........my plan/goal.
Any reason why mega squirt? not the other brand of stand alone?
 

Green06

Known Member
Senior Member
Thread starter
Apr 17, 2006
141
14
3,018
Pahang
Hi Tg.,
Why MS, it is because MS can be DIY. I am a DIYer and thats it...........:biggrin:
 

Green06

Known Member
Senior Member
Thread starter
Apr 17, 2006
141
14
3,018
Pahang
I.. yah......this is the 3rd. time I am trying to post some work done on my project and always could not get it done correctly, this showed that I am away for too long .............hope this time will work.
All this while I was having problem as my Mac Air book was acting funny and have to reformat. Lost my USB to Serial RDS232 comm link. Tried numerous time to finally downloaded the correct software that works with my Mac.
Upgraded to MS2 with daughter board and loaded with ver.3.3.2 firmware. See attached photos.
Added an external heatsink ( overkill ) which will help to keep my injector driver cool. See photos.
Replaced the serial connector to higher amperage connector. See photo.
Was having issue with RPM synch with my crank sensor and finally bought and paid the paid version Tuner Studio and problem gone, I got RPM synch with my crank sensor ( actual live tested ).See photo.
This show "no free lunch" is better. Anyway those dudes spend their sweat & time needs to get their lunch paid which is fair !!
Tested RPM cut at 7700 rpm, spark cut works perfectly. Its good to test with the stimulator and ensure all function works before installing than to ruin the engine. See photo.
Tried to attach photos...........hope it works............:driver:
 
Last edited:

Green06

Known Member
Senior Member
Thread starter
Apr 17, 2006
141
14
3,018
Pahang
Next will have to figure out how to run the wire loom, relays, fuses etc. Coil pack installation is another headache, where to put it? Any suggestion? Will be using back the spark plug cable ( TRD ).
Planning to modify the intake manifold to side feed as the mid feed is having uneven distribution of air since #2&3 cylinder will always run leaner. Hope with a side feed will solve this issue. Also to modify an intercooler to top mount for the shortest pipe run. Wow........looks like tons of work........for DIYer.
 

^pomen_GTR^

7,000 RPM
Senior Member
May 13, 2010
7,509
1,690
1,713
The Mines
Next will have to figure out how to run the wire loom, relays, fuses etc. Coil pack installation is another headache, where to put it? Any suggestion? Will be using back the spark plug cable ( TRD ).
Planning to modify the intake manifold to side feed as the mid feed is having uneven distribution of air since #2&3 cylinder will always run leaner. Hope with a side feed will solve this issue. Also to modify an intercooler to top mount for the shortest pipe run. Wow........looks like tons of work........for DIYer.


maybe go for air-water type intercooler? atleast increase in item to install makes it easier for DIY-er
 

Green06

Known Member
Senior Member
Thread starter
Apr 17, 2006
141
14
3,018
Pahang
ya lah......project took so long.................air water intercooler good initially but once heated up also takes time to cool down. Thanks for the suggestion.
 

Random Post Every 5 Minutes

During routine radiator coolant top up activity, i found out that my top radiator hose leaked. This call for short trip to car spare part shop. Below steps I did to replace it.


Spare part:
1. 1. Hose radiator up- PN PW823117 (this Part No. for Proton Gen 2)- 1 unit. RM17.00
...
Ask a question, start a discussion or post something for sale!
Post thread

Online now

Enjoying Zerotohundred?

Log-in for an ad-less experience